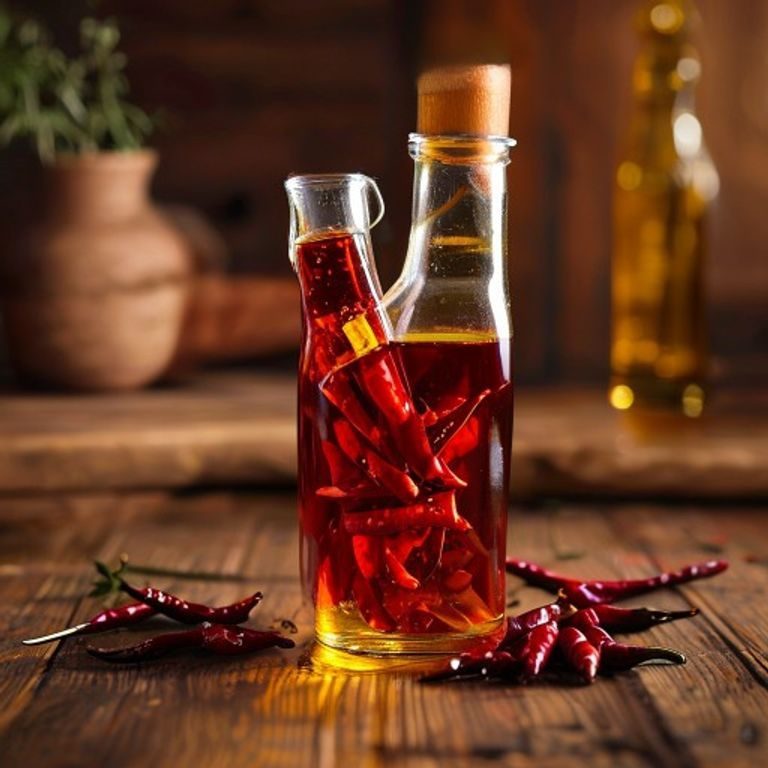
Sous Vide Chili Oil
A deeply aromatic, slow-infused chili oil made by drying fresh chilies on a salt bed, then gently extracting their heat and flavor into olive oil over 36 hours in a sous vide bath — a patient, precision-driven technique that rewards you with the most vibrant, pure, and versatile chili oil you have ever tasted.
| Amount | Ingredient |
|---|---|
| 300 g (10.5 oz) | fresh red chilies (see Chef's Tips and Variations for choices) |
| 1000 g (about 4 cups / 1 liter) | extra virgin olive oil |
| 500 g (about 2 cups) | coarse sea salt or kosher salt (for the drying bed) |
Commercial chili oils are almost always made with dried chili flakes and heated oil, which produces a one-dimensional, harsh heat. This recipe takes the opposite approach: fresh red chilies are halved, laid on a bed of salt, and dried in a low oven for 12 hours to concentrate their flavor without scorching them. The dried chilies are then vacuum-sealed with high-quality olive oil and cooked at a gentle 50 °C (122 °F) for 36 hours — a sous vide method that slowly and steadily draws the chili's fruity, floral heat into the oil while keeping the olive oil's character intact. The result is an exceptionally clean, brilliant red oil with layered chili flavor and a slow-building warmth that enhances rather than overpowers. Drizzle it over pizza (as is tradition in Italy), finish a bowl of pasta, brighten roasted vegetables, or use it as a dipping oil for crusty bread. Once you make this, you will never go back to the shelf-stable stuff.
Ingredient notes: The quality of both chilies and olive oil directly determines the quality of the finished oil. Use bright, firm, unblemished fresh red chilies — the redder and riper, the more vibrant the color and fruitier the heat. A mix of chili varieties (see Variations) creates complexity. Extra virgin olive oil is traditional and adds fruity, peppery notes, but you can substitute a neutral oil like grapeseed or avocado oil for a more neutral chili-forward result; if using olive oil, choose one that is pleasant drinking quality but not your most expensive bottle — the 36-hour infusion will extract plenty of flavor. The salt is used only as a drying medium and is not consumed; coarse sea salt or kosher salt works best because it does not clump and allows airflow around the chilies.
- Kitchen gloves (mandatory — chili oils on skin are painful and persistent)
- Chef's knife and cutting board
- Baking sheet or rimmed tray (large enough to hold the chili halves in a single layer)
- Oven (capable of maintaining 40 °C / 100 °F)
- Vacuum sealer and vacuum-sealable bags (or a zipper-lock bag with water displacement method — see Tips)
- Precision cooker / sous vide immersion circulator
- Large container or pot for the water bath
- Fine-mesh strainer or colander
- Cheesecloth or clean kitchen towel (for double-straining, optional)
- Funnel
- Sterilized glass bottle or airtight jar (for storage)
- Prepare the chilies (15 min). Put on kitchen gloves. Wash and thoroughly dry the fresh chilies. Cut each chili in half lengthwise (through the stem end to the tip). For a milder oil, you can remove the seeds and white pith membranes — this is where most of the capsaicin concentrates. Pro tip: Leave the seeds in for a hotter, more complex oil. If you want to moderate the heat, remove the seeds from half the chilies only — this gives you the best of both worlds.
- Salt bed and drying setup (5 min + 12 hours). Spread the coarse salt evenly across a baking sheet to form a bed about ½ inch (1 cm) deep. Place the chili halves cut-side down onto the salt bed, nestling them gently so each half has good contact with the salt. Do not overlap. Place the tray in an oven set to the lowest possible temperature — ideally 40 °C (100 °F) — and dry for 12 hours, or until the chilies are leathery, shriveled, and completely dry to the touch. Pro tip: If your oven cannot go as low as 40 °C, use the "warm" setting or the lowest available temperature with the door slightly cracked. The goal is gentle dehydration, not cooking. Drying time varies with chili thickness and ambient humidity — check at 10 hours and add time if needed. The chilies should be dry but still pliable, not brittle.
- Remove chilies from salt (5 min). Wearing gloves, lift each dried chili half from the salt bed. Gently brush off any loose salt crystals. Discard the salt — it has served its purpose as a drying medium and is no longer needed. Pro tip: Work over a bowl or sink to catch falling salt. Do not rinse the chilies — any remaining salt will dissolve in the oil during infusion, adding a subtle seasoning that is actually desirable. If individual chilies are stuck to the salt, gently pry them loose; do not force or break them.
- Vacuum seal with olive oil (5 min). Place the dried chili halves into a vacuum-sealable bag. Pour the olive oil over them. The chilies should be fully submerged or as close to it as possible. Seal the bag using a vacuum sealer according to the manufacturer's instructions. Pro tip: If you do not have a vacuum sealer, use the water displacement method: place the chilies and oil in a high-quality zipper-lock freezer bag, zip it almost all the way closed, then slowly lower the bag into a pot of water, allowing the water pressure to push the air out through the small opening. Seal completely once all air is expelled. Make sure the bag is large enough that the oil and chilies can spread out in a single-ish layer for even heating.
- Sous vide at 50 °C (36 hours). Fill your sous vide container or large pot with water and preheat the immersion circulator to 50 °C (122 °F). Once the water is at temperature, fully submerge the sealed bag, ensuring it is weighted down if necessary (a stainless steel or ceramic plate on top works well). Cook for exactly 36 hours. Pro tip: 50 °C is non-negotiable — it is warm enough to facilitate slow extraction of flavors and capsaicinoids without cooking the olive oil or damaging its delicate polyphenols. Higher temperatures will produce a bitter, harsh oil. If your circulator has a water evaporation issue, cover the container with plastic wrap or aluminum foil to maintain the water level.
- Strain and bottle (10 min). Wearing gloves, carefully remove the bag from the water bath. Allow it to cool slightly so handling is safe. Cut open the bag and pour the contents through a fine-mesh strainer set over a clean bowl or wide-mouth measuring cup. Discard the chili solids. For an impeccably clear oil, line the strainer with cheesecloth or a clean, lint-free kitchen towel and strain a second time. Allow the oil to settle at room temperature for 30 minutes — any residual water from the sous vide process will sink to the bottom, where you can leave it behind. Using a funnel, pour the clear chili oil into sterilized glass bottles or airtight jars. Pro tip: Do not squeeze or press the chili solids during straining — this releases fine sediment and bitter compounds that will cloud the oil and compromise its clean flavor. Let gravity do the work.
- Rest and store (optional rest + immediate use). The oil is ready to use immediately, but its flavor will continue to deepen and meld over the first week. Store as directed in the Storage section. Pro tip: If you notice any tiny salt crystals at the bottom of the bottle after a day or two, do not worry — this is just residual salt from the drying bed that dissolved into the oil and settled. It will not affect flavor and can be left undisturbed.
- Choose your chili wisely. The chili variety defines the oil's character. Fresno chilies are the gold standard — bright red, moderately hot (2,500–10,000 Scoville), fruity, and widely available. Red jalapeños (ripe jalapeños, also called chiles rojos) are milder and slightly sweet. Bird's eye chilies (Thai chilies) produce searing heat. Red habaneros add intense heat and a floral, tropical fruit note. For the most complex result, use a blend — 70% Fresno for body and color, 20% red jalapeño for sweetness, 10% habanero for heat and aroma.
- Do not use dried chili flakes or pre-dried chilies. This recipe specifically uses fresh chilies that you dry yourself. Pre-dried chilies have already lost volatile aromatic compounds during their commercial drying process and will not produce the same layered, fruity result.
- The salt bed is critical, not optional. Placing the cut chilies on a salt bed serves multiple purposes: it draws out moisture gently (protecting against mold), it prevents the chilies from sticking to the baking sheet, and the salt acts as a thermal buffer that prevents the low oven heat from scorching the delicate chili skin. Do not skip this step.
- Temperature precision matters. The 50 °C / 122 °F sous vide temperature is precise. If your circulator drifts above 55 °C, the olive oil will begin to degrade and the resulting oil will taste cooked and bitter. Check your circulator's calibration before starting.
- Scale up or down easily. The recipe scales linearly — double the chilies and oil for a 2-liter batch. Just make sure your vacuum bag and sous vide container are large enough. If scaling up, consider splitting into multiple bags for more even heat distribution.
- Label your bottle. Homemade chili oil can look like regular olive oil. Label the bottle clearly (and consider using a colored glass bottle or dark cabinet) to avoid confusion.
- Storage matters. The oil keeps best in a cool, dark place. Do not refrigerate — the olive oil will solidify and the texture will separate. A pantry shelf away from direct sunlight is ideal.
| Mistake | Why It Hurts | The Fix |
|---|---|---|
| Not wearing gloves | Capsaicin burns skin on contact and transfers to eyes, nose, and other sensitive areas — painful and long-lasting | Always wear kitchen gloves when handling fresh or dried chilies. Wash gloved hands before removing the gloves. Do not touch your face |
| Drying at too high a temperature | The chilies cook rather than dehydrate: they turn brown, lose their fruity aroma, and develop acrid, bitter notes | Keep the oven at or below 40 °C (100 °F). If your oven cannot maintain this, crack the door open and monitor with an internal thermometer |
| Over-drying the chilies | Brittle chilies shatter when handled, making them difficult to remove from the salt bed and creating dust in the oil | The chilies should be leathery and pliable, like dried apricots. They should bend without snapping. Check after 10 hours |
| Under-drying the chilies | Residual moisture in the chilies transfers into the oil during the sous vide step, creating a cloudy oil that can spoil faster | The chilies should feel completely dry to the touch with no soft or spongy spots. When in doubt, add 1–2 more hours of drying time |
| Sous vide temperature too high | Above 55 °C, olive oil undergoes chemical changes — it becomes bitter, loses its fruity character, and the chili flavors turn harsh | Calibrate your sous vide circulator. Use a separate probe thermometer to verify the water bath temperature, especially in larger containers where temperature can stratify |
| Sealing the bag with too much air | Air pockets create uneven heating and reduce the contact between oil and chilies, resulting in weaker extraction | Remove as much air as possible with the vacuum sealer. For the water displacement method, take your time to push every bubble out |
| Squeezing the chili solids while straining | Releases bitter compounds, fine sediment, and chili dust into the oil, making it cloudy, harsh, and less shelf-stable | Let gravity drain through a fine-mesh strainer or cheesecloth — do not press, squeeze, or force the solids |
- Fresno Chili Oil: The recommended baseline. Fresno chilies produce a bright red oil with moderate, well-rounded heat and subtle fruity notes. Excellent all-purpose chili oil.
- Red Jalapeño Oil (Milder): Use 400 g red jalapeños. Mild heat (2,500–8,000 Scoville), slightly sweet, with a clean green-vegetal undertone. Ideal for those who want chili flavor without aggressive heat.
- Bird's Eye Chili Oil (Very Hot): Use 200 g bird's eye chilies + 100 g Fresno chilies (for color and body). Bird's eye chilies are intensely hot (50,000–100,000 Scoville) — this oil should be used sparingly, by the drop.
- Habanero Oil (Fruity & Fiery): Use 200 g red habaneros + 100 g Fresno chilies. Habaneros bring extreme heat plus a distinctive floral, tropical fruit aroma — mango, citrus, and apricot notes that pair beautifully with seafood and Caribbean dishes.
- Fused Flavor Oils — Garlic Chili Oil: Add 10 peeled and lightly crushed garlic cloves to the bag with the chilies and oil. The garlic infuses beautifully at 50 °C, adding savory depth without the harsh raw garlic edge. Strain with the chilies.
- Fused Flavor Oils — Sichuan Chili Oil: Use half Fresno chilies, half dried Sichuan red chilies (skip the drying step for the Sichuan chilies — they are already dried). Add 1 tablespoon Sichuan peppercorns to the bag. The result is a numbing, citrusy, aromatic oil inspired by Chinese chili oil.
- Fused Flavor Oils — Herb & Spice Chili Oil: Add 4 sprigs fresh rosemary, 4 sprigs fresh thyme, 2 bay leaves, and 1 teaspoon black peppercorns to the bag. The herbs infuse gently at 50 °C without becoming bitter.
- Smoked Chili Oil: Before the drying step, smoke the halved fresh chilies in a cold smoker for 1 hour (using applewood or hickory), then proceed with the salt bed drying. The subtle smoke note adds another layer of complexity.
- Neutral Oil Version: Substitute the extra virgin olive oil with grapeseed, avocado, or sunflower oil for a completely neutral base that lets the chili flavor take center stage. This is the preferred approach for very hot chili oils (bird's eye, habanero) where you want pure heat without olive oil's fruity character competing.
| Storage Method | Details |
|---|---|
| Room temperature (pantry) | Store in a sterilized, airtight glass bottle or jar away from direct sunlight for up to 6 months. The flavor is at its best within the first 3 months but remains good for up to 6. |
| Refrigeration | Not recommended. Olive oil solidifies at refrigerator temperatures (around 4–7 °C), resulting in a cloudy, thick, separated texture. If the oil was made with neutral oil, it may be refrigerated but will still thicken. If you must refrigerate, allow 30 minutes at room temperature to liquefy and clarify before use. |
| Freezer | Freezing is not recommended. The texture upon thawing will be separated and compromised. If you need to keep the oil for more than 6 months, make a fresh batch instead. |
| Signs of spoilage | Discard if the oil develops an off smell (rancid, musty, sour), visible mold growth, or cloudiness that does not settle after sitting at room temperature. Properly strained and stored oil is very stable, but always trust your senses. |
This clean, fruity, slow-heat chili oil pairs with wines and drinks that can match its intensity without overpowering its delicate aromatic notes.
- Grüner Veltliner (Austria) — White pepper, green apple, and high acidity. The white pepper note harmonizes beautifully with the chili's heat, while the acidity keeps the palate fresh.
- Riesling (Kabinett, Germany) — The slight residual sugar tames the chili heat without sweetness being noticeable. A classic pairing for spicy oils and chilies.
- Vermentino (Sardinia) — Briny, herbal, and crisp, with a slight bitterness that stands up to the oil's richness. A natural match for seafood served with chili oil.
- Rosé (Provence, dry) — Light, fruity, and refreshing. The chill of a Provençal rosé is a perfect foil for the slow-building warmth of this oil.
- For beer drinkers: A crisp Belgian witbier (with orange peel notes), a German hefeweizen, or a Mexican lager with lime — all light, clean, and low enough in bitterness to let the chili sing.
- For cocktails: A Margarita or Paloma — both built on citrus and salt, which amplify the chili oil's fruity and savory dimensions.
| Per Serving (1 tablespoon / 15 ml) | |
|---|---|
| Calories | 119 |
| Total Fat | 14 g |
| Saturated Fat | 2 g |
| Carbohydrates | 0 g |
| Fiber | 0 g |
| Protein | 0 g |
| Sodium | 0 mg (negligible) |
Nutrition values are approximate and based on one serving of the finished oil. This is nearly pure fat (olive oil) with trace amounts of chili solids. The capsaicin content has no caloric value. Sodium is negligible if salt is thoroughly brushed from the dried chilies.
Is this recipe safe? I have heard about botulism risk in flavored oils.
Yes, this recipe is safe when followed correctly. The risk of botulism in chili oil comes from raw garlic or fresh herbs that are submerged in oil at room temperature, creating an anaerobic environment where Clostridium botulinum can grow. This recipe does not use raw garlic or fresh herbs at room temperature. The chilies are dried before infusion (reducing water activity), the oil is heated to 50 °C (which is pasteurizing), and the final oil is strained clear of solids. For maximum safety, always use thoroughly dried chilies, strain completely, and store in a sterilized bottle. If you add garlic or fresh herbs (see Variations), the oil must be refrigerated and used within 2 weeks.
Can I make this without a sous vide circulator?
A sous vide circulator provides the exact, stable 50 °C temperature required for this recipe. Without one, it is very difficult to maintain a consistent 50 °C for 36 hours. A low oven (if it can hold exactly 50 °C) would work in theory but most ovens cannot maintain such a low temperature stably. An alternative method: place the sealed bag in a slow cooker filled with water set to "warm" (usually 55–65 °C, which is borderline too hot). Monitor with a probe thermometer and adjust frequently. However, the sous vide method is strongly recommended — the precision is what makes this recipe work.
What kind of bottle should I use?
Use a sterilized glass bottle or jar with a tight-fitting lid. Dark-colored glass (amber or cobalt) is ideal because it protects the oil from light degradation. A bottle with a pour spout or a dropper top is convenient for drizzling. Avoid plastic containers — chili oil can eventually degrade certain plastics and absorb off-flavors. Sterilize the bottle by washing with hot soapy water, rinsing thoroughly, and drying in a low oven (100 °C / 212 °F) for 10 minutes, or by running through a dishwasher on the sanitize cycle.
How do I know if the chilies are dry enough?
The dried chilies should feel like dried fruit — leathery, pliable, and completely moisture-free on the surface. Bend one: it should flex without snapping. If it cracks or shatters, it is over-dried (still usable, but handle carefully to avoid dust). If it feels soft, spongy, or tacky, it needs more time in the oven. A properly dried chili has lost about 80–90% of its original moisture.
How spicy will this oil be?
The heat level depends on the chili type and whether you leave the seeds in. With Fresno chilies (seeds in) and 300 g in 1 liter of oil, the result is moderately spicy — a slow-building warmth that is noticeable but not punishing. It is significantly milder than commercial chili oils that use chili extract or dried chili flakes at high heat. You can increase heat by adding hotter chilies (see Variations) or reduce it by removing seeds and using red jalapeños.
Can I reuse the chili solids for anything?
The strained chili solids have already given most of their flavor and heat to the oil and are quite spent. However, they can be blended with a little of the fresh oil and a pinch of salt to make a rough chili paste for cooking, or added to stews, soups, and braises for background heat. They will not be as potent as fresh chilies, but they contribute a mild, oily chili depth.
My oil is cloudy — what went wrong?
Cloudiness is usually caused by one of two things: residual moisture in the chilies (they were not dried thoroughly) or temperature shock (the oil was refrigerated or cooled too quickly after straining). If the cloudiness is from moisture, the oil may spoil faster — use within 1 month and store in the refrigerator. If the cloudiness is from temperature, let the oil rest at room temperature for 24 hours — it often clarifies on its own. If it does not, the oil is still safe to use; it is just visually less appealing.
- Chimichurri Sauce (Volume 2)
- Basic Gochujang Sauce Korean (Volume 2)
- Yogurt Gochujang Fusion Sauce (Volume 2)
- Scotch Bonnet Pepper Hot Sauce (Volume 2)
- Sambal Oelek (Volume 2)
Recipe from "The Italian Kitchen" by Vita Milanese — Volume 2: Sunday Sauce
Recipe from The Italian Kitchen by Vita Milanese — Volume 2 · Sunday Sauce. Discover all volumes on the ebook page.