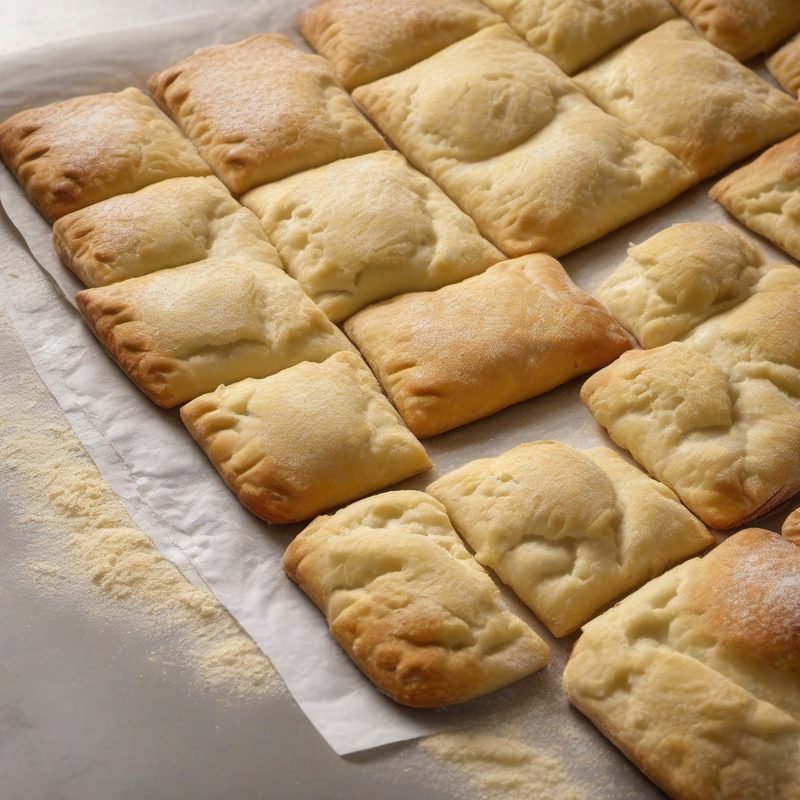
Plunder Pastry Dough
A rich, yeasted laminated dough that bakes into tender, buttery, feather-light Danish pastries — the Central European Plunderteig that gives us Apfeltaschen, Zimtschnecken, and the full family of Wienerbrød classics, with a rewarding three-turn lamination that takes just a few hours from bowl to bake.
| Amount | Ingredient |
|---|---|
| 200 g (14 tbsp / 1¾ sticks) | Unsalted butter, cold but pliable (cool room temperature, ~13–15°C / 55–60°F) |
Pasta per plunder — or Plunderteig in German — occupies a fascinating middle ground between two pastry worlds. It is not the lean, crisp, unsweetened puff pastry of the French pâte feuilletée, nor is it the soft, enriched, non-laminated brioche of the Italian pan brioche. Rather, it is a yeasted laminated dough: a soft, slightly sweet yeast dough that is rolled, encased with a cold butter block, and then folded through a series of turns exactly like puff pastry — creating dozens of delicate butter-and-dough layers that, thanks to the yeast, also develop a tender, airy crumb during baking.
The result is a pastry with a unique texture: shatteringly crisp on the outside, soft and almost pull-apart on the inside, with a rich, milky, buttery flavor that neither puff pastry nor brioche alone can capture. This is the dough behind the classic Danish — wienerbrød — as well as the German Plundergebäck: apple turnovers (Apfeltaschen), cinnamon rolls (Zimtschnecken), nut-filled spirals (Nussschnecken), and the elegant Hörnchen (croissant-like crescents). The name plunder itself refers to the pastry's indulgent, almost "pillaged" or "plundered" richness — a dough that steals the best qualities from both the pastry kitchen and the bakery.
This recipe yields approximately 500 g of dough, enough for 8–10 medium Danish pastries, and uses the envelope fold method (also called the letter or single turn) with 30-minute chills between each of three turns. The process is more forgiving than classic puff pastry because the yeast dough is more elastic and less prone to tearing. Even so, temperature discipline remains essential — cold butter, cold dough, and a cool kitchen are the keys to success.
> \Bake time depends on the finished pastry shape and size — filled Danish pastries typically bake at 190–200°C (375–400°F) for 12–18 minutes until deep golden brown. The dough itself is complete after the final chill and can be refrigerated for up to 2 days or frozen for 3 months.*
For the Yeast Dough (Détrempe)
For the Butter Block (Lamination)
The butter for lamination must be in a very specific temperature window: cold enough to remain solid during folding, but pliable enough to roll evenly without cracking. Remove it from the refrigerator 15–20 minutes before shaping the butter block. European-style butter (82–84% butterfat) is strongly recommended — its lower water content produces a cleaner lamination and a more tender, flavorful finished pastry. The dough itself uses whole milk rather than water for a softer, richer crumb; the single egg adds structure and tenderness. Tipo "00" flour produces the most delicate result, while all-purpose flour yields a slightly more robust but still excellent pastry. Do not use bread flour — its higher gluten content makes the dough too elastic and difficult to roll without springing back. Fresh yeast is traditional and gives a more complex fermentation aroma, but active dry yeast works perfectly; if using instant dry yeast, reduce to 4 g (1 tsp) and add it directly to the dry ingredients.
🥘 Equipment
- Digital kitchen scale (strongly recommended for precision)
- Small bowl (for proofing yeast)
- Large mixing bowl
- Whisk
- Rubber spatula or wooden spoon
- Plastic wrap
- Rolling pin
- Ruler or tape measure (for checking dimensions during folding)
- Bench scraper or pastry scraper
- Baking sheet (lined with parchment paper)
- Sharp knife or pastry wheel (for cutting the finished dough)
- Pastry brush (for egg wash)
- Parchment paper
- Wire cooling rack
📋 Preparation
Step 1 — Activate the Yeast (5 minutes + 10 minutes proofing)
In a small bowl, warm the 125 ml (½ cup) whole milk to lukewarm — it should feel comfortably warm to the inside of your wrist (35–38°C / 95–100°F). If using fresh yeast: crumble the 15 g fresh yeast into the warm milk and stir gently until dissolved. Add 1 tablespoon of the 30 g sugar and stir. Let stand for 5–10 minutes until the mixture becomes frothy and slightly expanded — this confirms the yeast is active.
If using active dry yeast (5 g): whisk the yeast into the warm milk with the same 1 tablespoon of sugar and let stand for 10 minutes until foamy. If the mixture does not become frothy within 10 minutes, the yeast may be dead — start with fresh yeast.
The frothy, bubbling mixture is your assurance that the yeast is alive and ready. The small amount of sugar fed to the yeast gives it an immediate energy source, jump-starting fermentation. The milk should be warm but not hot — above 45°C (115°F) will kill the yeast and leave you with a dense, lifeless dough. Cold milk will simply take longer to activate the yeast but won't harm it; if your kitchen is warm, room-temperature milk can work with a longer proofing time.
Step 2 — Mix the Dough (5 minutes)
In a large mixing bowl, whisk together the 250 g (2 cups) all-purpose flour, the remaining sugar (about 17 g / 1½ tbsp — you used 1 tbsp for the yeast), and the pinch of fine sea salt.
Make a well in the center of the flour mixture. Pour in the yeast-milk mixture, add the 1 large egg (room temperature), and stir with a rubber spatula or wooden spoon in a circular motion, gradually drawing the flour into the wet ingredients until a shaggy, soft dough forms.
If the dough seems very dry (different flours absorb differently), add warm milk 1 tablespoon at a time until the dough comes together. If it seems very sticky, add flour 1 tablespoon at a time — but be cautious; a slightly tacky dough produces a more tender pastry than a stiff, dry one.
Unlike lean bread dough, this Danish pastry dough should be soft and tender — not stiff. The egg enriches the dough with fat and protein, giving it both tenderness and structure. The sugar (about 12% of flour weight by baker's percentage) provides sweetness, aids browning, and also contributes to tenderness by interfering with gluten development. The salt is kept to just a pinch because the butter block will add its own saltiness during lamination.
Step 3 — Knead and Rest the Dough (8–10 minutes kneading + 30 minutes rest)
Turn the shaggy dough out onto a lightly floured work surface. Knead gently but thoroughly for 8–10 minutes — the dough should become smooth, supple, and slightly tacky but not sticky. It should spring back when lightly pressed with a fingertip.
Do not over-knead. This is not bread dough — you want enough gluten development to give the dough strength to hold the butter layers, but not so much that it becomes elastic and difficult to roll. A moderate gluten network, not a strong one, is the goal.
Form the dough into a ball, place it back in the bowl, cover with plastic wrap, and let it rest at room temperature for 30 minutes. During this rest, the dough will relax and begin to ferment slightly, developing flavor.
The gentle kneading is one of the defining differences between Plunderteig and French puff pastry. In puff pastry, the dough (détrempe) is barely kneaded — just enough to bring it together — because gluten development is undesirable. In Plunderteig, moderate kneading creates an elastic network that can stretch around the butter layers without tearing, while the yeast adds lift and flavor that pure puff pastry lacks. The 30-minute rest is crucial: it relaxes the gluten so that the first roll is easy, and it allows the yeast to begin its work, giving the dough a subtle fermented complexity that deepens through the subsequent chilling stages.
Step 4 — Shape the Butter Block (5 minutes)
While the dough rests, prepare the butter block. Place the 200 g (14 tbsp) unsalted butter between two sheets of plastic wrap (or parchment paper). Using a rolling pin, gently pound and roll the butter into a rectangle approximately 12 × 12 cm (4½ × 4½ inches) and about 1 cm (½ inch) thick.
The butter should be cold but pliable — it should bend without cracking but not be so soft that it smears. If it cracks when folded, it is too cold — let it sit at room temperature for 2–3 more minutes. If it smears or looks greasy, return it to the refrigerator for 10 minutes.
Place the butter block on a plate or small tray and return it to the refrigerator while you roll out the dough.
The perfect butter block is the single most important element of successful lamination. If the butter is too cold and hard, it will crack and fragment inside the dough during rolling, creating uneven layers and butter pockets. If it is too soft, it will squeeze out the sides of the dough during rolling (a condition called "blowout"), ruining the lamination entirely. The ideal temperature is approximately 13–15°C (55–60°F) — the butter should yield gently to pressure but hold its shape. Tapping the butter with a rolling pin through the plastic wrap is gentler than pounding and helps achieve an even thickness. Make the edges as square as possible for a clean envelope fold.
Step 5 — Roll the Dough and Enclose the Butter (5 minutes)
After the 30-minute rest, turn the dough out onto a lightly floured work surface. Roll it into a rectangle approximately 30 × 23 cm (12 × 9 inches) — large enough to enclose the butter block with the dough extending about 1½ times the length of the butter block on each side.
Roll from the center outward, applying even pressure. Keep the corners as square as possible and the thickness even — about 6 mm (¼ inch).
Remove the chilled butter block from the refrigerator and unwrap it. Place it in the center of the rolled dough rectangle, oriented so its edges are parallel to the dough's edges.
Fold the envelope: Take the top third of the dough and fold it down over the butter block, covering it completely. Then take the bottom third and fold it up, overlapping the top fold slightly — like closing a letter. The butter should be completely enclosed, with no exposed edges. Gently pinch the seams and the two open ends to seal the butter inside.
The envelope fold (also called a letter fold or single turn) is the signature method for Danish pastry lamination. Unlike puff pastry's book fold (double turn), the envelope fold creates three layers rather than four with each turn — but it is gentler on the dough and less likely to cause butter blowout, which is important for a softer, yeast-risen dough. After three single turns, the dough will have 3³ = 27 layers of butter and dough — fewer than puff pastry's hundreds of layers, but perfectly sufficient for the tender, flaky-crisp texture of authentic Danish pastry. The key is to ensure the butter is fully sealed: any exposed butter will leak during rolling, creating greasy patches and ruining the lamination.
Step 6 — First Turn (5 minutes + 30 minutes chill)
With the dough still on the floured surface, use your rolling pin to gently press along the length of the package a few times — this "wakes up" the butter and ensures even distribution. Then roll the dough into a rectangle approximately 30 × 18 cm (12 × 7 inches), about 1 cm (½ inch) thick. Roll from the center outward, keeping the rectangle as even as possible.
Perform the first envelope fold: Take the short end of the rectangle and fold it toward the center by one-third. Then fold the opposite short end over the first fold, like folding a letter. You now have three layers.
Rotate the dough 90 degrees so that the open ends (the "book spine") face you. This ensures even lamination in both directions.
Wrap tightly in plastic wrap and refrigerate for 30 minutes.
The 30-minute chill between each turn is non-negotiable for three reasons: (1) it relaxes the gluten, making the dough easy to roll without springing back; (2) it re-chills the butter, keeping it solid and preventing it from smearing into the dough during the next roll; (3) it slows the yeast fermentation — you want the yeast to work during baking, not during the folding process. If the dough is too elastic and resists rolling, it hasn't rested long enough. On a warm day, you may need to extend the chill to 45 minutes. Always mark the plastic wrap with the turn number (e.g., "T1") so you don't lose count.
Step 7 — Second Turn (5 minutes + 30 minutes chill)
Remove the chilled dough from the refrigerator. Unwrap and place it on the lightly floured work surface with the open ends facing you (the same orientation as when it went into the fridge).
Roll the dough again into a 30 × 18 cm (12 × 7 inch) rectangle, about 1 cm (½ inch) thick. Keep the corners square and the thickness even.
Perform the second envelope fold, exactly as before: fold the short ends into thirds like a letter.
Rotate 90 degrees, wrap tightly in plastic wrap, and refrigerate for 30 minutes.
During the second turn, you may notice the dough resisting slightly more than the first turn — this is normal. The gluten network is being reinforced with each fold, and the butter layers are becoming thinner. If the dough springs back aggressively, let it rest at room temperature for 5 minutes before continuing to roll. If you see streaks of butter on the surface (indicating the butter has broken through), dust the area lightly with flour and continue — a few small patches won't ruin the final result.
Step 8 — Third Turn and Final Chill (5 minutes + minimum 30 minutes chill / overnight preferred)
Repeat the rolling and folding process for the third and final turn. After folding, rotate 90 degrees, wrap tightly, and refrigerate for at least 30 minutes (or up to 48 hours).
For the best results, refrigerate overnight. The slow, cold fermentation develops a deeper, more complex flavor in the dough, the gluten relaxes completely for easier rolling and shaping, and the butter firms up perfectly for clean, sharp cuts.
The overnight rest is one of the great secrets of professional Danish pastry. The yeast continues to work slowly at refrigerator temperature (4°C / 40°F), producing subtle fermentation byproducts — alcohols, esters, and organic acids — that give the finished pastry a complexity no same-day dough can achieve. The flavor difference between a same-day Plunderteig and an overnight one is striking: the overnight dough tastes distinctly of "bakery" — nutty, slightly tangy, deeply buttery — while the same-day dough simply tastes like butter and flour. If you can plan ahead, always choose the overnight option. After the final chill, the dough is ready to shape into any Danish pastry style.
🧑🍳 Chef's Tips
- Temperature is the master variable. The entire process depends on keeping the butter at the right temperature — cold enough to remain solid, but not so cold that it cracks. A good rule of thumb: if the dough feels cool to the touch and the butter doesn't melt when touched, you're in the right range. If the dough feels warm or the butter feels greasy, stop and chill immediately.
- The milk must be lukewarm, not hot. Yeast dies at 45°C (115°F). Test the milk on the inside of your wrist — it should feel comfortably warm, like bathwater, not hot. If you're unsure, err on the cooler side; the yeast will just take a little longer to activate.
- Room-temperature egg matters. A cold egg straight from the refrigerator will cool down the milk-yeast mixture and slow fermentation. Crack the egg into a small bowl and let it sit at room temperature for 20 minutes before starting, or warm it gently in a bowl of lukewarm water for 5 minutes.
- Don't skip the 30-minute initial rest. This first rest after kneading is essential for relaxing the gluten so the first roll is easy. If you try to roll the dough immediately after kneading, it will spring back aggressively and the butter block will be difficult to enclose evenly.
- Chill between every turn. Each 30-minute chill has three jobs: relax the gluten, re-chill the butter, and control yeast fermentation. No exceptions. Set a timer every time — it's easy to lose track when you're in the rhythm of rolling.
- Mark your turns. Use a pen to write "T1," "T2," "T3" on the plastic wrap, or make a small indentation with your fingertip on the wrapped dough. It's surprisingly easy to forget which turn you're on.
- Use a ruler for even dimensions. Precise rectangles produce even layers. An uneven rectangle means some parts of the dough will have more or fewer folds, leading to uneven rise and texture in the finished pastry.
- If the butter breaks through the dough, dust the area with flour and chill the dough for 15 minutes before continuing. A few small patches are not a disaster — they'll caramelize and create delicious crispy spots on the baked pastry.
- Work in a cool kitchen. The ideal ambient temperature for Danish pastry lamination is 18–20°C (65–68°F). On a hot summer day, work in an air-conditioned room, or chill the flour and bowl before starting. If your hands are warm, run them under cold water and dry thoroughly before handling the dough.
- A food processor can simplify the dough-making. Pulse the flour, sugar, and salt 3 times. Add the egg and milk-yeast mixture, then pulse 8–10 times until a shaggy dough forms. Turn out onto a floured surface and knead gently for 2–3 minutes — no need to knead the full 8–10 minutes, as the food processor has already partially developed the gluten. Proceed with the 30-minute rest.
- Let the shaped pastries proof before baking. Unlike puff pastry, which goes straight into the oven, Danish pastries need a final proof — typically 45–60 minutes at room temperature (or until puffy and doubled in size). Brush with egg wash (1 egg beaten with 1 tablespoon milk) before baking for a deep golden, glossy crust.
❌ Common Mistakes
| Mistake | Why It Hurts | The Fix |
|---|---|---|
| Milk is too hot | Kills the yeast → dough won't rise; pastry is dense and heavy | Test on your wrist — it should feel comfortably warm, not hot. Use a thermometer: 35–38°C (95–100°F) |
| Butter block is too cold | Butter cracks during rolling → uneven lamination, butter pockets in finished pastry | Let the block sit at room temperature for 2–3 minutes until it bends without cracking |
| Butter block is too warm | Butter smears into dough during rolling → layers fuse together; greasy, dense pastry | Return to refrigerator for 10–15 minutes until firm but still pliable |
| Dough is over-kneaded | Too much gluten → dough springs back aggressively during rolling; difficult to get even layers | Knead just 8–10 minutes — the dough should be smooth but not excessively elastic |
| Dough is under-kneaded | Weak gluten structure → butter breaks through during rolling; dough tears easily | Knead until the dough is smooth and passes the windowpane test (stretches thin without tearing) |
| Skipping or shortening the chilling rests | Gluten hasn't relaxed → dough resists rolling; butter is soft → layers smear together | Respect the 30-minute-chill rule. Set a timer — don't guess |
| Butter not fully sealed in the envelope | Butter leaks out during rolling → greasy surface, ruined lamination | Pinch the seams firmly. If you see butter escaping, dust with flour and chill immediately |
| Rolling too thin on the first turn | Butter block gets flattened too much → layers too thin → pastry has poor structure | Roll to 1 cm (½ inch) thickness for each turn |
| Using too much flour on the work surface | Excess flour dries out the dough → tough, dense pastry | Use a light, even dusting; brush off excess before folding |
| Not rotating the dough between turns | Butter layers align in one direction only → uneven rise | Always rotate 90 degrees before rolling each turn |
| Shaped pastries not proofed enough | Dense, heavy, poorly risen pastries | Proof at room temperature for 45–60 minutes until visibly puffy and doubled in size |
| Oven temperature too low | Butter melts slowly → pastry poaches in fat instead of rising; greasy, flat result | Bake at 190–200°C (375–400°F) — the high heat creates instant steam that lifts the layers |
| Over-baking | Burnt butter flavor, dry pastry | Watch carefully in the last 3–5 minutes; Danish pastries go from golden to burnt quickly |
💡 Variations
| Variation | How To |
|---|---|
| Cardamom Plunderteig | Add 1 teaspoon ground cardamom to the flour before mixing. Cardamom is the classic Scandinavian spice for Danish pastry — it adds a warm, aromatic, slightly citrusy note that is absolutely iconic in wienerbrød. Reduce the sugar to 25 g for a less sweet, more aromatic dough. |
| Vanilla-Scented Plunderteig | Add the seeds of ½ vanilla bean (or 1 teaspoon vanilla bean paste) to the milk-yeast mixture. The vanilla adds a floral, creamy sweetness that pairs beautifully with fruit-filled pastries. |
| Lemon-Zest Plunderteig | Add the finely grated zest of 1 large lemon to the flour. The bright citrus oils cut through the butter richness and complement cream cheese fillings, almond paste, or fruit preserves. |
| Whole Wheat Plunderteig | Replace 75 g (½ cup + 1 tbsp) of the all-purpose flour with whole wheat flour. Add 1 tablespoon extra milk. The dough will be nuttier and more rustic, with a slightly denser but still tender crumb. Ideal for savory Danish pastries filled with cheese and ham or mushrooms. |
| Chocolate Plunderteig | Replace 25 g (3 tbsp) of the flour with unsweetened cocoa powder. Add 1 tablespoon extra milk. Use for chocolate-filled or hazelnut-filled Danish pastries — the cocoa adds depth and a beautiful dark color. |
| Spiced Apple Plunderteig | Add 1 teaspoon ground cinnamon, ½ teaspoon ground ginger, and ¼ teaspoon ground nutmeg to the flour. Perfect for autumn Danish pastries filled with apple compote, calvados-soaked raisins, or pear butter. |
| Saffron Plunderteig | Steep a generous pinch of saffron threads in the warm milk for 15 minutes before adding the yeast. The saffron infuses the dough with a warm, honeyed floral aroma and a magnificent golden color. Traditional in Swedish Saffransbullar (St. Lucia buns). |
| Savory Plunderteig | Reduce the sugar to 10 g (2 tsp). Add 1 teaspoon fresh thyme leaves and ½ teaspoon freshly ground black pepper to the flour. Use for savory Danish pastries filled with spinach and feta, mushroom duxelles, or ham and Gruyère. The savory version is also excellent as a base for Käsekuchen (German cheesecake) or Quiche Lorraine. |
| Brioche-Plunder Hybrid | Increase the egg to 2 and reduce the milk to 100 ml (scant ½ cup). The extra egg adds richness and creates a more brioche-like crumb while maintaining the laminated structure. This hybrid dough is used in French pain au chocolat and pain aux raisins. |
❄️ Storage & Make-Ahead
| Method | Details |
|---|---|
| Refrigerator (unbaked dough, after final chill) | Wrapped tightly in plastic wrap, the finished dough keeps for up to 2 days. The flavor improves during the first 24 hours as the yeast continues to develop complexity. Let it sit at room temperature for 10–15 minutes before rolling and shaping — it will be quite firm. |
| Freezer (unbaked dough, after final chill) | After the final chill, wrap the dough tightly in plastic wrap, then in aluminum foil. Freeze for up to 3 months. Thaw overnight in the refrigerator before using. Do not thaw at room temperature — the butter layers can soften unevenly. |
| Freezer (shaped, unbaked pastries) | Shape the pastries, place on a parchment-lined baking sheet, and freeze until solid (about 2 hours). Transfer to a zipper-lock bag or airtight container and freeze for up to 1 month. To bake: place frozen pastries on a baking sheet, let proof at room temperature for 1–1½ hours (until puffy), brush with egg wash, and bake as directed — the proof time will be longer than fresh pastries because the yeast needs time to wake up. |
| Refrigerator (baked pastries) | Danish pastries are best enjoyed the same day they are baked. If you must store them, keep them in an airtight container at room temperature for up to 1 day. Do not refrigerate — moisture will soften the crisp outer layers. Re-crisp in a 180°C (350°F) oven for 3–5 minutes. |
| Freezer (baked pastries) | Cool completely, then freeze in a single layer on a baking sheet. Transfer to an airtight container or zipper-lock bag. Freeze for up to 1 month. Reheat directly from frozen in a 180°C (350°F) oven for 5–8 minutes. |
| Make-ahead tip: pre-portioned dough | After the final chill, divide the dough into 2 equal pieces (~250 g each), wrap individually, and refrigerate or freeze. This is perfect for making a small batch of Danish pastries on a weekday morning — just thaw one piece overnight, shape, proof, and bake. |
| Make-ahead tip: prepared butter block | The butter block can be prepared up to 1 week in advance. Roll it between sheets of plastic wrap, place in a zipper-lock bag, and refrigerate. Let it sit at room temperature for 5–10 minutes before using. |
🍷 Wine Pairing
| Wine | Why |
|---|---|
| Moscato d'Asti (Piedmont) | Sweet, lightly sparkling, and low in alcohol — the peachy, floral sweetness is a natural match for sweet Danish pastries like apple turnovers, cinnamon rolls, and cream-cheese-filled wienerbrød. The gentle bubbles cut through the butter richness. |
| Prosecco Superiore di Valdobbiadene (Veneto) | Lively, floral, and gently fruity — the crisp effervescence and steely acidity cut through the buttery, yeasted richness like a palate cleanser. Perfect with both sweet and savory Danish pastries. |
| Franciacorta Brut (Lombardy) | Italy's answer to Champagne — fine bubbles, high acidity, and a toasty, nutty note that mirrors the browned butter and caramelized sugar of baked Danish pastry. A celebratory pairing for any plunder creation. |
| Brachetto d'Acqui (Piedmont) | A sweet, lightly sparkling red with aromas of strawberries and rose petals. The berry notes complement fruit-filled Danish pastries (cherry, raspberry, strawberry), while the sweetness balances the buttery dough. Serve lightly chilled. |
| Gewürztraminer (Alto Adige) | An aromatic white with lychee, rose, and spice notes. Its natural sweetness and floral intensity stand up beautifully to spiced Danish pastries (cardamom, saffron, cinnamon) without being overpowered. |
| Recioto di Soave (Veneto) | A rich, sweet white wine with honeyed apricot, almond, and citrus notes. Complex and layered, it mirrors the laminated structure of the pastry itself. Perfect with nut-filled Danish pastries (Nussschnecken) or those with almond paste. |
| Dry Oloroso Sherry (for savory Plunderteig) | Nutty, oxidative, and savory — the dry, umami-rich character of Oloroso pairs brilliantly with savory Danish pastries filled with mushrooms, ham and cheese, or spinach and feta. The nuttiness echoes the browned butter in the pastry. |
🥗 Suggested Accompaniments
- Good-quality fruit preserves — Apricot, raspberry, cherry, or fig jam, warmed and brushed over the baked pastries for a beautiful glossy finish. This is the traditional Danish abrikosmarmelade glaze that gives wienerbrød its signature sheen.
- Vanilla crème anglaise or vanilla sauce — A warm, silky vanilla custard sauce poured over a freshly baked apple turnover or cinnamon roll elevates it from breakfast pastry to dessert.
- Clotted cream or crème fraîche — A cool, tangy dollop provides a luxurious contrast to the hot, flaky, buttery layers. The acidity cuts through the richness beautifully.
- Lightly sweetened whipped cream — The classic accompaniment to Danish pastries in Scandinavia. Whip 200 ml heavy cream with 1 tablespoon powdered sugar and a splash of vanilla extract until soft peaks form.
- Fresh berries and mint — A simple, bright garnish that balances the richness. Sliced strawberries, raspberries, or blueberries with a sprig of mint add color and freshness.
- Chilled café latte or cappuccino — The bitter, roasty notes of coffee are the perfect counterpoint to the sweet, buttery pastry. In Denmark, wienerbrød is almost always enjoyed with coffee (kaffe).
- Gløgg or mulled wine (seasonal) — Spiced, warm, and aromatic — the perfect winter pairing for cardamom or saffron Danish pastries. The warming spices in the drink echo the spices in the dough.
- Aged Gouda or Comté (for savory Plunderteig) — Thin slices of a nutty, crystalline aged cheese alongside a savory Danish pastry filled with mushrooms or ham make for an exceptional brunch or light lunch.
📊 Nutrition (per ⅛ of total dough — approximately 63 g unbaked)
| Calories | Protein | Fat | Carbs | Fiber | Sugar |
|---|---|---|---|---|---|
| ~260 | 5 g | 17 g | 23 g | 0.7 g | 4 g |
Nutritional values are estimates for the unbaked dough (⅛ of the full ~500 g recipe). The vast majority of calories come from butter (about 140 calories from fat per serving) and flour (about 85 calories from carbohydrates). This is, by its nature, a high-fat preparation — the butter lamination that creates the flaky layers is also the primary source of calories. Each serving contains approximately 17 g of fat (10 g saturated). The dough's sugar content is modest at just 4 g per serving — the primary sweetness of the finished pastry comes from fillings, glazes, and toppings rather than the dough itself. The full recipe (8 servings) contains approximately 2,080 calories and 136 g of fat. Note that once the dough is shaped, filled, and baked, the nutritional profile changes dramatically based on the filling: a cream-cheese-filled Danish can add 100–150 calories per serving, while a fruit-filled turnover with an apricot glaze adds about 50–80 calories. A savory version with cheese and ham adds approximately 80–120 calories. Danish pastries are, by their nature, an occasional indulgence — a celebration of butter, flour, and technique that rewards careful craftsmanship with exceptional flavor.
❓ Frequently Asked Questions
What's the difference between Plunderteig (Danish pastry dough) and classic puff pastry?
The fundamental difference is yeast. Classic puff pastry (pâte feuilletée) is unleavened — its rise comes entirely from steam created by dozens of butter layers in a hot oven. Plunderteig is a yeasted laminated dough: it contains yeast, sugar, milk, and egg, giving it a richer flavor and a softer, more tender crumb. The yeast produces carbon dioxide during proofing and baking, creating an additional lift that puff pastry doesn't have. The result is a pastry that is crisp on the outside but soft and airy on the inside, whereas puff pastry is uniformly crisp and flaky throughout. Plunderteig also uses fewer turns (typically 3 single turns = 27 layers) compared to puff pastry (6+ turns = 729+ layers), because the yeast lift compensates for the fewer laminations.
Can I make this dough without a stand mixer?
Absolutely. In fact, Danish pastry dough has been made by hand for centuries. Mix the dough in a bowl with a wooden spoon until it comes together, then turn it out onto a floured surface and knead by hand for 8–10 minutes. The dough is soft and forgiving — it requires gentle, not vigorous, kneading. A bench scraper is helpful for collecting and turning the dough as you knead.
Can I use instant dry yeast instead of fresh or active dry?
Yes. Use 4 g (1 teaspoon) instant dry yeast. Unlike active dry yeast, instant yeast does not need to be proofed in warm milk first. Simply whisk it into the flour along with the sugar and salt, then add the lukewarm milk and egg directly to the dry ingredients. Proceed with mixing and kneading as directed. The rising times may be slightly shorter because instant yeast has more live cells per gram.
Can I use salted butter for the butter block?
Yes, but reduce the salt in the dough to zero — omit the pinch of fine sea salt. Different brands of salted butter contain varying amounts of salt (from ¼ to ½ teaspoon per stick), so the result may be less consistent. Unsalted butter with your own salt gives the most reliable result. For the butter block specifically, unsalted European-style butter (82–84% butterfat) is strongly preferred because of its lower water content.
Why did my butter break through the dough during rolling?
This is the most common issue in laminated doughs. It happens when: (1) the butter block is at a different temperature or consistency than the dough — one of them is too cold or too warm; (2) the dough wasn't thick enough when you started rolling; (3) you applied too much pressure with the rolling pin. To prevent it: ensure both the dough and butter are at similar cool-but-pliable temperatures, roll gently and evenly, and keep the dough at least 6 mm (¼ inch) thick. If it happens, dust the area with flour, chill the dough for 15 minutes, and continue.
Why are my Danish pastries dense and heavy instead of light and airy?
Several possible causes: (1) the yeast was dead or the milk was too hot, killing the yeast → no fermentation → no rise; (2) the pastries were not proofed long enough before baking → the yeast didn't have time to produce gas bubbles → dense crumb; (3) the butter was too warm during lamination → it got absorbed into the dough → no distinct layers → no flakiness; (4) the dough was over-floured during rolling → too much flour dried out the dough → tough, dense texture; (5) the oven wasn't hot enough → the butter melted slowly and the pastry essentially fried in fat instead of rising.
Why is my pastry greasy?
A greasy result means the butter separated from the dough and pooled out during baking. This happens when: (1) the butter was too warm during folding and got absorbed into the dough instead of staying in distinct layers; (2) the oven temperature was too low, giving the butter time to melt and leak before the structure set; (3) the pastries were baked before they were fully chilled; (4) the pastries were over-proofed — the overactive yeast produced too much gas, which broke the butter layers. To fix: make sure the shaped pastries are cold before baking (chill for 15 minutes after shaping), and use a hot oven (190–200°C / 375–400°F minimum).
Can I make Danish pastries with this dough?
Yes — that is the primary purpose of this recipe! After the final chill, roll the dough to about 4 mm (⅛ inch) thickness and shape it into your desired forms: Spandauern (rectangular pastries with custard or jam and a lattice top), Copenhageners (oval pastries with filling and a strip of dough across the center), Hörnchen (crescents rolled up around filling), Zimtschnecken (cinnamon rolls), Apfeltaschen (apple turnovers), or Kopenhagener (the classic Danish with icing). After shaping, proof the pastries at room temperature for 45–60 minutes until puffy and doubled in size. Brush with egg wash and bake at 190–200°C (375–400°F) for 12–18 minutes. Cool completely, then glaze with abrikosmarmelade (warmed apricot jam) and/or a simple icing (powdered sugar + milk/lemon juice).
Can I halve or double this recipe?
Yes. Halve or double all ingredients proportionally. For a half recipe (125 g flour, 15 g sugar, 100 g butter, 63 ml milk, ½ egg — beat the egg and use half, or use 1 small egg), the dough will be smaller and easier to handle. For a double recipe (500 g flour, 60 g sugar, 400 g butter, 250 ml milk, 2 eggs, 30 g fresh yeast or 10 g dry), it's best to make the dough in two separate batches — handling twice the amount of laminated dough at once is unwieldy and the butter may warm up from extended handling. The amount of butter block for the double recipe should be divided into two 200 g blocks.
Can I use this dough for croissants?
This recipe makes a dough that is very similar to, but distinct from, classic croissant dough (pâte à croissant). Croissant dough typically uses water instead of milk and has a slightly lower sugar content (about 10% instead of 12%). The milk and higher sugar in this Plunderteig produce a softer, sweeter, more tender pastry than a traditional croissant. For true French croissants, replace the milk with water, reduce the sugar to 20 g, and use 20 g fresh yeast. The folding and chilling process remains the same.
How do I get the signature shiny glaze on Danish pastries?
The classic Danish glaze is a two-step process: first, as soon as the pastries come out of the oven, brush them with warm apricot jam (abrikosmarmelade) that has been heated and strained — this gives them a beautiful golden sheen. After they have cooled completely, drizzle them with a simple icing made from 100 g (1 cup) powdered sugar mixed with 1–2 tablespoons milk or lemon juice until smooth. The combination of jam glaze and white icing is the hallmark of authentic wienerbrød.
What's the best way to cut laminated dough for Danish pastries?
Use a sharp knife, pastry wheel, or pizza wheel with a clean, decisive downward motion — do not saw or drag the blade, which can press the layers together and prevent rising. For the cleanest edges, dip the blade in hot water and dry it before cutting (the heat seals the edges slightly, helping the layers stay separate). After cutting, always chill the shaped pieces for 15 minutes before proofing.
🔗 Related Recipes
- Rough Puff Pastry Express (#307) — The non-yeasted, faster cousin of this laminated dough. Use it when you want flaky layers without the yeast — perfect for savory pies, cheese straws, and quick tarts.
- Basic Shortcrust Pastry — Pasta Frolla (#124) — The sweet Italian shortcrust that is the non-laminated counterpart to this dough. Master both and you cover the entire pastry repertoire from croissants to cookies.
- Basic Brioche Dough — Pan Brioche (#158) — The enriched, non-laminated yeast dough that shares ingredients (butter, eggs, milk, sugar) with Plunderteig but uses a completely different method. Compare the two to understand how lamination transforms a dough.
- Krapfen / Berliner — Jam-Filled Doughnuts (#187) — Another yeasted, enriched, fried dough that uses similar ingredients. The contrast between laminated (Plunderteig) and non-laminated (Krapfen) enriched doughs is a fascinating study in technique.
- Apple Strudel — Strudel di Mele (#63) — A different kind of thin-layered pastry from Central Europe. The paper-thin strudel dough is stretched, not laminated, but the tradition of wrapping fruit fillings in delicate, buttery layers is shared.
- Éclair Cream and Chocolate (#106) — The choux pastry counterpart — a completely different pastry technique (steam-leavened, not yeast-leavened or laminated). Understanding all three — puff pastry, Plunderteig, and choux — covers the major Western pastry techniques.
- Croissant Dough — Pasta per Croissant (#198) — The close cousin of this Plunderteig. Compare the two to understand how small changes in ingredients (water vs. milk, sugar percentage) create distinct pastries.
- Puff Pastry Cottage Cheese and Asparagus (#248) — A savory puff pastry tart. The filling and assembly can be adapted for Plunderteig as well — the yeasted dough adds an interesting savory dimension.
- Pie Crust Dough (#243) — A simple, workhorse pie dough for everyday pies. Useful to compare against this laminated dough — both are butter-based, but the method (rubbing vs. lamination) produces radically different textures.
🏷️ Search Tags
📸 Photo Reference
Photo reference: `vol1_320.png` — A close-up, overhead shot on a lightly floured wooden work surface. In the foreground, the finished Plunderteig dough is unwrapped after its overnight final chill — a neat, smooth rectangle of pale golden dough with subtle striations visible at the edges where butter layers press against the cut surface. Beside it, a cross-section reveals the delicate laminated structure: dozens of paper-thin alternating bands of butter and yeasted dough, some translucent, some opaque, forming what looks like geological strata. In the center of the frame, two shaped Danish pastries rest on a parchment-lined baking sheet: one Apfeltasche (apple turnover) — a square of dough folded over a generous mound of cinnamon-spiced apple compote, edges crimped, with three small steam vents cut into the top — and one Zimtschnecke (cinnamon roll), a spiral of dough wrapped around a dark swirl of cinnamon-butter-sugar filling. Both have been brushed with egg wash and are glossy and golden before baking. In the background, small bowls hold the mise en place: a ramekin of beaten egg for egg wash, a small dish of ground cinnamon, a saucer of demerara sugar for sprinkling, and a clean pastry brush. A ruler lies alongside the dough rectangle to indicate scale. A jar of apricot jam stands nearby, its lid off, with a small saucepan on the stove hinting at the warm glaze to come. The lighting is warm and natural — early morning sunlight from a kitchen window, casting soft shadows that emphasize the visible layers in the dough cross-section and the glossy sheen of the egg wash on the shaped pastries. A small kitchen thermometer reads 20°C (68°F), confirming the ideal proofing temperature. In the corner of the frame, a white ceramic cup of steaming coffee stands ready — a reminder that these pastries are made to be enjoyed. The mood is patient, deliberate, and quietly rewarding — the image of a baker who has taken the time to do it right, knowing that the overnight wait will be repaid with pastries that taste of butter, yeast, and craftsmanship.
Recipe from "The Italian Kitchen" by Vita Milanese — Volume 1: Pasta Perfetto 🥟
Recipe from The Italian Kitchen by Vita Milanese — Volume 1 · Pasta Perfetto. Discover all volumes on the ebook page.