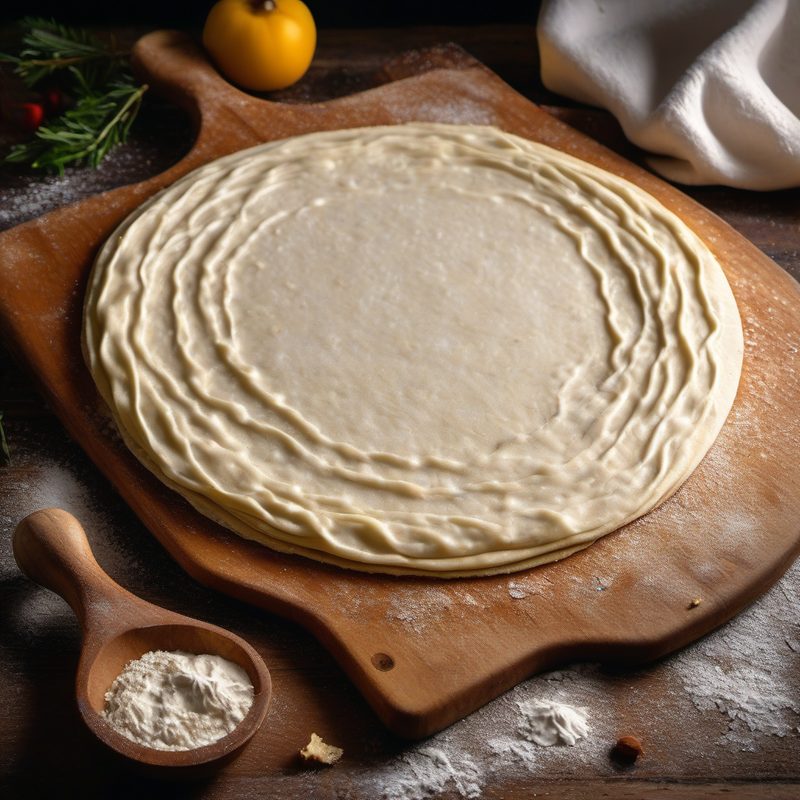
Tarte Flambee Dough
Category: Pane, Pizze, Focacce — Pasta fresca e impasti
| Amount | Ingredient |
|---|---|
| Calories | 585 kcal |
| Protein | 10 g |
| Fat | 15 g |
| Saturated Fat | 2 g |
| Carbohydrates | 95 g |
| Fiber | 3 g |
| Sodium | 585 mg (varies with salt) |
Yield: 2 large tartes (≈500 g dough total)
Active Time: 15 minutes
Total Time: 45 minutes (includes 30 minutes resting)
Rest / Proof Time: 30 minutes at room temperature
Difficulty: Easy
Why This Recipe Works
Tarte flambée — also known as flammekueche — is an Alsatian classic that marries a whisper-thin, crackling crust with a luscious topping of crème fraîche, onions, and lardons. The dough itself is the foundation of the dish, and it must be nothing short of ethereally thin and sturdy enough to hold the topping without turning soggy. This recipe achieves that ideal through three critical choices.
First, the fat-to-flour ratio. A modest 2 tablespoons of olive oil (about 14% of the flour weight) provides enough tenderness to keep the crust from turning brittle, yet not so much that the dough becomes short or friable — it needs to roll paper-thin without tearing. Second, warm-water hydration. Using water at about 38–43 °C (100–110 °F) kick-starts gluten development, allowing the dough to come together quickly and relax into a silky, extensible mass during the brief rest. Third, a generous 30-minute rest. Unlike bread dough that can be worked immediately, this dough needs time for the gluten to relax fully; without that rest, the dough will snap back when you try to roll it thin, producing a tough crust. The result is a supple, neutral-flavored dough that bakes to a shatteringly crisp finish — the perfect canvas for tarte flambée's signature creamy, smoky, oniony topping.
Key Techniques
- Warm-water hydration: Using water at 38–43 °C (100–110 °F) ensures the flour absorbs moisture evenly and gluten develops consistently. Water that is too hot can kill gluten formation; water that is too cool slows absorption.
- Kneading to windowpane stage (almost): The dough should be smooth, supple, and slightly tacky — not sticky. You should be able to stretch it thin enough to see light through it without tearing. This is the hallmark of properly developed gluten.
- The cold-water test for resting: After the rest, the dough should feel relaxed and not spring back when pressed with a finger. If it springs back aggressively, rest it 10 minutes more.
- Rolling from the center outward: For a truly even, paper-thin sheet, start each roll at the center and push outward, rotating the dough 90 degrees between passes. Do not flip the dough; roll on a very lightly floured surface.
Equipment
- Large mixing bowl (stainless steel or ceramic)
- Fork or wooden spoon for initial mixing
- Clean work surface (marble, granite, or wood)
- Bench scraper (optional but helpful for cleaning the surface)
- Kitchen scale (digital, for precision; the flour measurement by weight is critical — do not rely on volume)
- Rolling pin (preferably a tapered French pin for thin dough, but a standard pin works)
- Bowl or plastic bag for resting (covered airtight)
- Pastry brush (for oiling the bowl)
- Refrigerator (optional, for longer rests)
- Parchment paper or silicone baking mat (for transferring rolled dough)
- Baking sheet or baking stone
- Oven thermometer (to verify 260 °C / 500 °F temperature)
Prep (Mise en Place)
- Weigh the flour directly into a large mixing bowl. If measuring by volume, spoon into the measuring cup and level off — do not scoop or pack.
- Warm the water in a small saucepan or microwave: heat to 38–43 °C (100–110 °F). Test on the inside of your wrist — it should feel like warm bathwater, not hot.
- Measure the olive oil into a small cup.
- Measure the salt into a small dish.
- Lightly oil a clean bowl (or the same mixing bowl, washed and dried) with about ½ tsp olive oil for the resting stage.
- Clear and lightly flour your work surface — about 1–2 tsp of flour is enough; too much will dry out the dough.
Step-by-Step Instructions
1. Mix the Dry Ingredients (1 minute)
- Add the 5 g (1 tsp) salt to the 250 g flour in the bowl.
- Whisk or stir with a fork until the salt is evenly distributed throughout the flour — about 20 seconds of mixing.
2. Add the Wet Ingredients and Form the Dough (2–3 minutes)
- Make a well in the center of the flour.
- Pour in the 125 ml warm water and 30 ml olive oil simultaneously.
- Using a fork, gradually draw the flour into the liquid, working in a circular motion from the center outward, until a shaggy, clumpy mass forms.
- The dough should be cohesive but rough-looking at this stage — if it feels dry and there is loose flour remaining, add 1 teaspoon of water at a time until it comes together. If it feels sticky and wet, add 1 teaspoon of flour at a time.
3. Knead the Dough (5–7 minutes)
- Turn the shaggy dough out onto a lightly floured work surface.
- Begin kneading: push the dough away from you with the heel of your hand, fold it back over itself, rotate 90 degrees, and repeat.
- Continue for 5 minutes at a steady, rhythmic pace. After 5 minutes, the dough should be smooth, supple, and slightly tacky (it should stick to your hand just faintly, but not leave residue on the counter).
- Test for readiness (windowpane test): Pinch off a small piece of dough and carefully stretch it between your thumbs and forefingers. If you can stretch it thin enough to see light through without tearing, the gluten is properly developed. If it tears easily, knead 1–2 minutes more and test again.
- Do not exceed 8 minutes of total kneading — overworked dough becomes tight and difficult to roll thin.
4. Rest the Dough (30 minutes)
- Shape the kneaded dough into a smooth, round ball by cupping your hands around it and rotating it on the counter in a circular motion.
- Lightly oil the inside of a clean bowl with about ½ tsp olive oil.
- Place the dough ball in the bowl, seam side down, and turn once to coat lightly with oil.
- Cover the bowl tightly with plastic wrap, a damp kitchen towel, or an airtight lid.
- Let rest at room temperature for 30 minutes. This allows the gluten to relax and the dough to become extensible.
- Timing note: If your kitchen is cold (below 20 °C / 68 °F), extend the rest to 40 minutes. If it is very warm (above 28 °C / 82 °F), rest for 25 minutes and check.
5. Divide and Roll the Dough (10 minutes)
- After the rest, turn the dough out onto a lightly floured surface. It should feel soft, relaxed, and pliable — it should not resist when you press it.
- Divide the dough into 2 equal pieces (about 250 g each) using a bench scraper or knife.
- Form each piece into a ball and cover with a damp towel; let rest for 5 minutes more (this final rest ensures maximum extensibility for rolling).
- Working with one piece at a time (keep the other covered):
- Flatten the ball into a disk with your palm.
- Using a rolling pin, start at the center and roll outward in one direction. Rotate the dough 90 degrees and roll again from the center outward. Repeat, rotating frequently, until the dough is paper-thin — about 2–3 mm (¹⁄₁₂ inch) thick.
- The final shape should be a rough oval or rectangle, approximately 30 × 35 cm (12 × 14 inches), depending on your baking sheet.
- Transfer the rolled dough to a parchment-lined baking sheet or a floured peel (if using a stone). Proceed immediately to topping and baking.
Baking Parameters
| Parameter | Recommendation |
|---|---|
| Oven temperature | 260 °C (500 °F) or as high as your oven goes — maximum heat is essential for a crisp crust |
| Baking surface | Preheated baking stone (ideal) or inverted heavy-gauge baking sheet |
| Bake time | 10–14 minutes, rotating halfway through |
| Visual doneness | Crust is deep golden brown in spots, the edges are slightly charred, and the topping is bubbling |
| Cooling | Slide onto a wire rack immediately — do not cool on the baking sheet or the bottom will steam and turn soft |
Chef's Notes & Tips
- Flour matters. Tipo 00 flour (commonly available in Italian markets or online) produces a noticeably more tender, delicate crust than standard all-purpose because it is ground finer and has a lower protein content (about 9–10.5%). If you use bread flour (higher protein), expect a chewier, less crisp result; you may need to rest the dough 10 minutes longer.
- Water temperature is not negotiable. At 38–43 °C, the water activates gluten proteins without damaging them. If you use cold tap water, knead for 9–10 minutes instead of 5–7.
- No added yeast or baking powder. Traditional tarte flambée dough is unleavened — it relies solely on thin rolling and high heat for texture. Adding a leavener would produce a puffier, breadier crust that is incorrect for this dish.
- Rolling without tears. If the dough tears while rolling, pinch it back together and let it rest, covered, for 5 minutes before continuing. The gluten needs more relaxation time.
- Saving scraps. If you have trimmings after shaping, knead them together into a ball, rest 10 minutes, and reroll. They produce a slightly stiffer but still usable crust.
- Use a ruler. It is easy to think you have rolled thin enough when you have not. Roll until you can see the outline of your hand through the dough when held up to light. That is the correct thickness.
Troubleshooting
| Problem | Likely Cause | Solution |
|---|---|---|
| Dough is too stiff to knead | Too much flour; insufficient water | Add water 1 tsp at a time and continue kneading |
| Dough is sticky and unworkable | Too much water; insufficient kneading | Add flour 1 tsp at a time; knead another 2 minutes |
| Dough springs back when rolling | Insufficient rest time; gluten too tight | Cover and rest 10 more minutes at room temperature |
| Dough tears while rolling | Dough too dry; rolled too aggressively | Pinch tear closed, cover, rest 5 minutes; roll more gently |
| Crust is tough after baking | Overkneaded; oven temperature too low | Reduce kneading time to 5 minutes; verify oven reaches 260 °C |
Variations
- Herb-infused dough: Add 1 tsp dried thyme or 1 tbsp finely chopped fresh rosemary to the flour before mixing. This is a common Alsatian twist that complements the traditional onion-and-lardon topping.
- Whole-wheat tarte flambée: Replace 75 g (2⅔ oz) of the all-purpose flour with whole-wheat flour. Increase warm water by 1–2 tbsp (15–30 ml), as whole wheat absorbs more moisture. Expect a nuttier flavor and slightly less crispy crust.
- Buckwheat variation (Galette-style): Replace 100 g (3½ oz) of the all-purpose flour with buckwheat flour. The dough will be less elastic and more fragile; roll with care. Buckwheat pairs beautifully with traditional Alsatian toppings.
- Cold fermentation (advanced): For a more complex, slightly fermented flavor, after kneading, refrigerate the dough (tightly covered) for 12–24 hours. Bring to room temperature for 1 hour before dividing and rolling. The long cold rest develops flavor and makes the dough even more extensible.
- Spelt dough: Replace all of the all-purpose flour with spelt flour. Spelt absorbs less water, so reduce the warm water to 100 ml (⅓ cup + 1 tbsp). The dough will be more delicate; handle gently.
Make-Ahead and Storage
- Refrigerating the rested dough: The rested dough can be refrigerated, tightly wrapped in plastic wrap or in an oiled, airtight container, for up to 24 hours. Bring to room temperature for 30 minutes before dividing and rolling.
- Freezing the dough: Wrap each portion (unrolled, as a ball) tightly in plastic wrap, then place in a freezer bag. Freeze for up to 3 months. Thaw overnight in the refrigerator, then let come to room temperature for 30 minutes before rolling.
- Freezing rolled dough: Roll the dough to final thickness, place on a parchment-lined baking sheet (in a single layer), and freeze until firm. Stack between layers of parchment and seal in a freezer bag. Bake directly from frozen, adding 2–3 minutes to the bake time; do not thaw or the dough will become sticky and difficult to handle.
- Baked crusts: If baking the crusts in advance (for future use), par-bake at 260 °C for 5–6 minutes until just set but not coloured. Cool completely, stack between parchment, and seal airtight. Store at room temperature for up to 2 days. Finish with toppings and a final bake of 8–10 minutes.
Pairing Suggestions
- Traditional topping (Garniture classique): Spread each tarte with 150 g (generous ½ cup) crème fraîche or fromage blanc, season with salt, pepper, and a pinch of nutmeg. Top with 1 large onion (thinly sliced, about 200 g) and 100 g (3½ oz) lardons or thick-cut bacon strips (cut into 1 cm pieces). Bake at 260 °C until golden. This is the canonical Alsatian preparation.
- Wine: A dry, crisp Alsatian Riesling, Pinot Blanc, or Gewürztraminer. The wine's acidity cuts through the richness of the crème fraîche and bacon. Alternatively, a chilled dry rosé or a light German Pilsner.
- Salad: A sharp, acidic frisée or arugula salad with a Dijon vinaigrette — the bitterness and acidity contrast perfectly with the rich, smoky tarte.
- Soup pairing: Serve as a starter alongside a bowl of French onion soup or a creamy pumpkin soup — the crisp crust provides excellent textural contrast.
Nutrition (per tarte, approximate — dough only, without toppings)
Recipe Summary
- Total ingredients: 4
- Active time: 15 minutes
- Rest time: 30 minutes
- Total project time: 45 minutes
- Yield: 2 large tartes (≈250 g dough per tarte)
This dough is the authentic foundation for Alsatian tarte flambée (flammekueche). Rolled paper-thin and baked at maximum oven heat, it produces a crust that is crackling-crisp, lightly chewy, and sturdy enough to support a generous layer of crème fraîche, onions, and bacon without turning soggy. Master this dough, and you have unlocked one of the great rustic flatbreads of European cuisine.
Recipe converted to ATK-style format (19-section adapted for dough/pastry). Original: "Pasta per tarte flambée" (Tarte Flambée Dough), position 319. Category: Pane, Pizze, Focacce.
Recipe from The Italian Kitchen by Vita Milanese — Volume 1 · Pasta Perfetto. Discover all volumes on the ebook page.