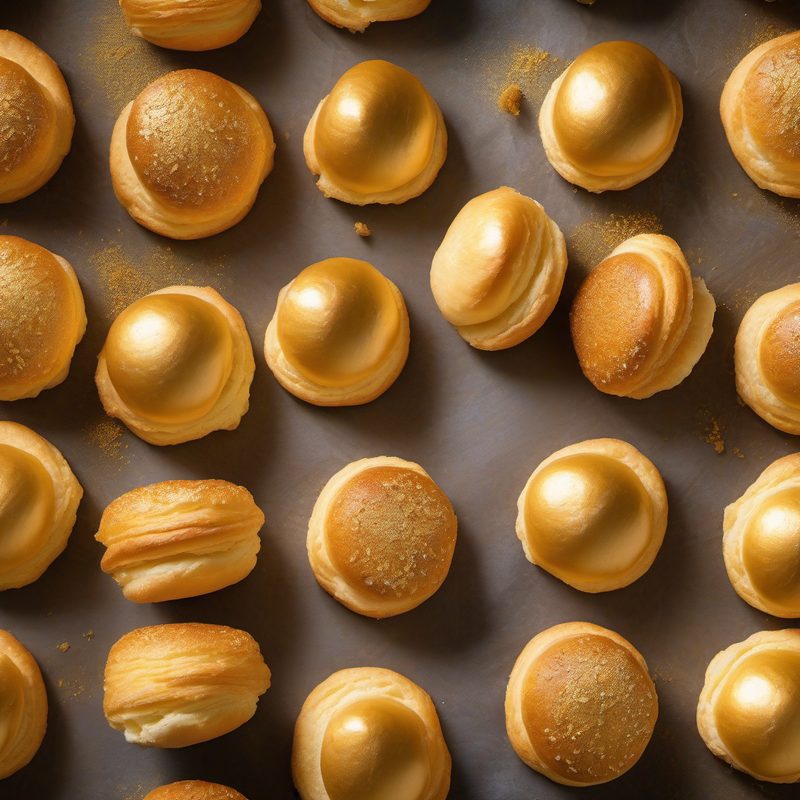
Choux Pastry
A light, airy, steam-leavened pastry that transforms a simple mixture of water, butter, flour, and eggs into crisp, hollow shells — the foundation of éclairs, cream puffs, profiteroles, gougères, and the entire family of pâte à choux creations, in about 45 minutes from saucepan to piping bag.
| Amount | Ingredient |
|---|---|
| Whole Wheat Choux | Replace 50 g (⅓ cup + 1 tbsp) of the all-purpose flour with whole wheat flour. Add 1 tablespoon extra water — whole wheat absorbs more moisture. The shells will be nuttier, slightly denser, and wonderfully rustic. Excellent for savory applications with strong cheeses or herbs. |
| Choux with Brown Butter (Beurre Noisette) | Brown the 100 g butter in the saucepan before adding the water and milk. Cook over medium heat until the butter turns golden-brown and smells nutty (about 3–4 minutes), then add the liquids and proceed. The nutty, caramelized flavor infuses the entire pastry. Spectacular with chocolate or caramel fillings. |
| Cheese Choux (Gougères) | Add 100 g (1 cup) finely grated Gruyère or Comté cheese to the panada after cooking, stirring until melted before adding the eggs. Also stir in ½ teaspoon Dijon mustard and a pinch of cayenne pepper. Pipe or spoon into small (1-inch / 2.5 cm) puffs. The classic French cheese puff, served warm as an appetizer. |
| Herb Choux | Add 2 tablespoons finely chopped fresh herbs (thyme, chives, parsley, or a mix) to the panada before adding the eggs. Excellent for savory choux filled with herbed cream cheese, smoked salmon mousse, or mushroom duxelles. |
| Spiced Sweet Choux | Add 1 teaspoon vanilla extract and ½ teaspoon ground cinnamon (or the zest of 1 lemon) to the panada after cooking. Adds aromatic depth to sweet choux. Combine with a chocolate or vanilla pastry cream filling. |
| Cocoa Choux | Replace 15 g (2 tbsp) of the flour with unsweetened cocoa powder. Sift the cocoa with the flour before adding. The result is a chocolate-flavored choux shell, perfect for chocolate éclairs filled with chocolate pastry cream and topped with chocolate glaze. Reduce the sugar to ½ teaspoon (the cocoa adds bitterness). |
| Parmigiano and Black Pepper Choux | Add 50 g (½ cup) finely grated Parmigiano-Reggiano and 1 teaspoon coarsely ground black pepper to the panada after cooking. Omit the sugar. A bold, savory choux perfect for cocktail parties, served with aperitivo. |
| Churro-Style Choux (Deep-Fried) | Instead of baking, pipe the choux paste through a star tip into 4-inch (10 cm) lengths directly into hot oil (180°C / 350°F). Fry for 3–4 minutes until deep golden brown, turning once. Drain on paper towels and roll immediately in cinnamon sugar (½ cup sugar mixed with 1 tbsp cinnamon). A classic Spanish street food made with choux paste. |
| Zeppole (Italian Fried Choux) | Drop tablespoon-sized dollops of choux paste into hot oil (180°C / 350°F), fry for 4–5 minutes until puffed and golden. Drain on paper towels, dust with powdered sugar, and fill with pastry cream or sweetened ricotta. The classic Italian zeppole di San Giuseppe (St. Joseph's Day fritters). |
| Gluten-Free Choux | Replace the all-purpose flour with an equal weight of gluten-free flour blend (one that includes xanthan gum, such as Cup4Cup or King Arthur Measure-for-Measure). The panada may be slightly looser; you may need one fewer egg. Bake 2–3 minutes longer. The result is surprisingly good — nearly indistinguishable from traditional choux. |
Choux pastry — pasta a choux in Italian, pâte à choux in French — is one of the most remarkable preparations in the pastry repertoire. Unlike puff pastry (which rises through hundreds of butter layers), brioche (which rises through yeast fermentation), or sponge cake (which rises through beaten eggs), choux pastry achieves its dramatic puff entirely through steam. A simple mixture of water, milk, butter, and flour is cooked on the stovetop until it forms a smooth, cohesive dough ball (panada). Then, off the heat, eggs are beaten in one by one until the dough becomes a silky, pipeable paste. When baked, the moisture in the dough turns to steam, inflating the pastry into a hollow, golden-brown shell with a crisp exterior and a tender, airy interior.
The name choux (French for "cabbage") refers to the characteristic shape of the baked puffs, which resemble tiny cabbages. The Italian name pasta a choux directly imports the French term, reflecting the French origins of this technique. Unlike most pastry doughs, choux can be either sweet or savory — it embraces fillings from vanilla pastry cream to Gruyère cheese without missing a beat. It can be piped into éclairs, formed into cream puffs, dropped by the spoonful for profiteroles, or piped into rings for Paris-Brest. It can be deep-fried as churros or zeppole, or piped into gnocchi-like gougères for an elegant hors d'oeuvre.
This recipe yields approximately 500 g of choux paste, enough for about 24 cream puffs or 12 éclairs. The process is straightforward and forgiving, but it rewards attention to a few critical details: the flour must be cooked until the dough forms a film on the bottom of the pan; the eggs must be added one at a time; and the baked shells must be dried in the turned-off oven to ensure they stay crisp.
> Bake time depends on size: small puffs (1 inch / 2.5 cm) take about 20–22 minutes; medium éclairs (4 inches / 10 cm) take 25–28 minutes; large Paris-Brest rings take 30–35 minutes. All choux require a short drying period in the turned-off oven after baking.
The classic choux ratio is roughly 2:1:1:2 by weight — liquid (water + milk) to butter to flour to eggs. Here, 250 g of liquid (water + milk), 100 g butter, 150 g flour, and approximately 200 g of eggs delivers a perfectly balanced paste. The combination of water and milk produces a better result than either alone: water creates steam for maximum lift, while milk adds milk solids and lactose that deepen the golden-brown color and enrich the flavor. For an all-water version (neutral flavor, maximum crispness, traditional for savory gougères), replace the 125 ml milk with an equal amount of water. For an all-milk version (richer flavor, softer texture, deeper browning), replace the water with milk — but expect slightly less dramatic puffing. The sugar is minimal (barely a whisper of sweetness) and can be omitted for savory preparations. The salt seasons the pastry from within — do not omit even for sweet versions, as it balances the richness of the eggs and butter. The eggs are the most variable ingredient: their size, temperature, and even the humidity of the day can affect how much the dough absorbs. You may need anywhere from 3¾ to 4½ eggs. Start with 4, and be prepared to add a fifth if the paste is too stiff; if it becomes too thin after 4, beat an extra yolk rather than a whole egg.
🥘 Equipment
- Medium heavy-bottomed saucepan (2–3 quart / 2–3 L)
- Wooden spoon or heat-resistant silicone spatula
- Digital kitchen scale (strongly recommended)
- Fine-mesh sieve or sifter (for sifting flour)
- Small mixing bowl (for beating eggs)
- Whisk or fork (for beating eggs)
- Piping bag (16-inch / 40 cm) with plain round tip (½-inch / 12 mm for cream puffs, ⅝-inch / 16 mm for éclairs)
- Baking sheet (rimmed, 13 × 18 inch / 33 × 45 cm)
- Parchment paper
- Small offset spatula or knife (for smoothing piped shapes)
- Pastry brush (for egg wash, if using)
- Wire cooling rack
- Kitchen thermometer (optional, for checking panada temperature)
📋 Preparation
Step 1 — Sift the Flour (2 minutes)
Sift the 150 g (1¼ cups) all-purpose flour through a fine-mesh sieve into a small bowl. Set aside.
Sifting aerates the flour and removes any lumps — important because the flour is added all at once and must incorporate instantly into the hot liquid. Lumps in the flour become lumps in the paste, and you cannot smooth them out once the eggs are added (the paste is too delicate to be worked vigorously at that stage). If you're using tipo "00" flour, which is very finely milled and clump-prone, sifting is even more critical. Measure the flour by weight, not volume — 150 g of sifted flour is considerably more volume than 150 g of packed flour, so a cup measurement can be off by 20% or more.
Step 2 — Bring the Liquid to a Boil (3–4 minutes)
In a medium heavy-bottomed saucepan, combine 125 ml (½ cup) water, 125 ml (½ cup) whole milk, 100 g (7 tbsp) unsalted butter (cut into small cubes), ¼ teaspoon fine sea salt, and 1 teaspoon granulated sugar.
Place the saucepan over medium heat. Stir occasionally with a wooden spoon to help the butter melt evenly and prevent the milk solids from scorching on the bottom. Bring the mixture to a full, rolling boil — the surface should be actively bubbling, and the butter should be completely melted.
The liquid must reach a full boil before the flour is added. If it is merely simmering or just below the boil, the flour will not gelatinize properly, and the resulting paste will be slack, greasy, and unable to puff. You should see large, active bubbles breaking the surface — this is the signal. The heavy bottom of the saucepan is important: it distributes heat evenly and prevents hot spots that could scorch the milk solids. Do not walk away at this stage — from the moment the liquid comes to a boil, the process moves quickly.
Step 3 — Add the Flour and Cook the Panada (2–3 minutes)
Reduce the heat to low. Add the sifted flour all at once, dumping it directly into the center of the simmering liquid.
Immediately begin stirring vigorously with a wooden spoon or heat-resistant silicone spatula. Stir in a figure-eight motion, scraping the bottom and sides of the pan continuously. The mixture will look lumpy and shaggy at first — then, quite suddenly, it will come together into a smooth, cohesive dough ball that pulls away from the sides of the pan. This transformation typically takes 1–2 minutes of vigorous stirring.
Continue stirring for an additional 1 minute after the dough forms a ball. You should see a thin film of cooked starch forming on the bottom of the pan — this is the sign that the flour is fully cooked and the starch has been properly gelatinized. The dough should be smooth, glossy, and hold its shape when gathered.
This step — cooking the panada — is the most critical in choux pastry. The flour must be cooked until the starch granules absorb the liquid and swell (gelatinize). Properly gelatinized starch can hold many times its weight in water, which is what allows the choux to puff so dramatically in the oven. If the panada is undercooked, the paste will not hold enough moisture and the baked shells will deflate or fail to puff. If it is overcooked, the fat can separate and the dough will become greasy. The thin film on the pan bottom (called the pelicola in Italian) is your visual cue — it should be a pale, papery layer, not brown or burnt. Stirring vigorously and continuously is essential: you are simultaneously cooking the flour and developing the starch gel. Stirring also ensures even heat distribution and prevents scorching. The wooden spoon is traditional and effective — it is sturdy enough for the vigorous stirring and won't scratch your pan.
Step 4 — Cool the Panada (3–5 minutes)
Remove the saucepan from the heat. Transfer the panada to a large mixing bowl (this helps it cool faster than leaving it in the hot pan). Spread it out slightly with a spatula to increase the surface area.
Let the panada cool for 3–5 minutes, stirring occasionally to release heat. It should be warm but not hot — about 55–65°C (130–150°F). You should be able to hold your hand comfortably against the side of the bowl.
This cooling step is essential: if the panada is too hot when you add the eggs, the eggs will begin to cook, turning the paste into sweet scrambled eggs and ruining the texture. If it is too cool, the paste will be stiff and difficult to pipe — and the fat may begin to solidify, making it hard to incorporate the eggs smoothly. The ideal temperature is warm enough to keep the paste pliable but not so hot that it cooks the eggs. If you don't have a thermometer, test by touching a small amount of the panada to your lower lip — it should feel comfortably warm, not hot. The panada will cool faster in a metal bowl than a ceramic one. Spread it thin for faster cooling.
Step 5 — Beat the Eggs (1 minute)
In a small bowl, lightly beat the 4 large eggs with a fork or whisk until the whites and yolks are just combined. Do not overbeat — you want them homogeneous, not frothy.
Lightly beating the eggs before adding them ensures they incorporate more evenly into the panada. If you add whole eggs one at a time without beating, you risk getting streaks of egg white that don't emulsify properly. However, do not overbeat — you don't want to incorporate air bubbles at this stage. A few quick strokes with a fork are sufficient. The eggs must be at room temperature — cold eggs will stiffen the panada and make incorporation difficult, and they can cause the paste to separate. If your eggs are refrigerator-cold, place them in a bowl of warm water for 5–10 minutes before starting.
Step 6 — Add the Eggs One at a Time (5–7 minutes)
Add the beaten eggs to the cooled panada one at a time, mixing thoroughly after each addition. Use a wooden spoon or spatula, and stir with determination — the paste will be stiff after the first egg, then gradually loosen and become silky as each subsequent egg is incorporated.
For each egg: Pour about ¼ of the beaten egg mixture into the panada. Stir vigorously in circular motions, pressing the paste against the sides of the bowl to work in the egg. The paste will first appear to separate and become lumpy — this is normal. Keep stirring, and it will come back together into a smooth, unified mass. This typically takes 45–60 seconds per egg.
After all 4 eggs are incorporated, check the consistency: the paste should be smooth, glossy, and thick enough to hold its shape when lifted on a spoon but soft enough to slowly fall from the spoon in a single, continuous ribbon (this is the ruban test). When you touch a small amount with your fingertip and pull away, a gentle peak should form and then droop slightly.
If the paste is too stiff (it holds its shape firmly without drooping, and it's difficult to pipe): beat the remaining egg (or 1 yolk) lightly and add it 1 tablespoon at a time, stirring thoroughly after each addition, until the correct consistency is reached. You may need only 1–2 tablespoons.
If the paste is too thin (it flows freely off the spoon and doesn't hold any shape): beat an additional egg yolk (not whole egg — the white would make it too thin) and stir it in, or simply let the paste rest for 5 minutes — the starch will continue to absorb moisture and thicken slightly.
This is the moment where choux pastry becomes a matter of feel rather than exact measurement. The number of eggs you need depends on: (1) the exact size of your eggs (large eggs vary from 50 g to 60 g each); (2) how thoroughly you cooked the panada (more cooking = more moisture driven off = more egg needed); (3) the humidity of the day (on humid days, the flour absorbs more moisture from the air, so you may need less egg). The visual and tactile cues are more reliable than the egg count. The paste should be glossy like mayonnaise and smooth as satin. When you lift a spoonful, it should fall back into the bowl in a thick, continuous ribbon that folds over itself and slowly disappears back into the mass. If it falls in a single blob that holds its shape, it's too stiff. If it runs like batter, it's too thin. Trust the ribbon, not the recipe.
Step 7 — Pipe the Choux (5–10 minutes)
Preheat the oven to 200°C (400°F) with the rack in the middle position. Line a rimmed baking sheet with parchment paper. (If you have limited baking sheets, the parchment can be reused for a second batch.)
Transfer the choux paste to a piping bag fitted with a plain round tip:
- For cream puffs/profiteroles: use a ½-inch (12 mm) tip. Pipe 1-inch (2.5 cm) diameter mounds, spaced 2 inches (5 cm) apart.
- For éclairs: use a ⅝-inch (16 mm) tip. Pipe 4-inch (10 cm) long logs, spaced 2 inches (5 cm) apart.
- For Paris-Brest: use a ½-inch (12 mm) tip. Pipe a ring about 6 inches (15 cm) in diameter.
To pipe: Hold the piping bag at a 45-degree angle, tip touching the parchment. Squeeze steadily from the top of the bag (not the tip), letting the paste flow onto the parchment. For mounds: stop squeezing, then lift and twist the bag away in a quick flick to minimize the peak. For éclairs: pipe in one continuous motion, maintaining even pressure; release pressure just before the end and pull the tip away cleanly. For rings: pipe a complete circle, overlapping the start by about ½ inch (1 cm).
Smooth any peaks or points by dipping a fingertip in cold water and gently pressing down on the tip of each piped shape. (Some bakers prefer to leave the peaks — they will brown more quickly and add texture. Either approach is valid.)
Optional egg wash: Beat 1 egg with a splash of water and a pinch of salt. Gently brush a thin layer over each piped shape, being careful not to drip onto the parchment (which can cause sticking). Egg wash produces a darker, glossier finish and helps any toppings (sliced almonds, pearl sugar, grated cheese) adhere.
Piping technique matters: keep the pressure steady and the motion continuous. Stop squeezing before you lift the bag to avoid a trailing thread of paste. The piped shapes should be uniform in size for even baking. Space them generously — choux expands to nearly double its piped size, and touching puffs will tear when baked. A wet fingertip is the best tool for smoothing peaks: the moisture creates a thin steam barrier that helps the pastry rise evenly at the peak. If you don't have a piping bag, you can use two spoons: scoop a heaping teaspoon of paste, then use a second spoon to push it onto the baking sheet. The shapes will be less uniform but equally delicious.
Step 8 — Bake the Choux (25–30 minutes, plus drying time)
Place the baking sheet in the preheated oven and bake at 200°C (400°F) for 15 minutes. Do not open the oven door during this time — the sudden rush of cold air will cause the choux to collapse.
After 15 minutes, reduce the oven temperature to 180°C (350°F) and continue baking for 10–15 minutes, depending on size:
- Small puffs (1 inch / 2.5 cm): 10 minutes at 180°C (350°F) — total 25 minutes
- Medium éclairs (4 inches / 10 cm): 12 minutes at 180°C (350°F) — total 27 minutes
- Large rings (6 inches / 15 cm): 15 minutes at 180°C (350°F) — total 30 minutes
The choux are done when they are puffed, deep golden brown, and feel light for their size. They should sound hollow when tapped on the bottom with a fingernail.
To dry the choux: Turn off the oven, crack the oven door open (use a wooden spoon handle to prop it open), and leave the choux in the cooling oven for 5–10 minutes. This allows the interior steam to escape and the shells to become crisp and dry.
Remove the baking sheet from the oven. Transfer the choux to a wire cooling rack to cool completely before filling.
The two-temperature baking method is the key to properly puffed choux. The initial high heat (200°C / 400°F) creates a burst of steam that inflates the pastry rapidly — the shell sets quickly, locking in the expanded shape. The lower second temperature (180°C / 350°F) finishes cooking the interior and develops the deep golden-brown color without burning the exterior. The critical rule: never open the oven in the first 15 minutes. The choux are essentially a balloon of steam held in a thin starch-and-egg shell; a draft of cold air will cause the steam to condense and the balloon to deflate. Some bakers dust the piped shapes with a light shower of water droplets from their fingertips or a spray bottle before baking — the extra moisture creates more steam and produces a more dramatic puff. The drying step in the turned-off oven is essential for crisp shells; without it, the interior moisture will soften the pastry as it cools, resulting in a dense, chewy texture rather than a light, crisp one. If you skip the drying step, you can — in a pinch — poke a small hole in the bottom of each shell immediately after removing from the oven to let steam escape, then cool on a wire rack. But the oven-drying method is superior.
🧑🍳 Chef's Tips
- Weigh your ingredients. Choux is a science project — the ratios matter. Use a digital scale for the flour, liquid, butter, and eggs. Volume measurements are too imprecise, especially for flour (the difference between sifted and packed flour can be 30 g or more, which would ruin the paste).
- The panada must be fully cooked. Do not stop stirring as soon as the dough forms a ball. Continue stirring for a full minute after it pulls away from the sides. The flour must be properly gelatinized to hold the moisture that creates steam in the oven.
- Cool the panada before adding eggs. Hot panada cooks the eggs; cold panada won't incorporate them properly. The sweet spot is 55–65°C (130–150°F) — warm but not hot. If you're in a hurry, spread the panada thinly on a plate to cool in 2 minutes.
- Add eggs one at a time and mix thoroughly between each. The paste will look like it's breaking after the first egg — this is normal. Keep stirring firmly and it will come back together. Each egg must be fully incorporated before the next one goes in.
- Test the consistency. The ruban test (the paste falls from the spoon in a continuous ribbon) is more reliable than the egg count. Learn to recognize the correct consistency by feel — it should be glossy, smooth, and just stiff enough to hold a soft peak on your fingertip.
- Pipe immediately after mixing. Choux paste should be piped and baked as soon as it's made. If it sits, the starch continues to absorb moisture and the paste thickens, becoming difficult to pipe and producing denser, less puffed results. However, unbaked piped choux can be frozen (see Storage).
- Don't open the oven door for the first 15 minutes. Write this on your hand if you have to. The single most common choux failure is a deflated pastry caused by a draft of cold air. Trust the process — don't peek.
- Egg wash with care. Brush gently to avoid deflating the piped shapes. A light touch is all that's needed. If the egg wash drips onto the parchment, it can cause the choux to stick — use a pastry brush, not a basting brush.
- Drying is not optional. The 5–10 minute rest in the turned-off oven (door cracked) is what gives choux its signature crispness. Without it, the shells will be soft and chewy. For extra-crisp shells, leave them in the turned-off oven with the door open for up to 15 minutes.
- Fill just before serving. Filled choux become soggy within 1–2 hours. The shells can be baked days in advance (stored in an airtight container), but fill them no more than 2 hours before serving. For profiteroles, assemble just before serving.
- Save the tops. When splitting éclairs or cream puffs for filling, slice off the top third with a serrated knife — the top becomes a lid that keeps the filling contained. Don't discard the little "hats."
- Rethink your piping tip. A plain round tip produces the cleanest, most uniform shapes. Star tips (St. Honoré tips) create ridges that brown more and can trap filling. Reserve star tips for decorative elements like Paris-Brest.
- A baking stone helps. If you have a pizza stone or baking steel, place it on the lowest rack of the oven and preheat it with the oven. The radiant heat from the stone helps stabilize the oven temperature when you open the door to load the choux, and provides a secondary heat source that promotes more dramatic puffing.
❌ Common Mistakes
| Mistake | Why It Hurts | The Fix |
|---|---|---|
| Panada is undercooked | Starch not gelatinized → insufficient moisture retention → choux won't puff or deflate after baking | Continue stirring for 1 full minute after the dough forms a ball. Look for the thin film on the pan bottom |
| Panada is overcooked | Too much moisture driven off → paste is stiff and dry → requires too many eggs → greasy, heavy result | Remove from heat as soon as the film forms on the pan bottom; the film should be pale, not brown |
| Eggs added when panada is too hot | Eggs begin to cook → paste becomes lumpy and scrambled → won't pipe smoothly or puff | Cool panada to 55–65°C (130–150°F) before adding eggs. Test with your lip if no thermometer |
| Eggs added when panada is too cold | Fat solidifies → paste is stiff and difficult to incorporate → uneven texture | Let panada cool only 3–5 minutes; if you've waited too long, warm the bowl briefly over a pan of hot water |
| All eggs added at once | Impossible to incorporate evenly → greasy, separated paste | Add eggs one at a time, mixing thoroughly after each. Be patient — each takes 45–60 seconds |
| Paste is too stiff | Choux don't puff as much → dense, heavy interior | After 4 eggs, check the ribbon. Add beaten egg 1 tablespoon at a time until the correct consistency |
| Paste is too thin | Choux spread instead of puffing → flat, misshapen shells with thin walls | Add an extra egg yolk (not whole egg) to thicken, or let the paste rest 5 minutes for the starch to absorb moisture |
| Oven door opened too early | Cold air causes steam to condense → choux collapse from the sudden temperature drop | Do not open the oven for the first 15 minutes. No exceptions. Set a timer and don't peek |
| Oven temperature is too low | Steam forms too slowly → choux don't puff fully → dense, flat result | Preheat thoroughly to 200°C (400°F). Use an oven thermometer — many ovens run 15–25°C (25–50°F) cooler than their dial |
| Oven temperature is too high | Exterior browns before interior is cooked → burnt outside, raw inside | Follow the two-temperature method: 200°C (400°F) for 15 min, then 180°C (350°F) for 10–15 min |
| Choux not dried after baking | Interior steam condenses as shells cool → soft, chewy, deflated texture | Leave choux in turned-off oven (door cracked) for 5–10 minutes to dry. This is non-negotiable for crisp shells |
| Choux filled too early | Filling soaks into warm shells → soggy, collapsed pastry | Cool choux completely on a wire rack before filling. For best texture, fill within 2 hours of serving |
| Piped shapes too close together | Choux expand and touch → misshapen, torn shells | Space piped shapes 2 inches (5 cm) apart. Account for doubling in size |
| Using stale or low-protein flour | Weaker starch structure → less puff and less structural integrity | Use fresh all-purpose or tipo "00" flour. Bread flour can work but produces a tougher, less tender shell |
💡 Variations
| Variation | How To |
|---|
❄️ Storage & Make-Ahead
| Method | Details |
|---|---|
| Unbaked choux paste (refrigerator) | Choux paste does not refrigerate well — the starch continues to absorb moisture and the paste thickens, becoming difficult to pipe and producing denser results. If you must, press plastic wrap directly onto the surface, refrigerate for up to 24 hours, and let it come to room temperature before piping — but expect slightly less puff. |
| Unbaked, piped choux (freezer) | This is the best make-ahead method. Pipe the choux shapes onto a parchment-lined baking sheet. Freeze until solid (about 2 hours), then transfer to a zipper-lock bag or airtight container. Freeze for up to 1 month. Bake directly from frozen — do not thaw. Add 3–5 minutes to the bake time, and keep the oven at 200°C (400°F) for the full bake (no temperature reduction needed, as the frozen center needs the extra time). |
| Baked, unfilled choux shells (room temperature) | Cool completely after the oven-drying step. Store in an airtight container at room temperature for up to 2 days. Do not refrigerate — moisture will soften the shells. If they soften, re-crisp in a 180°C (350°F) oven for 3–5 minutes before filling. |
| Baked, unfilled choux shells (freezer) | Cool completely, then freeze in a single layer on a baking sheet. Transfer to a zipper-lock bag. Freeze for up to 3 months. Re-crisp directly from frozen in a 180°C (350°F) oven for 5–7 minutes before filling. |
| Filled choux (refrigerator) | Filled choux are best enjoyed within 2 hours of filling. If you must refrigerate, place in a single layer in an airtight container and refrigerate for up to 4 hours. The shells will soften but will still be enjoyable. For profiteroles, assemble no more than 1 hour before serving — the filling (especially ice cream) will soften the shells. |
| Make-ahead tip: freeze piped, not baked | The single best way to have fresh choux on demand is to pipe and freeze the unbaked shapes. Then bake as needed — 30 minutes from freezer to golden, crisp shells. This is the technique used by professional pastry shops to manage their éclair and cream puff production. |
| Make-ahead tip: dry and store properly | After baking and oven-drying, let the shells cool completely on a wire rack. Any residual warmth will create condensation in the storage container. Once completely cool, transfer to an airtight container with a silica gel packet (food-grade) to absorb excess moisture. Stored this way, shells stay crisp for up to 4 days at room temperature. |
🍷 Wine Pairing
| Wine | Why |
|---|---|
| Moscato d'Asti (Piedmont) | Sweet, lightly sparkling, and low in alcohol — the peachy, floral sweetness is a natural match for cream-filled choux (vanilla éclairs, cream puffs with whipped cream). The gentle bubbles cut through the richness of the pastry cream. |
| Prosecco Superiore di Valdobbiadene (Veneto) | Lively, floral, and gently fruity — the crisp effervescence and steely acidity cut through the butter and egg richness of choux like a palate-cleansing sigh. Perfect with both sweet and savory choux creations. |
| Franciacorta Brut (Lombardy) | Italy's answer to Champagne — fine bubbles, high acidity, and a toasty, nutty note that mirrors the browned butter notes in well-baked choux. A celebratory pairing for any choux-based dessert. |
| Brachetto d'Acqui (Piedmont) | A sweet, lightly sparkling red with aromas of strawberries and rose petals. The berry notes complement fruit-filled choux (raspberry, strawberry, cherry cream puffs) while the sweetness balances the egg-rich pastry. |
| Vin Santo del Chianti (Tuscany) | A rich, sweet dessert wine with notes of honeyed apricot, almond, and dried figs — a classic Italian pairing for any filled pastry. The nutty, oxidative character echoes the caramelized notes of the choux shell. Drizzle a little over vanilla ice cream-filled profiteroles for an extraordinary dessert. |
| Passito di Pantelleria (Sicily) | Intensely sweet and aromatic, with notes of dried apricot, orange blossom, and honey — a spectacular pairing for chocolate-filled choux, where the wine's sweetness and acidity balance the bittersweet chocolate. The Sicilian sun-drenched character adds a Mediterranean warmth. |
| Dry Oloroso Sherry (for savory choux / gougères) | Nutty, oxidative, and savory — the dry, umami-rich character of Oloroso pairs brilliantly with Gougères (Gruyère choux puffs) or Parmigiano-Black Pepper choux. The nuttiness echoes the browned cheese on the choux shells. |
| Bratto (from Franciacorta, for savory choux) | A dry, still red from Franciacorta made from the same grapes as Franciacorta — light, earthy, with bright acidity. Perfect with herb choux or mushroom-filled choux puff appetizers. |
🥗 Suggested Accompaniments
- Vanilla pastry cream (crema pasticcera) — The classic filling for choux. Rich, silky, and vanilla-scented, it's the soul of the French éclair and the Italian bignè. See Volume 1, recipe #106 (Éclair Cream and Chocolate) for a master recipe.
- Chocolate ganache or glaze — For topping éclairs or filling cream puffs. A simple 1:1 ratio of heavy cream to dark chocolate, melted together and cooled until thickened. The benchmark choux topping.
- Chantilly cream (lightly sweetened whipped cream) — The simplest and most elegant filling for cream puffs and profiteroles. Whip 250 ml (1 cup) heavy cream with 1 tablespoon powdered sugar and ½ teaspoon vanilla extract until soft peaks form.
- Ice cream — Fill profiteroles with vanilla, chocolate, or hazelnut gelato and drizzle with warm chocolate sauce for profiteroles al gelato — a legendary Italian dessert. Assemble just before serving and serve immediately.
- Zabaglione (zabaione) — A warm, foamy Italian custard made with egg yolks, sugar, and Marsala wine. Serve as a dipping sauce for unfilled cream puffs — a sublime winter dessert.
- Fresh berries and a dusting of powdered sugar — The simplest and most beautiful way to dress up any filled choux creation. The bright acidity of raspberries or sliced strawberries balances the richness of the pastry.
- Warm caramel or butterscotch sauce — Drizzle over vanilla cream-filled choux for an indulgent profiteroles au caramel — a Parisian bistro classic. The bitter-sweetness of caramel is the perfect counterpoint to the neutral, eggy choux.
- Honey or aged balsamic glaze — A drizzle over savory choux (Parmigiano-Black Pepper or Herb Choux) adds a sweet-savory complexity that echoes the caramelized notes of the baked shell.
- Thinly sliced prosciutto or Speck (for savory choux) — Wrap warm gougères in a slice of cured ham for an elegant, irresistible appetizer. The saltiness of the ham and the cheese in the choux is a match made in heaven.
- Good-quality fruit preserves — Apricot, raspberry, or fig jam, warmed and brushed over the choux before serving, adds both flavor and a beautiful glossy finish. Classical French choux à la crème are often finished with a glaze of warm apricot jam.
- A pot of strong espresso or caffè latte — The bitter, roasty notes of coffee are the perfect counterpart to the sweet, eggy richness of filled choux. The classic Italian colazione (breakfast) or merenda (afternoon snack).
📊 Nutrition (per ⅙ of unbaked paste — approximately 85 g)
| Calories | Protein | Fat | Carbs | Fiber | Sugar |
|---|---|---|---|---|---|
| ~210 | 7 g | 14 g | 16 g | 0.5 g | 1.5 g |
Nutritional values are estimates for the unbaked choux paste (⅙ of the full ~500 g recipe, approximately 85 g per serving). The majority of calories come from butter (about 100 calories from fat per serving) and eggs (about 35 calories from protein and fat per serving). This is a moderately high-fat, moderate-calorie preparation — the indulgence comes primarily from the butter and eggs. Each serving contains approximately 14 g of fat (8 g saturated) and 115 mg of cholesterol (from the egg yolks). The full recipe (6 servings) contains approximately 1,260 calories and 84 g of fat. Note that once the choux are filled, the nutritional profile changes dramatically: a vanilla pastry cream-filled éclair adds approximately 150 calories and 8 g of fat; a chocolate ganache-filled cream puff adds approximately 200 calories and 12 g of fat; a profiterole filled with vanilla gelato and drizzled with chocolate sauce adds approximately 250–300 calories. Savory choux like gougères with Gruyère cheese add approximately 50 calories per serving from the cheese. Choux pastry is naturally low in sugar (just 1–1.5 g per serving from the 1 teaspoon in the paste) — the sweetness comes entirely from the filling and topping. For a slightly lighter version, replace 50 g of the butter with 50 ml additional milk — the resulting paste will be slightly less rich and will puff marginally less, but the difference is subtle. The all-water version (no milk) reduces calories by approximately 15 per serving. Nutritional values for gluten-free choux are nearly identical, as the gluten-free flour blend has a similar caloric profile. Choux is best enjoyed as a special-occasion treat — a celebration of technique that transforms humble ingredients into something genuinely magical.
❓ Frequently Asked Questions
What is choux pastry, and how is it different from other pastries?
Choux pastry (pâte à choux) is a steam-leavened pastry — it relies on the moisture inside the dough turning to steam in the hot oven to create its signature hollow, puffed structure. Unlike puff pastry (which rises through hundreds of butter layers), brioche (which rises through yeast), or sponge cake (which rises through beaten eggs and chemical leaveners), choux has no built-in leavening agent. Its rise comes entirely from the physics of water turning to steam and the structural strength of gelatinized starch and egg protein. This makes it unique: it is simultaneously the simplest pastry (four basic ingredients) and the most technically demanding (success depends on precise execution of a few critical steps).
Why is it called "choux" pastry?
The name comes from the French word for "cabbage" (chou). When baked, small puffs of choux pastry resemble tiny cabbages — round, green-tinged (when baked with a hint of sugar), with a slightly irregular surface that mirrors cabbage leaves. The plural choux (pronounced "shoo") is used for both the pastry and the individual puffs. In Italian, the name pasta a choux is a direct borrowing from the French, reflecting the French origin of the technique, though Italian bakers also call them bignè (cream puffs).
Can I make choux pastry without a piping bag?
Absolutely. Use two spoons: scoop a heaping teaspoon (or tablespoon for larger puffs) of the paste, then use a second spoon to push it onto the parchment-lined baking sheet. The shapes will be less uniform than piped ones — more rustic and irregular — but they will bake just as well and taste identical. For éclairs, you can also spread the paste into rough logs using an offset spatula. For a more elegant free-form approach, use a zipper-lock bag with a corner snipped off as an impromptu piping bag.
Why did my choux pastry collapse after baking?
This is the most common choux failure. Several possible causes: (1) the oven door was opened too early (first 15 minutes) — the cold air caused the steam to condense and the structure to collapse; (2) the choux were underbaked — the shells hadn't set enough to hold their shape when removed from the oven; (3) the panada was undercooked — the starch hadn't gelatinized enough to hold the moisture; (4) the paste was too thin (too much egg) — the walls couldn't support the structure; (5) the oven temperature was too low — the steam formed too slowly and the shells didn't set before the moisture escaped. For troubleshooting: make sure your oven is fully preheated, use an oven thermometer, do not open the door for the first 15 minutes, and bake until deep golden brown.
Why are my choux puffs dense and heavy instead of light and hollow?
Dense, heavy choux usually mean one of the following: (1) the panada was not cooked enough — undercooked starch can't hold enough moisture to create adequate steam; (2) too little egg — the paste was too stiff and didn't contain enough moisture; (3) the oven temperature was too low — the steam formed too slowly and the choux didn't puff before the structure set; (4) the choux were baked on a humid day — the flour absorbed extra moisture from the air, making the paste heavier. To fix: cook the panada until the film forms on the bottom, test the paste consistency carefully (it should fall in a thick ribbon), and preheat the oven fully.
Why did my choux spread into flat pancakes instead of puffing into round puffs?
Flat, pancake-like choux are the result of a paste that is too thin (too much egg or too much liquid in the panada). The excess moisture causes the paste to spread before the heat can set the structure. To fix: add eggs cautiously, checking the consistency after each one. If the paste becomes too thin, beat an extra egg yolk and stir it in — the yolk's lecithin and protein will help thicken and stabilize the paste. Also ensure the panada was properly cooked — an undercooked panada can't hold enough moisture to give the paste structure.
Why are my choux greasy?
A greasy result means the fat separated from the paste during baking. This happens when: (1) the panada was overcooked — too much moisture was driven off, and the fat separated from the starch; (2) the eggs were added when the panada was too hot — the eggs partially cooked and the emulsion broke; (3) too many eggs were added — the excess egg white didn't emulsify properly and the fat leaked out; (4) the paste was overmixed after adding the eggs — the gluten developed and squeezed out the fat. To fix: cook the panada just until the film forms (no longer), cool it before adding eggs, and add eggs one at a time with minimal but thorough mixing.
Can I make choux pastry ahead of time?
Yes, in several ways. The best make-ahead method is to pipe the shapes onto a parchment-lined baking sheet and freeze them unbaked. Once frozen solid, transfer to a zipper-lock bag and freeze for up to 1 month. Bake directly from frozen — no thawing needed — adding 3–5 minutes to the bake time. Baked, unfilled shells can be stored in an airtight container at room temperature for up to 2 days (re-crisp in the oven for 3 minutes before filling) or frozen for up to 3 months. Do not fill choux more than 2 hours before serving, as the filling will soften the shells.
Can I use bread flour instead of all-purpose flour?
Technically yes, but the result will be tougher and less tender. Bread flour has higher protein content (12–14% vs. 9–11% for all-purpose), which creates a stronger gluten network. In choux, a moderate amount of gluten is beneficial — it gives the shells structure to hold their shape — but bread flour produces too much gluten, resulting in shells that are chewy rather than tender-crisp. If you only have bread flour, reduce it to 130 g and sift it twice to cut some of the gluten strands. For the best result, use all-purpose flour or Italian tipo "00" flour (which has a protein content similar to all-purpose but a finer grind).
Can I use salted butter instead of unsalted?
Yes, but reduce or omit the added salt. Unsalted butter with your own salt gives the most consistent result. If using salted butter, use 100 g and add no additional salt. Note that salted butter contains slightly more water than unsalted (about 16% vs. 15%), which can marginally affect the paste consistency — but the difference is negligible.
How do I fill choux pastry?
For cream puffs and profiteroles: use a piping bag fitted with a small round tip (¼-inch / 6 mm) and insert the tip into the bottom of each puff, squeezing gently until you feel the puff swell slightly. Alternatively, slice off the top third horizontally with a serrated knife, fill the bottom with pastry cream or whipped cream using a spoon or piping bag, and replace the top as a lid. For éclairs: use a long, thin piping tip (or a Bismarck tip) and inject filling through one or both ends, or slice the éclair in half horizontally and fill like a sandwich. For the neatest results, use the injection method — it keeps the shell intact and looks more professional.
Can I deep-fry choux pastry?
Yes! Deep-fried choux is the basis for churros (Spain), zeppole (Italy), beignets (France), and sopaipillas (Latin America). Pipe or spoon the choux paste directly into hot oil (180°C / 350°F). The paste will puff dramatically within seconds and cook in 3–5 minutes. Drain on paper towels and coat with cinnamon sugar, powdered sugar, or fill with pastry cream. The dough must be slightly stiffer than oven-baked choux — add one less egg or let the paste rest for 10 minutes before frying. Deep-fried choux has a uniquely light, airy interior and a crisp, golden exterior that is quite different from baked choux.
Why is there a hole in the bottom of my cream puffs?
Some bakers intentionally prick a small hole in the bottom of each baked choux puff immediately after removing them from the oven. This allows trapped steam to escape, preventing the interior from becoming soggy and helping the shell stay crisp. It's also the traditional entry point for filling. If you don't see a hole, you can create one with the tip of a small knife or a skewer before filling.
🔗 Related Recipes
- Éclair Cream and Chocolate (#106) — The definitive choux-based recipe in this volume. Master the éclair and you've mastered choux. The recipe includes both the classic vanilla pastry cream (crème pâtissière) and a dark chocolate glaze.
- Choux Pastry with Pastry Cream (#106) — Full assembly instructions for the classic French chou à la crème — cream puffs filled with vanilla pastry cream and topped with a chocolate or caramel glaze.
- Zeppole di San Giuseppe (#189) — The classic Italian fried choux pastry, filled with sweetened ricotta or pastry cream and topped with a cherry and powdered sugar. The St. Joseph's Day tradition that shows the versatility of choux.
- Gougères — Cheese Choux Puffs (#155) — The savory side of choux pastry: Gruyère-laced puffs that are the quintessential French apéritif snack. A perfect demonstration of how the same base pastry can go sweet or savory.
- Profiteroles with Chocolate Sauce (#203) — The ultimate choux dessert: small cream puffs filled with vanilla gelato and drizzled with hot chocolate sauce. The simplest and most impressive choux preparation, perfect for entertaining.
- Paris-Brest (#221) — The spectacular wheel-shaped choux pastry filled with praline mousseline cream, created to commemorate the Paris-Brest bicycle race. The most impressive choux-based dessert in the repertoire.
- Basic Brioche Dough — Pan Brioche (#158) — The enriched yeast dough that represents the other major enriched pastry technique. Comparing brioche (yeast-leavened, tender) with choux (steam-leavened, hollow) illustrates two completely different approaches to achieving texture and lift.
- Puff Pastry Express (#307) — The laminated, non-yeasted counterpart to choux. Understanding both puff pastry (hundreds of butter layers → flaky) and choux (steam-leavened → hollow) covers the two foundational pastry techniques of Western baking.
- Plunder/Danish Pastry Dough (#320) — The yeasted, laminated dough that sits between puff pastry and brioche — a third distinct pastry technique that, together with choux, gives you a complete pastry toolkit.
- Cannoli Shells (#241) — Another fried pastry that creates a crisp, hollow shell for filling — similar in concept to choux but made with a wine-and-oil dough and shaped around metal tubes.
- Pasta Frolla — Basic Shortcrust (#124) — The sweet, tender Italian shortcrust pastry. The opposite of choux in every way (short, dense, crumbly vs. light, hollow, crisp), but equally foundational.
🏷️ Search Tags
📸 Photo Reference
Photo reference: `vol1_322.png` — A bright, overhead shot on a clean marble countertop. In the center, a piping bag fitted with a ½-inch (12 mm) plain round tip rests on a folded kitchen towel, a small bead of choux paste at the tip catching the light. Beside it, a baking sheet lined with parchment paper bears a row of perfectly piped éclairs — each 4 inches (10 cm) long, uniform in size, their surfaces smooth and glossy from a delicate egg wash, each one finished with a tiny cross-hatch pattern scored with the tines of a fork (a traditional baker's mark). Next to the piped éclairs, a small bowl of the finished choux paste sits with a wooden spoon standing in it — the paste is glossy, smooth, and forms a thick ribbon as it folds over itself. In the background, the finished baked goods: a single éclair, split horizontally, reveals a perfectly hollow interior with thin, golden walls and a generous filling of vanilla pastry cream studded with tiny vanilla bean specks; beside it, a cream puff has been sliced in half to show the same hollow structure, filled with Chantilly cream and topped with a single fresh raspberry. A shallow bowl of chocolate ganache sits nearby for dipping. A small kitchen scale shows the raw ingredients: a block of butter, a pile of sifted flour, four eggs in a small ceramic bowl, a glass measuring cup with water and milk. A metal saucepan with a wooden spoon resting across it hints at the panada stage. The lighting is cool and diffused — indirect daylight from a large window, casting soft, even light that emphasizes the glossy sheen of the piped paste and the golden-brown color of the baked shells. The mood is calm, precise, and quietly scientific — the image of a baker who understands that in choux pastry, every detail from the temperature of the panada to the angle of the piping bag has been considered and controlled.
Recipe from "The Italian Kitchen" by Vita Milanese — Volume 1: Pasta Perfetto 🥟
Recipe from The Italian Kitchen by Vita Milanese — Volume 1 · Pasta Perfetto. Discover all volumes on the ebook page.