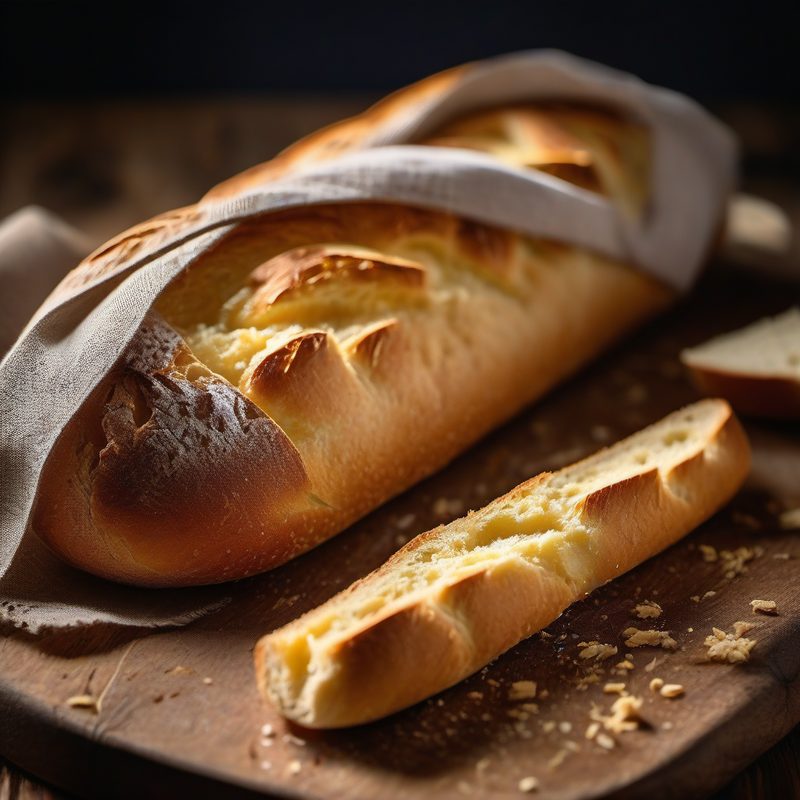
Classic Baguette
A crisp, golden baguette with a crackling crust, a tender, irregular crumb, and that unmistakable wheat-and-yeast aroma — made with just flour, water, salt, and yeast, and a technique that transforms four humble ingredients into one of the world's great breads, from mixing bowl to cooling rack in under four hours.
| Amount | Ingredient |
|---|---|
| 500 g (3⅓ cups) | Bread flour (12–13% protein), plus more for dusting |
| 350 ml (1½ cups) | Warm water (about 38°C / 100°F) |
| 10 g (1½ tsp) | Fine sea salt |
| 5 g (1⅓ tsp) | Active dry yeast (or 15 g fresh yeast, crumbled) |
| As needed | Semolina flour or rice flour (for dusting the couche/linen) |
The baguette — that iconic, yard-long loaf of French bread — is simultaneously the simplest and most demanding bread in the baker's repertoire. Four ingredients, a few hours, and a technique that rewards patience, practice, and a willingness to listen to the dough. The classic French baguette is defined by its crust: thin, shattering, deeply caramelized, and audibly crisp. The interior crumb should be open and irregular — not as dramatically holey as ciabatta, but with a visible network of small to medium air pockets that give the bread a light, airy chew. The flavor is clean and wheaten with a gentle tang from fermentation, a subtle sweetness from the caramelized crust, and a faint nuttiness from the Maillard reaction during baking.
This recipe follows the traditional baguette de tradition française method — the legally protected standard that defines what can be called a baguette in France: no additives, no preservatives, no dough conditioners, no frozen dough. Just flour, water, salt, and yeast (or levain). The method here uses active dry yeast for convenience, but the technique — a long, slow first fermentation, gentle shaping, a final proof, and steam-assisted high-heat baking — is the same one used by Parisian boulangers who have been making baguettes since the 1920s. The keys to success: develop the gluten fully, handle the dough gently during shaping to preserve the gas, score decisively, and generate sufficient steam in the oven to keep the crust elastic during the initial oven spring.
> Active time is about 20 minutes of hands-on work — the rest is fermentation, proofing, and baking. The schedule is flexible: you can extend the first rise in the refrigerator for up to 24 hours for deeper flavor, or shorten it slightly if you're pressed for time. A digital scale is strongly recommended — bread baking is a ratio-based craft, and weight measurements are far more reliable than volume.
Use bread flour, not all-purpose. The higher protein content (12–13%) builds the strong gluten network needed to trap the gas that creates the open crumb and supports the baguette's long, slender shape. All-purpose flour (9–11% protein) produces a flatter, denser loaf with a softer crust. If you can find it, French Type 55 flour (farine de tradition française) is the ideal choice — it's a medium-protein flour specifically milled for baguettes. The water should be warm — about 38°C (100°F) — to activate the yeast effectively. If your tap water is heavily chlorinated, let it sit out for 30 minutes or use filtered water; chlorine can inhibit yeast activity. Use fine sea salt, not table salt (which often contains anti-caking agents) and not coarse kosher salt (which dissolves too slowly at bread-hydration percentages). For the yeast, active dry is reliable and widely available; fresh (compressed) yeast gives a slightly more aromatic fermentation and dissolves instantly but must be refrigerated and used within a week of purchase. The semolina or rice flour for dusting is non-negotiable: it acts as ball bearings under the dough, preventing the baguettes from sticking to the proofing cloth without being absorbed into the crust.
🥘 Equipment
- Digital kitchen scale (accurate to 1 g)
- Large mixing bowl (3–4 qt / 3–4 L minimum)
- Wooden spoon or dough scraper
- Plastic wrap or a large reusable shower cap (for covering the bowl during fermentation)
- Clean work surface (wood, marble, or stainless steel — wood is traditional and ideal)
- Bench scraper or dough scraper (metal is best; plastic works)
- Couche (proofing linen) or a clean, lint-free kitchen towel — at least 60 cm (24 inches) long
- Baking sheet or peel (for transferring baguettes to the oven)
- Parchment paper (optional, for easier transfer)
- Lame or very sharp razor blade (for scoring — a serrated knife will tear the dough)
- Baking stone or baking steel (strongly recommended for even heat distribution and crust development)
- Spray bottle (for generating steam)
- Cast iron skillet or shallow metal pan (for creating steam — placed on the bottom oven rack)
- Oven mitts or heavy kitchen towels
- Wire cooling rack
- Instant-read thermometer (optional but helpful for checking internal temperature)
- Pastry brush (for brushing off excess flour before baking)
📋 Preparation
Step 1 — Bloom the Yeast and Mix the Dough (5 minutes)
Bloom the yeast: In a small bowl or liquid measuring cup, combine 5 g active dry yeast (or 15 g fresh yeast) with 100 ml of the warm water (from the 350 ml total). Stir gently to dissolve. Let stand for 5–10 minutes until the mixture becomes foamy and creamy on top. If it doesn't foam, your yeast may be dead — start over with fresh yeast.
Active dry yeast is dormant and needs to be rehydrated in warm water (38°C / 100°F) to wake up. The foaming action (called blooming) confirms the yeast is alive and active. If using instant dry yeast (also called rapid-rise or bread machine yeast), you can skip the blooming step and add it directly to the flour — but active dry produces a more flavorful result in this recipe. Fresh yeast should crumble into the water and dissolve with a gentle stir; it will not foam as dramatically but should show small bubbles within 5 minutes.
Mix the dry ingredients: In a large mixing bowl, combine 500 g bread flour and 10 g fine sea salt. Whisk or stir with your fingers to distribute the salt evenly throughout the flour.
Salt is not just for flavor — it strengthens the gluten structure and controls yeast activity, preventing the dough from over-fermenting and collapsing. Mixing the salt into the flour ensures even distribution and prevents direct contact between the salt and the yeast, which can kill the yeast if they touch for too long.
Form the dough: Add the bloomed yeast mixture and the remaining 250 ml warm water to the flour mixture. Stir with a wooden spoon or your hand (use a dough scraper if sticky) until all the flour is hydrated and a shaggy, rough dough forms. It will look lumpy, sticky, and far from smooth — this is correct. The dough should be quite wet and sticky, which is what gives a baguette its open crumb.
The hydration of this dough is 70% (350 g water ÷ 500 g flour = 0.70, or 70%). This is a moderately wet dough — stickier than sandwich bread dough but drier than ciabatta. A wetter dough produces a more open crumb and a lighter texture, but it's also harder to handle. If you're new to baguette-making, you can reduce the water to 325 ml (65% hydration) for a more manageable dough, though the crumb will be tighter. The shaggy mass will come together during kneading.
Step 2 — Knead the Dough: The Slap-and-Fold Method (10 minutes)
Turn the shaggy dough out onto a lightly floured work surface. Set a timer for 10 minutes and begin kneading using the slap-and-fold (also called fraisage or French knead) method:
- Lift the dough with both hands and slap it down on the work surface with a decisive motion — the leading edge should slap against the surface.
- Fold the far edge of the dough over toward you, covering the spot that just slapped down.
- Push the folded dough away from you with the heel of your palm, stretching it slightly.
- Give the dough a quarter turn and repeat.
Continue this rhythmic motion — slap, fold, push, turn — for the full 10 minutes. The dough will transform from a sticky, shaggy mess into a smooth, elastic, cohesive ball that springs back when poked.
Signs the dough is properly kneaded:
- The windowpane test: Pinch off a small piece of dough and stretch it gently between your fingers. If it stretches into a thin, translucent membrane without tearing, the gluten is fully developed.
- Poke test: Gently press a finger into the dough. It should spring back about halfway, leaving a slight indentation.
- Surface feel: The dough is smooth, supple, and slightly tacky but not sticky. It holds its shape when gathered into a ball.
The slap-and-fold method is the most efficient way to develop gluten in high-hydration doughs. The slapping motion aligns the gluten strands while the folding incorporates air. If your dough is sticking aggressively to the surface, use a bench scraper to gather it up — resist the urge to add more flour, as this will tighten the crumb. A very light dusting on the work surface is fine; handfuls of flour will ruin the hydration balance. If you prefer to use a stand mixer: combine all ingredients in the bowl of a stand mixer fitted with the dough hook. Mix on low speed for 2 minutes (until combined), then on medium speed for 8–10 minutes. The dough should clean the sides of the bowl and be smooth and elastic. Check the windowpane test to confirm.
Step 3 — First Fermentation (Bulk Rise): 1½ to 2 Hours
Shape the kneaded dough into a smooth ball by tucking the edges underneath. Place it in a clean, lightly oiled mixing bowl (use a few drops of olive or neutral oil — just enough to prevent sticking). Turn the dough ball once to coat it with oil, which prevents a skin from forming.
Cover the bowl tightly with plastic wrap or a reusable shower cap. Let the dough rise at room temperature (about 20–24°C / 68–75°F) for 1½ to 2 hours, until doubled in size. The exact time depends on your yeast, flour, and ambient temperature.
Check for doneness: The dough should be:
- Doubled in volume — not just slightly puffy
- Domed on top — the center should be higher than the edges
- Bubbly and elastic — when you gently shake the bowl, the dough should jiggle
- Holding gas — press a floured finger into the dough about 2 cm (¾ inch). If the indentation slowly springs back and doesn't completely fill, the dough is ready. If it springs back immediately, it needs more time. If the dough deflates completely or the indentation remains and doesn't spring back at all, it's over-fermented.
Optional cold fermentation for deeper flavor: After the first 1 hour at room temperature, cover the bowl tightly and refrigerate overnight (8–24 hours). Cold fermentation slows the yeast activity while enzymatic processes continue to break down starches into sugars, producing a more complex, nutty, and aromatic flavor. Next day, remove the dough from the refrigerator and let it sit at room temperature for 60–90 minutes before dividing and shaping.
The bulk rise is where the flavor develops. During this time, the yeast consumes sugars and produces carbon dioxide (which inflates the dough) and a host of aromatic compounds (ethanol, esters, organic acids) that give the bread its characteristic flavor. A longer, slower fermentation at a cooler temperature produces more complex flavor than a quick, warm rise. The dough should double in volume but not collapse — over-fermented dough loses its structure and will not hold the baguette shape during proofing and baking. If your kitchen is warm (above 26°C / 78°F), check the dough at 1 hour; it may be ready sooner. If it's cool (below 18°C / 64°F), allow up to 2½ hours.
Step 4 — Divide and Pre-Shape (5 minutes)
Turn the dough out onto a lightly floured work surface. Use a bench scraper to gently coax the dough from the bowl, trying to deflate it as little as possible.
Divide the dough into 3 equal pieces, each about 285 g (10 oz). A digital scale ensures uniformity, which means even baking. If you don't have a scale, divide the dough by eye, aiming for three roughly equal portions.
Pre-shape each piece: Gently flatten each piece into a rough rectangle about 15 × 10 cm (6 × 4 inches). Fold the top third down to the center, then the bottom third up over it (like folding a letter). Press the seam gently to seal. Using cupped hands, roll the piece against the work surface into a loose log about 15 cm (6 inches) long. Do not compress the dough — the goal is to create surface tension on the outside while preserving the gas bubbles inside.
Rest the pre-shaped logs: Place the pre-shaped logs seam-side down on a lightly floured surface, cover with a damp kitchen towel or plastic wrap, and let rest for 15–20 minutes. This relaxes the gluten so you can stretch the logs into baguettes without them snapping back.
The pre-shape stage is often skipped by home bakers, but it's critical for two reasons: (1) it creates a uniform internal structure, distributing the gas bubbles evenly throughout each piece; (2) it relaxes the gluten so the final shaping can stretch the dough to its full length without tearing. Skipping the pre-shape and rest leads to uneven baguettes that snap back and bake poorly.
Step 5 — Shape the Baguettes (10 minutes)
Prepare the couche: Lay a couche (proofing linen) or a clean, lint-free kitchen towel on a baking sheet or a wooden board. Dust it generously with semolina flour or rice flour — this prevents the shaped baguettes from sticking during the final proof.
Shape each baguette one at a time:
- Take one rested log and gently flatten it into a rectangle about 20 × 12 cm (8 × 5 inches), with the long side facing you. Degas it gently — press lightly with your fingertips to remove large air bubbles but leave the small ones intact.
- Fold the top long edge (the edge farthest from you) down to the center and press lightly to seal with the heel of your hand.
- Fold the bottom long edge (the edge nearest you) up to meet the center and press to seal.
- Fold the dough in half along the center seam, bringing the top edge to meet the bottom. Press the seam firmly with the heel of your hand to seal — you want a tight seam that won't open during proofing or baking.
- Roll the log back and forth under your palms, starting in the center and moving outward, to elongate it into a baguette shape about 35–40 cm (14–16 inches) long with slightly tapered ends. Apply gentle, even pressure — do not compress the dough. If the dough resists, let it rest for 5 minutes and try again.
Place on the couche: Transfer each shaped baguette to the floured couche, seam-side up, resting it in a fold of the linen so the folds support the sides and keep the baguettes from flattening. Space the folds about 8–10 cm (3–4 inches) apart — the baguettes will expand during proofing and should not touch.
Gentleness is the watchword during shaping. Every aggressive press deflates gas bubbles that you spent hours building. The goal is to create surface tension — a taut, smooth outer skin — while preserving an open, airy interior. The seam must be tight: a loose seam will burst open in the oven, turning your baguette into a misshapen split loaf. The tapered ends are traditional, but practice the even-cylinder shape first; tapered ends come with experience. If you don't have a couche, place the baguettes seam-side down on a parchment-lined baking sheet dusted with semolina. You'll lose some of the final proofing shape (they'll spread slightly), but the result is still excellent.
Step 6 — Final Proof (45 minutes)
Cover the shaped baguettes with the overhanging flaps of the couche or with a clean, damp kitchen towel. Let them proof at room temperature for 45 minutes.
Check for readiness: The baguettes should be puffy and noticeably increased in size — about 50% larger than when shaped. When gently poked with a floured finger, the dough should slowly spring back, leaving a slight impression. If it springs back immediately, proof longer (10–15 minutes). If the dough doesn't spring back at all and feels overly soft, it's over-proofed — bake immediately to salvage it.
The final proof (also called apprêt in French) is the last chance for the yeast to inflate the dough. During this 45 minutes, the baguettes will soften, puff, and become ready for the oven. Under-proofed baguettes will have a dense, tight crumb and may split along the seam during baking. Over-proofed baguettes will spread flat, have a coarse, gassy crumb with large tunnels, and may collapse in the oven. The 45-minute guideline is for room temperature (20–24°C / 68–75°F). In a warmer kitchen, check at 30 minutes. In a cooler kitchen, allow up to 60 minutes. If you want to delay baking, you can cold-proof the shaped baguettes in the refrigerator for up to 8 hours — the cold slows the yeast, giving you a window for flexible timing while also developing deeper flavor. Remove from the refrigerator 15 minutes before scoring and baking.
Step 7 — Preheat the Oven and Prepare Steam (30 minutes)
Position the oven racks: Place a baking stone or baking steel on the middle rack of the oven. Place a cast iron skillet or shallow metal pan on the bottom rack (or on the floor of the oven, if gas).
Preheat the oven to 230°C (450°F) for a minimum of 30 minutes — the baking stone needs this time to fully absorb and radiate heat. An oven thermometer is invaluable here, as many home ovens run cooler or hotter than their dial indicates.
Prepare for steam: Fill a spray bottle with water. Have a cup of boiling water ready (about 250 ml / 1 cup) for pouring into the hot skillet when you load the baguettes.
Steam is the single most important factor in producing a professional-quality baguette crust. During the first 10 minutes of baking, the steam keeps the crust soft and elastic, allowing the dough to expand fully (this is the oven spring). As the steam dissipates, the crust dries, sets, and begins to caramelize, producing that signature crackling, golden-brown shell. Without steam, the crust sets too early, restricting the baguette's expansion and producing a thick, tough, pale crust. A baking stone or steel provides the intense, even bottom heat needed to spring the baguettes upward rather than outward. If you don't have a baking stone, use a heavy, inverted baking sheet preheated in the oven — it's not as effective but better than nothing.
Step 8 — Transfer, Score, and Bake (25–30 minutes)
Prepare the transfer surface: Dust a baking sheet or peel (or a piece of parchment paper) with semolina flour. If using parchment, simply slide it onto a rimless baking sheet or pizza peel for the transfer.
Transfer the baguettes: Gently uncover the proofed baguettes. Starting with one end of the couche, carefully roll the baguettes one at a time from the linen onto your floured hand or the peel, turning them seam-side down. Space them evenly — about 5 cm (2 inches) apart. If using parchment, lift the parchment and place it on the peel.
Brush off excess flour from the tops of the baguettes with a dry pastry brush — you want a clean surface for scoring and even browning.
Score the baguettes: Using a lame or very sharp razor blade, make 3 to 5 diagonal slashes along the length of each baguette. Hold the blade at a 30-degree angle to the dough and cut quickly and decisively — about 1 cm (½ inch) deep. Each slash should overlap the previous one by about one-third. The slashes should be:
- Confident — a hesitant cut drags and tears the dough
- Even — about 8–10 cm (3–4 inches) long each
- Consistent in angle — 30 degrees allows the dough to open into a distinctive "ear" (the lip of crust that curls up along the slash)
Scoring is both functional and aesthetic. Functionally, the slashes create controlled weak points where the dough can expand during oven spring — without them, the baguette will burst unpredictably along its weakest point (usually the seam). Aesthetically, the pattern of slashes — traditionally 3 to 5 overlapping cuts — distinguishes a hand-formed baguette from a machine-formed one. The key techniques: a sharp blade, a 30-degree angle, and a swift, confident motion. If the blade drags or snags, it's not sharp enough. A lame (French for "blade") is a curved handle designed to hold a standard double-edged razor blade; it costs very little and makes scoring dramatically easier. If you don't have a lame, a new, clean double-edge razor blade held between your fingers works perfectly.
Load the baguettes into the oven: Working quickly:
- Open the oven door.
- Slide the baguettes (on the peel or parchment) onto the hot baking stone. Give the peel a sharp, quick jerk backward to release the baguettes. If using parchment, slide the entire parchment onto the stone.
- Immediately pour the cup of boiling water into the hot cast iron skillet on the bottom rack — stand back as steam will billow up.
- Quickly spray a mist of water into the oven (avoiding the heating elements and the baguettes themselves) with the spray bottle.
- Close the oven door to trap the steam.
Bake for 25–30 minutes:
- First 10 minutes: Do not open the oven door. The steam created by the boiling water and spray keeps the crust elastic. The baguettes will undergo dramatic oven spring.
- After 10 minutes: Open the oven door briefly to release the remaining steam — this allows the crust to dry and begin browning. If you used parchment, you can slide it out from under the baguettes at this point for better bottom crust development.
- Last 15–20 minutes: The baguettes will develop their deep golden-brown color and shattering crust.
Check for doneness: The baguettes are done when:
- Deep golden-brown all over — a rich amber color, not pale yellow
- The crust feels firm and makes a hollow sound when tapped on the bottom with your fingernail
- The internal temperature reaches 95–98°C (203–208°F) on an instant-read thermometer inserted through the bottom
The steam-injected, high-heat method is what separates a good baguette from a great one. The steam keeps the crust supple during expansion; releasing it after 10 minutes allows the crust to crisp and caramelize. If you see the baguettes browning too quickly (dark spots before 20 minutes), reduce the oven temperature to 220°C (425°F). If they are pale after 25 minutes, leave them in for 3–5 more minutes — an under-baked baguette will have a soft, gummy interior even if it sounds hollow. The open door at 10 minutes is brief — 5 seconds is enough — because you want to keep the oven temperature high while releasing the steam. A good crust needs both: initial moisture (for expansion) followed by dry heat (for browning).
Step 9 — Cool the Baguettes (30 minutes to 1 hour)
Remove the baked baguettes from the oven using a spatula or by sliding them off the baking stone onto a wire cooling rack.
Cool completely — at least 30 minutes, preferably 1 hour — before slicing. During this time, the crumb sets and the moisture redistributes evenly throughout the loaf. A baguette that is cut while hot will have a gummy, sticky crumb.
The cooling phase is often the most impatiently endured step, but it is scientifically necessary. As the baguette cools, the gelatinized starch retrogrades slightly, setting the crumb structure. Cutting into a hot baguette compresses the still-malleable crumb and releases steam that condenses on the cut surface, making it soggy. A fully cooled baguette's crust should crackle audibly when you squeeze it gently — that's the sound of a properly baked crust. Once cool, the baguettes are at their peak: the crust is shatteringly crisp, the crumb is tender and moist, and the flavor is clean and wheaten. This peak lasts about 3–4 hours at room temperature.
🧑🍳 Chef's Tips
- Weigh your ingredients. Bread baking is a science of ratios — 70% hydration, 2% salt, 1% yeast (relative to flour weight by mass). A digital scale eliminates the variability of cup measurements (a "cup" of flour can vary by 20 g or more depending on how you scoop it). Weigh everything in grams for consistent, reproducible results.
- Listen to the dough, not the clock. Fermentation times are guidelines, not rules. The dough doubles when it doubles — not when the clock says 1½ hours. Ambient temperature, flour protein content, yeast freshness, and even humidity affect fermentation speed. Learn to read the visual and tactile cues: doubled volume, domed surface, jiggly consistency, slow spring-back when poked.
- Use the windowpane test with confidence. If you're unsure whether you've kneaded enough, pinch off a small piece and stretch it gently. If it forms a thin, translucent membrane without tearing, your gluten is developed. If it tears easily, knead for 2 more minutes and test again.
- Wet hands are your friend. When handling high-hydration dough (70% or higher), wet your hands lightly with water instead of dusting them with flour. Flour changes the dough hydration; water doesn't. A wet hand slides through sticky dough without tearing it.
- The colder the fermentation, the better the flavor. A slow, cold fermentation (refrigerator, 12–24 hours) develops far more complex flavor compounds than a quick warm rise. The yeast produces organic acids and esters that give the bread a subtle tang, nuttiness, and depth that a same-day dough cannot match. Plan ahead for the best baguette of your life.
- Couche alternatives. If you don't have a proper linen couche, use a clean, lint-free kitchen towel that has been washed several times (new towels shed lint). Dust generously with rice flour — rice flour is non-hygroscopic (it doesn't absorb moisture) and forms an excellent non-stick barrier. Do not use a terry cloth towel, which will stick and leave fibers embedded in the dough.
- Troubleshooting a sticky dough. If your 70% hydration dough is unmanageably sticky, you may have: (1) under-kneaded (the gluten hasn't developed enough to hold the water); (2) used low-protein flour (all-purpose or pastry flour cannot absorb as much water as bread flour); (3) live in a very humid climate (the flour absorbs moisture from the air). Fix: knead longer, switch to bread flour, or reduce water to 325 ml next time.
- Stagger your afternoon bake. For baguettes at dinner time, start at noon: mix at 12:00, bulk rise 12:30–2:00, divide/pre-shape at 2:00, rest 15 min, shape at 2:20, proof 2:20–3:05, bake at 3:05–3:35, cool 3:35–4:35. Perfect baguettes for a 5:00 PM dinner.
- Keep a notebook. Professional bakers track every bake: flour brand, water temperature, room temperature, rise times, proof times, bake temperature, steam method, and results. Over time, patterns emerge, and you develop an intuitive feel for your oven and your kitchen.
- The bread knife matters. A sharp, serrated bread knife (25–30 cm / 10–12 inches) is essential for slicing baguettes without crushing the delicate crumb. Use a gentle sawing motion — don't press down. For the most dramatic presentation, serve baguettes whole or torn into chunks rather than sliced.
❌ Common Mistakes
| Mistake | Why It Hurts | The Fix |
|---|---|---|
| Using low-protein flour | All-purpose flour (9–11% protein) cannot develop the strong gluten network needed to support the long, slender baguette shape — the loaf spreads, flattens, and has a dense, tight crumb | Use bread flour (12–13% protein) or French Type 55 flour for the proper structure and crumb |
| Not kneading enough | Under-developed gluten cannot trap the gas produced by the yeast — the dough doesn't rise properly, the crumb is dense and heavy, and the baguettes are flat | Knead for a full 10 minutes and confirm with the windowpane test — the dough should stretch into a thin, translucent membrane |
| Over-flouring the work surface | Excess flour is absorbed into the dough, changing the hydration ratio — the crumb becomes dense, dry, and floury rather than light and open | Use a very light dusting of flour on the surface; wet your hands instead of adding flour when handling sticky dough |
| Deflating the dough during shaping | Aggressive handling bursts the gas bubbles built during fermentation — the crumb loses its open, irregular texture and becomes dense and uniform | Handle the dough gently during shaping; use light pressure and preserve the internal gas structure |
| Under-proofing the shaped baguettes | The yeast hasn't had enough time to inflate the dough — the crumb is dense, the baguettes are small, and they may split along the seam during baking | Proof until the baguettes are puffy and about 50% larger; the poke test should show a slow, partial spring-back |
| Over-proofing the shaped baguettes | The gluten structure weakens from extended fermentation — the baguettes spread flat, have a coarse, gassy crumb with large irregular tunnels, and may collapse in the oven | Proof just until puffy; if the dough doesn't spring back when poked and feels overly soft, bake immediately to salvage it |
| Scoring too shallowly or tentatively | The slashes don't penetrate enough to create a controlled opening — the baguette bursts unpredictably elsewhere, often along the seam | Score decisively: hold the blade at 30°, cut about 1 cm (½ inch) deep, and use a swift, confident motion |
| No steam in the oven | The crust sets too early, restricting oven spring — the baguette is smaller, denser, and has a thick, tough, pale crust instead of a thin, crisp, golden one | Create steam by pouring boiling water into a hot skillet and spraying the oven with a mist of water immediately after loading the baguettes |
| Opening the oven too early or too often | Opening the oven releases the steam and drops the temperature — the crust sets prematurely, the oven spring is limited, and the baguettes are pale and dense | Do not open the oven for the first 10 minutes; after releasing the steam at 10 minutes, keep the door closed for the remainder of the bake |
| Cutting the baguette while hot | The crumb hasn't set — cutting compresses the soft interior and releases steam that condenses on the cut surface, creating a gummy, sticky texture | Cool on a wire rack for at least 30 minutes (preferably 1 hour) before slicing. The patience is rewarded with a clean cut and perfect crumb texture |
💡 Variations
- Poolish Baguette (Baguette au Levain — Indirect Method): Replace the direct yeast addition with a poolish (a preferment made 12–16 hours ahead). The night before, mix 250 g bread flour, 250 g water (room temperature), and 2 g (½ tsp) active dry yeast. Cover and let ferment at room temperature for 12–16 hours. Next day, combine the poolish with the remaining 250 g flour, 100 g water, and 10 g salt. Omit the 5 g yeast from the main recipe. Fold the dough 4 times at 30-minute intervals instead of kneading. This produces a baguette with far more complex, nutty, and slightly tangy flavor, a more open crumb, and a longer shelf life. This is the standard method used by most French boulangeries.
- Whole Wheat Baguette: Replace 150 g of the bread flour (30%) with whole wheat flour. Increase the water to 375 ml (75% hydration) — whole wheat absorbs more water. Expect a denser crumb, a nuttier flavor, and a darker, more rustic crust. The whole wheat also accelerates fermentation slightly, so check the bulk rise 15–30 minutes earlier.
- Spelt Baguette: Replace 250 g of the bread flour (50%) with spelt flour. Increase water to 360–370 ml (72–74% hydration) — spelt is more absorbent than bread flour. Spelt has a delicate gluten structure, so knead gently and handle with extra care during shaping. The result is a subtly sweet, nutty baguette with a tender, slightly more fragile crumb.
- Rye Baguette (Pain de Campagne-style): Replace 100 g of the bread flour (20%) with dark rye flour. Increase water to 365 ml (73% hydration). Rye has no gluten-forming proteins, so this dough is stickier and harder to shape — keep your hands wet, not floured. Use a couche with extra rice flour. The flavor is earthy and complex; the crust bakes very dark. A classic French country bread in baguette form.
- Herb and Garlic Baguette: Add 2 tablespoons finely chopped fresh rosemary (or 1 tablespoon dried) and 2 minced garlic cloves to the flour before adding the water. Drizzle the garlic with a teaspoon of olive oil to mellow its raw edge. The herbs infuse the entire loaf with aromatic flavor. Excellent with olive oil for dipping.
- Olive Baguette: After the first hour of the bulk rise, gently fold in 150 g (1 cup) pitted, halved Kalamata or Niçoise olives and 1 tablespoon fresh thyme leaves. The olives add briny, savory bursts throughout the crumb. Reduce the salt to 8 g (the olives contribute saltiness).
- Cheese and Black Pepper Baguette: After the first hour of the bulk rise, fold in 150 g (1½ cups) finely grated Gruyère or Comté cheese and 2 teaspoons coarsely ground black pepper. The cheese melts into the crumb, creating pockets of creamy richness, while the pepper adds warmth. A spectacular appetizer baguette.
- Cranberry-Walnut Baguette: After the first hour of the bulk rise, fold in 100 g (⅔ cup) dried cranberries and 100 g (⅔ cup) toasted, roughly chopped walnuts. The sweetness of the cranberries and the earthy richness of the walnuts make this an excellent breakfast or cheese-plate baguette. Soak the cranberries in warm water for 15 minutes and drain before adding.
- Sourdough Baguette: Replace the 5 g active dry yeast with 200 g of active, bubbly sourdough starter (100% hydration). Reduce the flour to 400 g and the water to 250 ml — the starter contributes 100 g flour and 100 g water. Expect a much longer bulk fermentation (4–6 hours at room temperature, depending on starter strength). The flavor will be tangy, complex, and deeply aromatic. Handle the dough even more gently — sourdough's acidity weakens the gluten slightly.
- Mini Baguettes (Batards): Divide the dough into 6 pieces instead of 3 (about 140–145 g each). Shape into shorter, fatter loaves (about 20 cm / 8 inches long). Reduce bake time to 18–22 minutes. Perfect for dinner rolls or individual servings.
- Baguette Panino (Sandwich Loaf): Shape the dough into a single large loaf (about 40 cm / 16 inches long, thicker than a baguette). Score with 1 long slash down the center. Bake for 30–35 minutes. The larger, softer interior is ideal for slicing horizontally into sandwich bread.
❄️ Storage & Make-Ahead
| Method | Details |
|---|---|
| Room temperature (same day) | Baguettes are at their absolute peak within 3–4 hours of baking. Store uncut baguettes at room temperature, loosely wrapped in a clean kitchen towel (not plastic — plastic traps moisture and softens the crust). If you have a paper bag, use that. Never refrigerate a baguette — the cold accelerates starch retrogradation, making the bread stale and rubbery within hours. |
| Room temperature (next day) | To revive a day-old baguette, run the crust under cold tap water for about 5 seconds per side (just enough to dampen it, not soak it). Place in a 200°C (400°F) oven for 5–7 minutes, directly on the oven rack. The moisture creates a burst of steam that re-crisps the crust and re-moistens the crumb. This works remarkably well — a revived baguette is about 85% as good as a fresh one. |
| Freezer (whole baguette) | Cool the baked baguette completely. Wrap tightly in plastic wrap (two layers), then in aluminum foil or a freezer bag. Freeze for up to 3 months. To serve: thaw at room temperature for 1 hour (still wrapped), then reheat unwrapped in a 200°C (400°F) oven for 5–7 minutes. |
| Freezer (sliced baguette) | Slice the cooled baguette, arrange in a single layer on a baking sheet, and freeze until solid (about 1 hour). Transfer to a freezer bag, pressing out as much air as possible. Freeze for up to 3 months. Toast or reheat slices directly from frozen — perfect for bruschetta, crostini, or garlic bread. |
| Croutons from stale baguette | Cut stale baguette into 1–2 cm (½–¾ inch) cubes. Toss with olive oil, salt, and herbs. Bake at 180°C (350°F) for 10–15 minutes until golden and crisp. Store in an airtight container for up to 2 weeks. The single best use for day-old baguettes. |
| Breadcrumbs from stale baguette | Cut stale baguette into chunks, pulse in a food processor until coarse crumbs form. Spread on a baking sheet and bake at 150°C (300°F) for 10–15 minutes, stirring once, until dry and lightly golden. Store in an airtight container in the freezer for up to 6 months. Use for breading, toppings, or meatball binders. |
| Panzanella (Tuscan bread salad) | The classic Tuscan use for day-old bread. Cube stale baguette, toss with diced tomatoes, cucumber, red onion, basil, and a red wine vinaigrette. Let sit for 30 minutes — the bread absorbs the juices and becomes the soul of the salad. |
| Make-ahead: freeze the shaped, unbaked baguettes | After shaping in Step 5, place the baguettes seam-side down on a parchment-lined baking sheet dusted with semolina. Freeze until solid (about 2 hours), then wrap each frozen baguette tightly in plastic and then foil. Freeze for up to 1 month. To bake: remove from freezer, unwrap, place on a floured couche (or parchment-lined sheet), cover, and thaw/proof at room temperature for 2–3 hours until puffy. Score and bake as directed — no need to refreeze. This gives you fresh baguettes on demand with almost no day-of work. |
🍷 Wine Pairing
| Wine | Why |
|---|---|
| Beaujolais-Villages (Cru du Beaujolais) | Light, fruity, low-tannin Gamay with bright acidity. The berry-fruit notes and gentle earthiness complement the clean wheaten flavor of the baguette without overwhelming it. Serve with a cheese or charcuterie board. |
| Sancerre (Loire Valley Sauvignon Blanc) | Crisp, mineral-driven, with citrus and green herb notes. The acidity cuts through butter and cheese served alongside the baguette. A classic pairing for goat cheese on baguette. |
| Côtes du Rhône Rouge | A medium-bodied, peppery Rhône blend (Grenache-Syrah-Mourvèdre) with dark fruit and garrigue herb notes. The peppery finish matches the crusty, caramelized baguette beautifully. |
| Muscadet Sèvre et Maine (Loire Valley Melon de Bourgogne) | Bone-dry, saline, and mineral — one of the great food wines. Pair with a baguette sandwich filled with seafood (smoked salmon, shrimp, sardines) or simply with butter and sea salt. |
| Chablis (Chardonnay, no oak) | Steely, mineral, and crisp — the pure Chardonnay expression from northern Burgundy. The clean, flinty character is a perfect canvas for the simple wheaten flavor of a fresh baguette. |
| Côtes de Provence Rosé | Dry, pale, with strawberry, herb, and citrus notes. The ultimate picnic pairing: a fresh baguette, some chèvre, olives, and a chilled rosé. The high acidity and subtle fruit complement the bread's neutral character. |
| Champagne Brut | Toasty, yeasty bubbles with high acidity. The fine mousse and nutty notes echo the caramelized crust and yeasty crumb of the baguette. A celebratory pairing — Champagne and a perfect baguette are a match made in heaven. |
| Vin de Savoie (Jacquère) | Light, crisp, alpine white with subtle floral and mineral notes. The mountain freshness is ideal alongside a baguette with local Savoyard cheese (Beaufort, Tomme de Savoie). |
🍺 Beer Pairing
| Beer | Why |
|---|---|
| Belgian Saison | Fruity, spicy, high carbonation — the peppery yeast notes and dry finish complement the crusty, wheaten baguette. A classic farmhouse pairing. |
| French Bière de Garde | Malty, earthy, and slightly sweet — the toasty malt character echoes the caramelized crust. The moderate carbonation cleanses the palate. |
| Belgian Witbier | Coriander and orange peel notes are a natural match for baguette with soft cheeses or seafood. The light body and high carbonation are refreshing. |
| Czech Pilsner | Clean, crisp, with a pronounced hop bitterness that cuts through butter and rich pâtés served alongside the bread. The high carbonation scrubs the palate. |
| Sour Ale (Flanders Red or Oud Bruin) | The tart, fruity acidity is a surprising but excellent partner — it contrasts with the bread's malt sweetness and pairs beautifully with aged cheeses. |
🥗 Suggested Accompaniments
- French butter and sea salt — The simplest and most perfect accompaniment. Use a high-quality, cultured, unsalted French butter (like Échiré, Bordier, or President) at room temperature — spread generously on a warm baguette and sprinkle with a few flakes of fleur de sel or Maldon sea salt. This is the benchmark by which all baguettes are judged.
- Cheese board — Baguette is the ideal vehicle for a French cheese selection. Classics: Brie de Meaux, Camembert, Comté (aged), Roquefort, Chèvre (fresh or aged), Époisses, Pont-l'Évêque, or a simple slice of Mimolette.
- Charcuterie board — Thinly sliced prosciutto, saucisson sec, jambon de Bayonne, pâté en croûte, rillettes, and cornichons. The baguette's crisp crust and neutral crumb make it the perfect palate.
- Olive oil and balsamic vinegar — A small dish of high-quality extra-virgin olive oil with a splash of aged balsamic vinegar, for dipping torn pieces of warm baguette. Add a sprinkle of black pepper and flaky salt.
- Soupe à l'oignon (French onion soup) — The classic pairing. Toast baguette slices, float them on top of the soup, cover with grated Gruyère, and broil until bubbly. The baguette soaks up the rich broth while staying crisp on top.
- Ratatouille — A rustic vegetable stew that cries out for crusty bread to soak up every last drop of its tomato-herb juices. Tear, dip, and enjoy.
- Croque Monsieur / Croque Madame — The classic Parisian ham and cheese sandwich, made with baguette slices (or a split mini-baguette), Gruyère, béchamel, and ham. The baguette's crust provides the perfect structural integrity.
- Tartines — Open-faced sandwiches on toasted baguette slices. Try: avocado, lemon, and chili flakes; ricotta, honey, and figs; tapenade, goat cheese, and roasted red peppers; smoked salmon, cream cheese, and capers.
- Bruschetta and crostini — Toasted baguette slices rubbed with garlic and drizzled with olive oil. Top with chopped tomatoes, basil, and mozzarella (bruschetta) or with a smear of ricotta and roasted vegetables (crostini).
- Breakfast with butter and jam — The quintessential French breakfast: a fresh baguette, good butter, and your favorite jam, preserves, or honey. Served with café au lait or hot chocolate.
- Pain perdu (French toast) — The classic use for day-old baguette. Slice into 2 cm (¾ inch) thick rounds, soak in a mixture of beaten eggs, milk, vanilla, and a touch of sugar, and fry in butter until golden. Serve with maple syrup and fresh berries. The firm crumb absorbs the custard perfectly without falling apart.
📊 Nutrition (per baguette — 1/3 of recipe, approximately 300 g)
| Calories | Protein | Fat | Carbs | Fiber |
|---|---|---|---|---|
| ~720 | 24 g | 3 g | 150 g | 6 g |
Nutritional values are estimates based on 3 baguettes made with 500 g bread flour, 350 ml water, 10 g fine sea salt, and 5 g active dry yeast. Each baguette (approximately 300 g baked weight) contains roughly 720 calories. The vast majority of calories come from the flour (about 570 calories per baguette from carbohydrates and protein). Fat content is minimal — approximately 3 g per baguette (from the flour's natural oils, plus any negligible residue from the oil used to coat the bowl). Protein is substantial at 24 g per baguette, thanks to the high-protein bread flour. The fiber content (6 g per baguette) comes from the bran and germ in the bread flour. This is a naturally low-fat, low-sugar, high-carbohydrate food — a baguette is essentially a vehicle for the toppings and accompaniments you pair it with. Sodium is approximately 1,300 mg per baguette (from the 10 g salt divided across 3 loaves) — note that this is the total salt added; actual sodium is about 3,900 mg per 10 g salt, or about 1,300 mg per baguette. The baguette is naturally vegan (no animal products in the base recipe), dairy-free, egg-free, nut-free, and soy-free. It contains gluten (wheat flour). For a serving size of 100 g (about ⅓ of a baguette, or a 4-inch / 10 cm section): approximately 240 calories, 8 g protein, 1 g fat, 50 g carbohydrates, 2 g fiber, and 430 mg sodium. Values will vary based on exact flour brand, final baked weight (moisture loss during baking), and hydration. Baguettes baked longer or with more steam may have slightly less moisture and thus slightly higher caloric density by weight.*
❓ Frequently Asked Questions
What is the difference between a baguette, a bâtard, and a boule?
These are three shapes of French bread made from the same dough. A baguette is long and thin (about 60–70 cm / 24–28 inches long, 5–6 cm / 2–2.5 inches wide) with a high crust-to-crumb ratio. A bâtard is a shorter, fatter version (about 20–25 cm / 8–10 inches long, 8–10 cm / 3–4 inches wide) — essentially a large, thick baguette. A boule is a round loaf, baked free-form or in a banneton (proofing basket). The same dough works for all three shapes — the difference is purely in the shaping and baking time. For your first attempt, consider making bâtards instead of baguettes — they are easier to shape and slightly more forgiving during baking.
Why is my baguette crust tough and thick instead of thin and crisp?
A tough, thick crust typically means: (1) insufficient steam during the first 10 minutes of baking — the crust set and hardened before the baguette finished expanding; (2) the oven temperature was too low, causing the crust to dry out slowly and thicken rather than flash-caramelize; (3) the baguettes were over-floured before baking, creating an extra layer of dry flour on the surface that turns into a floury, tough coating. To fix: generate more steam (more boiling water, a longer spray), preheat thoroughly with a baking stone, and brush off excess flour before scoring and baking.
Why is my baguette crumb dense and tight with no holes?
A dense, tight crumb without the characteristic open, irregular air pockets usually indicates one of the following: (1) the dough was under-kneaded — the gluten network was too weak to trap the gas; (2) the dough was over-handled during shaping — you deflated the gas bubbles; (3) the dough was under-proofed — the yeast hadn't produced enough gas yet; (4) the flour was too low in protein (all-purpose instead of bread flour) — insufficient gluten to hold the gas; (5) the hydration was too low (less than 65%) — a stiff dough produces a tight crumb. For open crumb, you need: 70% hydration, bread flour, thorough kneading, gentle handling, and properly timed proofing.
Why did my baguettes flatten and spread out instead of holding their shape?
Flat, spreading baguettes are almost always a sign of: (1) over-proofing — the gluten structure weakened too much during the final proof, and the dough lost its ability to hold its shape; (2) insufficient gluten development during kneading — the dough never built the strength to hold the baguette's slender shape; (3) the shaped baguettes were placed too far apart on the couche without sufficient side support — the folds of the linen act as walls that keep the baguettes tall. If you're not using a couche, the baguettes will naturally spread more — consider using a baguette pan (perforated metal trough) to hold their shape.
What is the best flour for authentic French baguettes?
For the most authentic baguette de tradition française, use French Type 55 (T55) flour. This is a medium-protein flour (about 10.5–11.5% protein) that is specifically milled for baguette production. It has a slightly lower protein content than most American bread flours but higher than all-purpose, and it's milled from French wheat varieties that produce a distinctive flavor and texture. If you can't find T55, use a good-quality bread flour with 12–12.5% protein (like King Arthur Bread Flour or Bob's Red Mill Artisan Bread Flour). Avoid "high-gluten" flour (14%+ protein), which is designed for chewy artisan breads like ciabatta and produces a baguette that is too tough and elastic.
Can I make baguettes without a baking stone?
Yes, but the results will be better with one. If you don't have a baking stone or steel: use a heavy, inverted rimmed baking sheet (preheated in the oven for 30 minutes). Slide the baguettes (on parchment) directly onto the hot sheet. The inverted sheet provides a flat, hot surface for good bottom heat. For top heat, consider placing a second baking sheet on the top rack to radiate heat downward. A baking stone is inexpensive (about $30–40) and worth the investment if you plan to bake bread regularly.
How do I get more oven spring (a bigger, taller baguette)?
Six factors contribute to dramatic oven spring: (1) steam — more steam keeps the crust soft longer, allowing more expansion; (2) high heat — a fully preheated 230°C (450°F) oven with a hot baking stone; (3) proper proofing — the baguettes should be proofed just to the point where they pass the poke test, not over-proofed; (4) strong gluten — well-developed gluten traps the gas and holds the shape; (5) confident scoring — deep, decisive slashes at a 30° angle create the "ear" that allows maximum expansion; (6) low-hydration dough — counter-intuitively, slightly lower hydration (65–67%) can actually produce more dramatic oven spring than higher hydration (70%+), as the dough has more structural integrity. Experiment with water between 325 ml and 350 ml to find the balance that works for your flour.
My baguettes are pale and blond instead of deeply golden. What went wrong?
Pale baguettes are a sign of insufficient heat or insufficient steam. The deep golden-brown color comes from the Maillard reaction (amino acids reacting with sugars at high heat) and caramelization of the sugars in the crust. To fix: (1) make sure your oven is fully preheated to 230°C (450°F) — use an oven thermometer; (2) don't release the steam too early — keep the steam in the oven for the full first 10 minutes to allow the sugars to develop; (3) bake for the full 25–30 minutes — an extra 3–5 minutes can make the difference between pale and perfectly golden; (4) try adding 1 teaspoon of malt syrup or honey to the water (optional) — the extra sugar encourages deeper browning.
Can I use a bread machine for the kneading?
Yes. Use the dough-only cycle (not the full bake cycle). Add the ingredients in the order recommended by your bread machine manufacturer (typically: water, flour, salt, yeast — or: liquids first, dry ingredients on top, yeast in a well). Let the machine knead for 8–10 minutes. Remove the dough and proceed with the bulk rise, shaping, and baking as described. The bread machine kneads effectively but you may need to adjust the hydration slightly (machines work better with slightly stiffer doughs — try 340 ml water instead of 350 ml). Check the windowpane test after the kneading cycle and add 1–2 tablespoons of water if the dough is too stiff.
How do I create steam in an electric oven safely?
The safest method for electric ovens: place a cast iron skillet or a heavy metal baking pan on the bottom rack of the oven while preheating. When you load the baguettes, carefully pour 1 cup of boiling water into the hot pan — use a long-handled utensil and wear an oven mitt, as the steam will billow up. Alternatively, place a few ice cubes in the hot pan — they melt and create steam more gradually, which is safer than pouring boiling water. Another method: carefully spray a fine mist of water into the oven with a spray bottle immediately after loading the baguettes. Avoid spraying directly on the heating elements or the oven light bulb, which could shatter. The steam-pan method is the most reliable and produces the most consistent results.
Can I make baguettes with sourdough starter instead of commercial yeast?
Absolutely — see the Sourdough Baguette variation above. The key differences: you'll need an active, bubbly starter at 100% hydration, the bulk fermentation will be much longer (4–6 hours at room temperature), and the flavor will be tangier and more complex. The shaping and baking technique is identical. Expect a slightly denser crumb and a slightly darker crust due to the acidity of the sourdough. This is the traditional levain method used by French boulangers for centuries.
My baguette stuck to the couche during proofing. How do I prevent this?
Sticking to the couche is almost always because: (1) you didn't use enough dusting flour — the couche should be generously coated with rice flour or semolina; (2) you used all-purpose flour for dusting — all-purpose flour absorbs moisture and becomes glue-like when wet; rice flour is non-hygroscopic and stays dry; (3) the couche was damp when you started — always use a completely dry couche; (4) the baguette dough was too wet (over 75% hydration). Fix: use rice flour (available in most grocery stores' Asian food sections) for dusting, use a generous amount, and rotate the couche frequently so you're always placing the baguette on a freshly floured section of linen.
What is the "ear" on a baguette, and how do I get it?
The "ear" (l'oreille in French) is the distinctive lip of crust that curls up along each slash during baking. It's the hallmark of a properly scored and baked baguette. To get a pronounced ear: (1) hold the lame at a 30° angle to the dough, not perpendicular; (2) cut about 1 cm (½ inch) deep into the dough; (3) score with a swift, decisive motion — a hesitant cut drags and doesn't create the flap; (4) the ear forms because the dough expands and the slash opens at an angle, creating a flap of crust that stands up as the bread bakes. Professional bakers judge a baguette by the ear — it's the sign of a confident, skilled baker.
🔗 Related Recipes
- Pain de Campagne — French Country Bread (#347) — The round, rustic sibling of the baguette, made with the same dough but shaped into a boule and often including a percentage of whole wheat or rye flour. Compare the effect of shaping on the same dough.
- Ciabatta (#312) — The Italian high-hydration bread with a dramatically open, irregular crumb. A direct contrast to the baguette's more moderate crumb — both require gluten development and steam, but the technique and final texture are entirely different.
- Focaccia Genovese (#196) — The soft, dimpled, oil-rich Italian flatbread that demonstrates how the same basic ingredients yield an entirely different result through shaping, hydration, and oil incorporation.
- Pita Bread (#163) — A quick, high-heat, steam-leavened flatbread. The puffing mechanism (steam creating a pocket) is similar in principle to a baguette's oven spring.
- Pane di Matera — Matera Bread (#52) — The slow-fermented, naturally-leavened sourdough from Basilicata. Compare the baguette's quick, direct fermentation with Matera's long, cool fermentation — two philosophies of bread making.
- Pane Toscano — Tuscan Bread (#77) — The famously saltless Tuscan bread. Experience how omitting salt changes fermentation, crust color, and flavor — a fascinating counterpoint to the baguette.
- Poolish / Biga — Preferments (#313) — The master recipe for preferments. Learn to make poolish (liquid preferment, used in French baking) and biga (stiff preferment, used in Italian baking), and understand how they transform bread flavor and texture.
- Brioche Bread (#158) — The enriched, buttery, eggy French bread that represents the opposite end of the bread spectrum from the lean baguette. Compare the two to understand how fat, sugar, and eggs change dough behavior.
- Croissant Dough (#320) — The laminated, butter-layered cousin of the baguette. Both start with a yeasted dough, but one is rolled thin and folded with butter; the other is shaped and baked lean. Essential reading for understanding bread's two great traditions: lean versus enriched.
- Puff Pastry Express (#307) — The non-yeasted laminated dough. Understanding puff pastry (all layers, no yeast) alongside baguette (yeast, no layers) covers the two fundamental approaches to light, airy bakery products.
- Starter Maintenance and Sourdough Baking Guide — For those graduating to sourdough baguettes, this guide covers feeding schedules, hydration adjustments, and fermentation management.
- Gluten-Free Bread Base (#280) — For those who cannot eat gluten, this recipe provides an alternative to traditional wheat baguettes — a completely different approach to achieving bread-like texture without wheat protein.
🏷️ Search Tags
📸 Photo Reference
Photo reference: `vol1_346.png` — A warm, overhead three-quarter shot on a rustic wooden baker's table. Three perfectly baked baguettes rest side by side on a light linen couche, their deep golden-brown crusts glistening with the subtle sheen of caramelized starch. Each baguette is scored with four confident diagonal slashes, each slash opening into a characteristic "ear" — a curled lip of crust that stands slightly proud of the surface, pale gold at its edge and shading into deep amber in the center of the slash. The crust is visibly thin and crackled with a pattern of fine fissures (grigne) radiating from the slashes — the signature of a well-steamed, high-heat bake. One baguette has been sliced in half at an angle, revealing its interior: an open, irregular crumb with a mix of small, medium, and a few larger air pockets scattered throughout a creamy, ivory-colored background. The crumb is moist and slightly glossy — the mark of properly gelatinized starch. A small pile of flour dusts the background, with a baker's lame (its blade catching the light) resting beside the loaves. A shallow wooden bowl holds a few whole wheat berries and a sprinkling of coarse sea salt. In the foreground, a torn piece of baguette rests on the board, its jagged edge showing the tender, airy crumb, beside a small dish of golden cultured butter and a scattering of greyish fleur de sel crystals. A linen napkin is folded casually underneath. The lighting is warm, natural daylight from a side window — the kind of golden afternoon light that makes flour-dusted surfaces glow. A copper saucepan and a glass measuring cup are softly blurred in the background, suggesting a kitchen mid-bake. The mood is one of quiet pride and simple abundance — the satisfaction of four ingredients transformed into something transcendent by patience, technique, and three and a half hours of focused work.
Recipe from "The Italian Kitchen" by Vita Milanese — Volume 1: Pasta Perfetto 🥖
Recipe from The Italian Kitchen by Vita Milanese — Volume 1 · Pasta Perfetto. Discover all volumes on the ebook page.