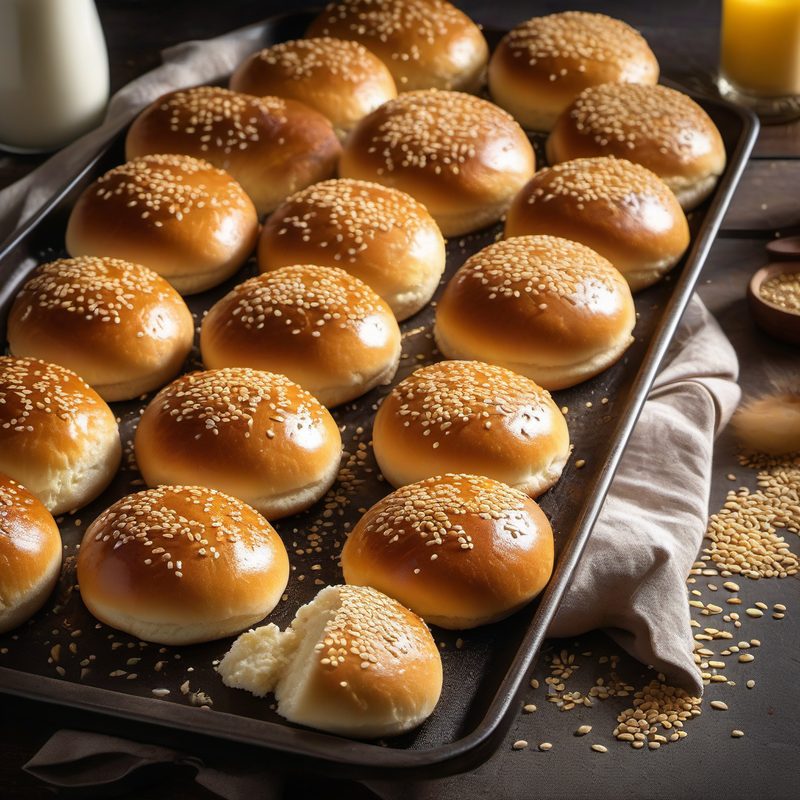
Milk Hamburger Buns
Soft, pillowy, and enriched with milk and butter — these tender buns elevate any burger into something truly special.
| Amount | Ingredient |
|---|---|
| 500 g (4 cups) | Bread flour |
| 250 ml (1 cup) | Whole milk, warmed to 110°F (43°C) |
| 1 large | Egg |
| 50 g (3½ tbsp) | Unsalted butter, softened |
| 30 g (2½ tbsp) | Granulated sugar |
| 7 g (2¼ tsp) | Instant or active dry yeast |
| 1 tsp | Table salt |
| For topping | 1 large egg + 1 tbsp water (egg wash) |
| For topping | Sesame seeds |
> Note: Active time is about 30 minutes. The remaining time is hands-off rising and proofing. Begin 3 hours before you plan to serve.
🥘 Equipment
- Stand mixer with dough hook (or large bowl + wooden spoon for hand mixing)
- Clean kitchen towel or plastic wrap
- Bench scraper
- Large baking sheet
- Parchment paper
- Pastry brush
- Instant-read thermometer
- Wire cooling rack
📋 Preparation
Step 1: Bloom the Yeast
In a small bowl or liquid measuring cup, combine the warm milk (110°F/43°C) with the sugar. Sprinkle the yeast over the surface, give it a gentle stir, and let stand for 5-10 minutes until foamy and fragrant.
Why bloom? This confirms your yeast is alive and active. If the mixture doesn't foam, your yeast is dead — start over with fresh yeast.
Step 2: Mix the Dough
In the bowl of a stand mixer fitted with the dough hook, whisk together the bread flour and salt. Add the foamy yeast mixture, the egg, and the softened butter.
Mix on low speed for 2 minutes until a shaggy dough forms. Increase to medium speed and knead for 8-10 minutes until the dough is smooth, elastic, and pulls away from the sides of the bowl.
The dough should feel soft and slightly tacky but not sticky. If it's too dry, add milk 1 tablespoon at a time; if too sticky, add flour 1 tablespoon at a time.
Step 3: Windowpane Test
To check if the dough is fully kneaded, tear off a small piece and stretch it gently between your fingers. A properly kneaded dough will stretch thin enough to see light through without tearing — this is the windowpane test.
Why this matters: The windowpane confirms gluten development, which gives the buns their soft, chewy structure.
Step 4: First Rise (Bulk Fermentation)
Lightly oil a large bowl. Place the dough in the bowl, turning once to coat. Cover tightly with plastic wrap or a damp kitchen towel and let rise in a warm, draft-free place for 1½ hours, or until doubled in volume.
Tip: A warm spot (75-80°F/24-27°C) yields the best rise. An oven with the light on works beautifully.
Step 5: Shape the Buns
Turn the risen dough onto a lightly floured surface. Gently press to deflate. Divide into 8 equal portions (about 105 g each).
Working with one piece at a time, shape each portion into a tight ball:
- Fold the edges toward the center.
- Flip seam-side down.
- Cup your hand over the dough and roll in a circular motion against the work surface to create surface tension.
Step 6: Final Proof
Place the shaped balls seam-side down on a parchment-lined baking sheet, spacing them evenly — they'll spread as they proof. Cover loosely with plastic wrap and let rise for 45 minutes, until puffy and nearly doubled in size.
Step 7: Egg Wash and Top
Preheat the oven to 190°C (375°F) with the rack in the middle position.
In a small bowl, whisk together 1 egg and 1 tablespoon water. Gently brush the tops of the risen buns with the egg wash. Sprinkle generously with sesame seeds.
Egg wash tip: Brush gently to avoid deflating the buns. Let the egg wash pool slightly at the edges for a beautiful golden crust.
Step 8: Bake
Bake for 15-18 minutes, rotating the sheet halfway through, until the buns are deep golden brown and an instant-read thermometer inserted into the center registers 190°F (88°C).
Step 9: Cool
Transfer the buns to a wire rack and let cool completely — at least 30 minutes. This step is essential: slicing warm buns will compress the crumb.
🧑🍳 Chef's Tips
- Weigh your ingredients: Bread baking is chemistry. Use a kitchen scale for the flour — measuring by volume can vary by 20% or more, leading to dry or sticky dough.
- Milk temperature matters: Too hot (above 130°F/54°C) kills the yeast; too cold slows fermentation. 110°F/43°C is the sweet spot.
- Butter at room temperature: Cold butter won't incorporate evenly. Leave it out for 30 minutes before starting.
- For extra-soft buns: Replace 50 g (¼ cup) of the milk with 50 g of heavy cream. The added fat tenderizes the crumb.
- Toast before serving: Split the buns and toast cut-side down on a griddle or in a skillet for 30 seconds — this prevents sogginess from burger juices.
❌ Common Mistakes
| Mistake | Why | Fix |
|---|---|---|
| Dense, heavy buns | Under-kneaded dough — insufficient gluten development | Knead a full 10 minutes; confirm with the windowpane test |
| Flat buns | Over-proofed dough — the gluten structure collapses | Proof only until doubled; don't exceed the recommended time |
| Dry, crumbly texture | Too much flour added during shaping | Use only a light dusting; brush excess flour off before baking |
| Uneven browning | No egg wash or uneven application | Brush evenly with a light hand; avoid pooling on the sheet |
| Yeast doesn't foam | Milk was too hot or yeast is expired | Always check expiration; keep milk at 110°F (43°C) |
| Buns stick to the pan | Insufficient parchment or greasing | Always line the sheet with parchment |
💡 Variations
- Brioche-style buns: Increase butter to 85 g (6 tbsp) and add a second egg yolk for a richer, more tender bun.
- Whole wheat buns: Replace 150 g of bread flour with whole wheat flour and add an extra 1-2 tablespoons of milk.
- Everything buns: After the egg wash, sprinkle with a mix of sesame seeds, poppy seeds, dried garlic, dried onion, and flaky salt.
- Potato buns: Substitute 100 g bread flour with 100 g mashed potato (cooled) and reduce milk by 30 ml. Potato starch yields an exceptionally soft, moist crumb.
- Spiced buns: Add ½ tsp garlic powder and ½ tsp onion powder to the flour mixture for a savory-sweet bun perfect for pulled pork.
- Mini sliders: Divide the dough into 12 portions (about 70 g each) and bake for 12-14 minutes.
❄️ Storage
| Condition | Duration | Method |
|---|---|---|
| Room temperature | Up to 3 days | In an airtight container or resealable bag |
| Refrigerator | Up to 1 week | Wrapped tightly in plastic wrap |
| Freezer | Up to 3 months | Wrapped individually in plastic, then foil |
To refresh: Thaw at room temperature (about 1 hour) and warm in a 175°C (350°F) oven for 5 minutes.
Pro tip: Freeze the buns split in half so you can pull and toast them directly from frozen.
🍷 Wine Pairing
| Wine | Why |
|---|---|
| Barbera d'Alba | High acidity cuts through the richness of the bun and any fatty burger toppings |
| Zinfandel | Jammy fruit complements the slight sweetness of the milk bun |
| Beaujolais Cru | Light-bodied, fruity — won't overwhelm the delicate bread |
🍺 Beer Pairing
| Beer | Why |
|---|---|
| American Pale Ale | Hoppy bitterness balances the sweet, buttery bun |
| Munich Helles | Clean, malty, and subtle — lets the bun's flavor shine |
| Vienna Lager | Toasty malt notes echo the browned crust of the bun |
🥗 Suggested Sides
- Classic burger sides: Hand-cut fries, onion rings, or potato chips
- Light salad: Coleslaw with a tangy vinaigrette or creamy dill coleslaw
- Grilled vegetables: Zucchini, bell peppers, and red onions charred on the grill
- Pickles: Cornichons or quick-pickled red onions add acidity that cuts through the richness
📊 Nutrition (per bun)
| Calories | Protein | Fat | Carbs | Fiber |
|---|---|---|---|---|
| 305 | 10 g | 8 g | 49 g | 2 g |
❓ FAQ
Can I make these dairy-free?
Yes. Substitute the milk with unsweetened oat milk or almond milk, and replace the butter with a plant-based butter or coconut oil (softened). The texture will be slightly less tender.
Can I use all-purpose flour instead of bread flour?
You can, but the buns will be less chewy and may not hold their shape as well. Bread flour's higher protein content (12-14%) is what gives these buns their signature soft-but-sturdy structure. If using all-purpose, consider adding 1 tablespoon of vital wheat gluten.
Why did my buns come out flat?
Most likely over-proofing (the dough rose too long and the gluten structure collapsed) or the yeast was dead. Always confirm your yeast foams during blooming, and keep a close eye on the final proof.
Can I make the dough the night before?
Yes. After kneading, place the dough in the refrigerator to cold-ferment overnight (up to 12 hours). The next day, let it sit at room temperature for 30 minutes, then shape, proof, and bake as directed. Cold fermentation also develops deeper flavor.
Do I really need a stand mixer?
No. You can knead by hand for 12-15 minutes on a lightly floured surface. It's a good arm workout! The key is achieving the windowpane test — don't stop kneading until the dough passes it.
🔗 Related Recipes
- Classic American Cheeseburger
- Panino al latte — Milk Bread Rolls (unsweetened)
- Brioche Burger Buns
- Potato Hamburger Buns
- Homemade Burger Patties — The Perfect Pairing
🏷️ Search Tags
Recipe from The Italian Kitchen by Vita Milanese — Volume 1 · Pasta Perfetto. Discover all volumes on the ebook page.