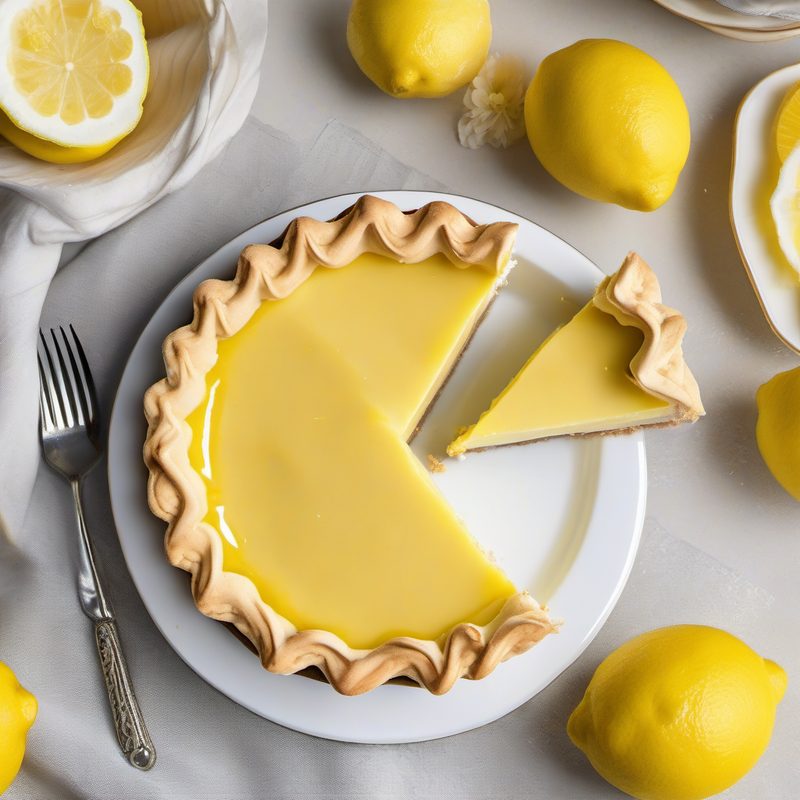
Lemon Pie Italian Meringue
Three perfect layers — buttery shortcrust, silky-smooth lemon curd, and a cloud of torched Italian meringue — this is lemon pie elevated to art.
| Amount | Ingredient |
|---|---|
| To taste | Fresh mint leaves |
| To taste | Lemon zest or thin lemon curls |
> Note: The 12-hour chilling of the filled tart is hands-off. Active work is about 1 hour 15 minutes.
Pasta Frolla (Italian Shortcrust)
Lemon Curd
Italian Meringue
For Decoration
🥘 Equipment
- 24 cm (9½-inch) fluted tart pan with removable bottom
- Rolling pin
- Large bowl
- Plastic wrap
- Parchment paper
- Pie weights or dried beans
- Baking sheet
- Medium saucepan
- Whisk
- Fine-mesh strainer (optional, for silkiest curd)
- Spatula
- Stand mixer or hand mixer
- Candy thermometer
- Piping bag with star tip (or zip-top bag)
- Kitchen blowtorch
📋 Preparation
Part 1: Pasta Frolla (Make First)
Step 1 — Make the dough
In a large bowl, whisk together the flour, sugar, and salt. Add the cold butter cubes and rub them into the flour mixture with your fingertips until the mixture resembles coarse sand with a few pea-sized butter pieces remaining. (Alternatively, pulse in a food processor — 8 to 10 one-second pulses.)
Add the beaten egg and lemon zest. Mix with a fork or pulse until the dough just begins to come together. Turn out onto a lightly floured surface and gently knead 2 or 3 times — just enough to bring it into a cohesive disk. Do not overwork.
Step 2 — Rest the dough
Flatten the dough into a 6-inch disk, wrap tightly in plastic wrap, and refrigerate for 30 minutes. This relaxes the gluten and firms the butter, ensuring a tender, non-shrinking crust.
Part 2: Lemon Curd
Step 3 — Make the curd
Bring the lemon juice to a simmer in a small saucepan over medium heat.
While the juice heats, whisk together the eggs, egg yolk, sugar, lemon zest, and cornstarch in a medium bowl until smooth and pale — about 1 minute.
Slowly pour the hot lemon juice into the egg mixture in a thin stream, whisking constantly — do this in two batches to temper the eggs without scrambling them.
Step 4 — Cook the curd
Return the mixture to the saucepan. Cook over medium heat, whisking constantly, until the curd thickens and just comes to a boil — about 4 to 6 minutes. As soon as you see the first bubble, remove from heat.
Step 5 — Finish the curd
Add the cold butter cubes and whisk until fully melted and incorporated. For the silkiest texture, strain the curd through a fine-mesh strainer into a clean bowl. Press plastic wrap directly onto the surface to prevent a skin from forming. Let cool to room temperature, then refrigerate until needed.
Part 3: Blind Bake the Crust
Step 6 — Roll and line the pan
Lightly flour a work surface. Roll the chilled dough to a 12-inch circle, about ⅛-inch (3 mm) thick. Roll the dough loosely around the rolling pin, then unroll it over the 24 cm tart pan. Gently press the dough into the fluted edges and across the bottom. Run the rolling pin over the top of the pan to trim off the overhang. Prick the bottom all over with a fork.
Step 7 — Second chill
Refrigerate the lined tart pan for 30 minutes — this prevents the dough from shrinking during baking.
Step 8 — First bake (with weights)
Preheat the oven to 170°C (340°F), static setting (no fan). Line the chilled crust with a large piece of parchment paper, pressing it into the corners. Fill with pie weights or dried beans to the rim. Bake for 15 minutes.
Step 9 — Second bake (without weights)
Remove the parchment and weights. Return the crust to the oven and reduce temperature to 160°C (320°F). Bake for another 15 minutes, until the crust is pale golden and dry to the touch.
Step 10 — Cool completely
Let the tart shell cool completely in the pan on a wire rack — about 30 minutes. Do not fill a warm crust; the curd will turn runny.
Part 4: Fill and Chill
Step 11 — Fill the tart
Remove the tart shell from the pan and place it on a serving plate or cake stand. Whisk the chilled lemon curd briefly to loosen it, then spread it evenly into the tart shell. Smooth the surface with an offset spatula.
Step 12 — Overnight chill
Refrigerate the filled tart uncovered for at least 12 hours (or up to 24). This long rest allows the curd to fully set and the flavors to deepen and marry.
Part 5: Italian Meringue
Step 13 — Start the syrup
In a small saucepan, combine the ¾ cup (150 g) sugar and ¼ cup (60 ml) water. Stir gently to wet the sugar, then place over medium-high heat. Bring to a boil without stirring. Attach a candy thermometer.
Step 14 — Whip the egg whites
Meanwhile, place the egg whites in the bowl of a stand mixer fitted with the whisk attachment. Begin whipping on medium speed. When the whites are frothy, gradually add the remaining ¼ cup (50 g) sugar. Increase speed to medium-high and whip until soft peaks form — the whites should be thick, white, and billowy but still droop slightly when the whisk is lifted.
Step 15 — Add the hot syrup
When the sugar syrup reaches 121°C (250°F) — the firm-ball stage — remove it from the heat immediately. With the mixer running on medium-low, slowly pour the hot syrup in a thin, steady stream down the side of the bowl, avoiding the whisk. The syrup must be poured slowly as the whites whip, or it can splash and clump.
Why the careful pour? A slow, steady stream allows the hot syrup to cook the egg whites safely while being incorporated evenly.
Step 16 — Whip until stable
Once all the syrup is added, increase the speed to medium-high and whip until the meringue is stiff, glossy, and cool to the touch — about 6 to 8 minutes. The bowl should feel room temperature or slightly warm, not hot.
Part 6: Finish
Step 17 — Pipe the meringue
Transfer the meringue to a piping bag fitted with a large star tip (or snip a corner off a sturdy zip-top bag). Pipe decorative rosettes, swirls, or peaks over the entire surface of the chilled lemon tart, covering the curd completely.
Step 18 — Torch
Hold a kitchen blowtorch 2–3 inches from the meringue and move it in a steady, sweeping motion until the peaks are toasted a deep golden brown — 1 to 2 minutes. Focus on the peaks of the swirls for the most dramatic effect.
No torch? Place the tart under a preheated broiler for 30–60 seconds, watching constantly. This is risky — the curd can overheat — so only do this if the tart is well-chilled and you watch every second.
Step 19 — Decorate and serve
Garnish with fresh mint leaves and thin curls of lemon zest. Serve immediately, or refrigerate for up to 4 hours before serving. Use a sharp knife dipped in hot water and wiped dry for clean slices.
🧑🍳 Chef's Tips
- Cold butter for the crust: The butter must be cold when you work it into the flour. Warm butter produces a greasy, tough crust. If your kitchen is hot, chill the flour and bowl too.
- Don't skip the second chill: Chilling the lined pan for 30 minutes before baking is the single best defense against a shrunken crust. It firms the butter so the crust holds its shape.
- Cornstarch is the secret: A small amount of cornstarch in the curd provides insurance against a runny filling. It stabilizes the emulsion and gives the curd a silky, sliceable texture.
- Room temperature egg whites: Egg whites whip to a greater volume at room temperature (about 70°F / 21°C). Separate the eggs when cold, then let the whites sit for 20 minutes before whipping.
- Patience with the meringue: The meringue must whip until completely cool. If you stop too early, it will be unstable and may weep or deflate. The bowl should feel neutral to the touch, not warm.
- Clean slices: Dip a chef's knife in hot water, wipe dry, and slice with a single smooth motion. Clean the blade between each cut.
❌ Common Mistakes
| Mistake | Why | Fix |
|---|---|---|
| Crust shrinks during baking | Gluten was overdeveloped or the crust wasn't chilled enough | Handle the dough minimally; respect the 30-minute fridge rest before baking |
| Lemon curd is grainy | Eggs scrambled from too-hot liquid or uneven mixing | Temper hot lemon juice slowly into eggs; pour in a thin stream while whisking constantly |
| Curd won't set | Insufficient cornstarch or didn't reach a boil | Cook until thickened and the first bubble appears — the cornstarch needs a full boil to activate |
| Meringue weeps/slides | Syrup poured too fast or meringue under-whipped | Pour syrup in a thin, steady stream; whip until the bowl is cool to the touch |
| Burnt meringue | Torch held too close or moved too slowly | Keep the flame 2–3 inches away and keep it moving in broad sweeps |
| Soggy bottom crust | Curd added while crust was still warm | Cool the baked tart shell completely before filling |
💡 Variations
- Lime pie: Substitute lime juice and zest for lemon — a Key-lime-inspired twist. Add a drop of green food coloring to the curd if desired.
- Pâte sucrée: For an even richer crust, replace the egg with an extra egg yolk and add 2 tbsp powdered sugar. The texture is more cookie-like and delicate.
- Mascarpone curd: Replace 2 tbsp of the butter with 2 tbsp mascarpone for a creamier, more luxurious curd with Italian flair.
- Coconut meringue: Fold ¼ cup toasted shredded coconut into the Italian meringue before piping.
- Berry topping: Scatter fresh raspberries, blueberries, or sliced strawberries over the curd before piping the meringue — the berries peek through and add bright acidity.
- Gluten-free crust: Substitute a high-quality 1:1 gluten-free flour blend for the all-purpose flour. Add ¼ tsp xanthan gum if your blend doesn't include it.
❄️ Storage
The assembled tart is at its best within 4 hours of assembling the meringue. Refrigerate leftovers uncovered (or loosely tented with foil) for up to 2 days — but note that the meringue will begin to soften and weep over time. The lemon curd and crust can be made up to 2 days ahead separately (curd refrigerated, crust stored airtight at room temperature).
🍷 Wine Pairing
| Wine | Why |
|---|---|
| Moscato d'Asti | Lightly sparkling, low alcohol, sweet — the peachy bubbles dance with the bright lemon |
| Passito di Pantelleria | Sicilian sweet wine with apricot, honey, and citrus — a perfect mirror of the pie's flavors |
| Vin Santo | Classic Italian dessert wine; nutty, raisined sweetness contrasts beautifully with tart lemon |
| Lemoncello as a digestivo | Not a wine, but the ultimate companion — serve ice-cold in chilled shot glasses |
🍺 Beer Pairing
| Beer | Why |
|---|---|
| Belgian Witbier | Faint citrus and coriander notes, hazy body, low bitterness — a natural fit |
| Berliner Weisse | Tart, refreshing, low ABV — its sourness echoes the lemon without competing |
🥗 Suggested Sides
- Fresh berries — a bowl of raspberries, blackberries, and sliced strawberries with a mint sprig
- Whipped cream — lightly sweetened, for those who want an extra layer of decadence
- Espresso or strong coffee — the bitterness cuts through the sweetness of the meringue and curd
- A crisp green salad — believe it or not, a simple arugula salad with lemon vinaigrette balances the richness
📊 Nutrition (per serving — ⅛ of pie)
| Calories | Protein | Fat | Carbs | Fiber |
|---|---|---|---|---|
| 320 | 6 g | 16 g | 40 g | 1 g |
❓ FAQ
Can I use a different crust?
Absolutely — a classic pâte brisée or a graham cracker crust (for a key-lime-pie vibe) both work. Adjust blind-baking times as needed.
Why Italian meringue instead of French or Swiss?
Italian meringue is the most stable — the hot sugar syrup cooks the egg whites, making it safe and durable for piping and torching. It holds its shape longer and is less prone to weeping than French meringue.
Can I make this without a blowtorch?
Yes — place the piped tart under a preheated broiler for 30–60 seconds. Watch constantly; the sugar burns quickly. Alternatively, serve the meringue untoasted for a pure white, cloud-like finish.
Do I need a candy thermometer?
Yes, for consistent results with the Italian meringue. The syrup must reach exactly 121°C (250°F) — too low and the meringue won't stabilize, too high and it will be sugary and brittle.
My curd didn't set after 12 hours — what went wrong?
The curd may not have reached a full boil, or the cornstarch ratio was off. If this happens, you can gently reheat the curd with an extra teaspoon of cornstarch dissolved in 1 tablespoon of water, whisk until it thickens, then refill and rechill.
🔗 Related Recipes
- Torta della Nonna — Italian Custard Tart with Pine Nuts
- Pastiera Napoletana — Easter Grain Pie
- Lemon Spaghettini — Bright Lemon Pasta
- Limoncello Tiramisù
🏷️ Search Tags
Recipe from "The Italian Kitchen" by Vita Milanese — Volume 1: Pasta Perfetto
Recipe from The Italian Kitchen by Vita Milanese — Volume 1 · Pasta Perfetto. Discover all volumes on the ebook page.