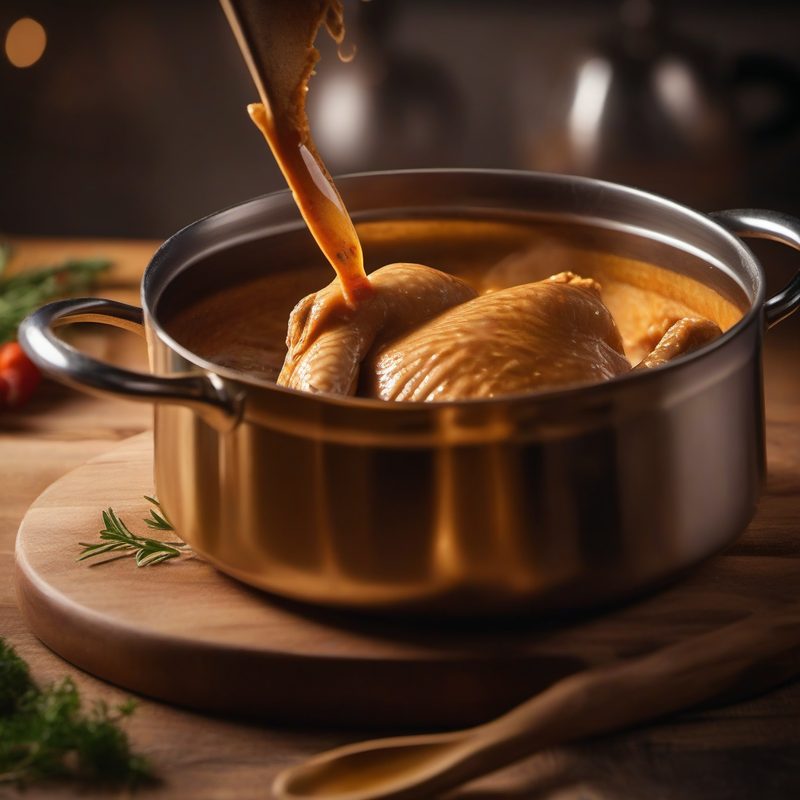
Chicken Gravy
Silky, savory, and made entirely from the pan — this chicken gravy transforms roast drippings into a luscious, spoon-coating sauce with a properly built roux, all in under 15 minutes. Every Sunday roast deserves a gravy as good as the bird it accompanies. Built on the classic technique of deglazing, separating fat, and building a golden roux, this recipe extracts every drop of flavor from the roasting pan and turns it into a glossy, emulsified sauce that clings to chicken, potatoes, stuffing, and greens alike. A proper gravy is not a last-minute afterthought — it's the soul of the meal, and the technique that produces it is one of the most transferable skills in the kitchen.
| Amount | Ingredient |
|---|---|
| As rendered | Pan drippings from 1 roast chicken (about 5 lb / 2.3 kg) |
| Up to 2 cups (480 ml) | low-sodium chicken broth |
| As needed | vegetable oil or unsalted butter, melted |
| ¼ cup (30 g) | all-purpose flour |
| kosher salt | |
| freshly ground black pepper |
Ingredient notes: The quality of your gravy depends entirely on the quality of your drippings. A well-roasted chicken with good browning yields flavorful fond (the browned bits stuck to the pan). Use homemade or store-bought low-sodium chicken broth to top up the liquid — avoid high-sodium broths, which can make the gravy unpleasantly salty. If your drippings yield less than ¼ cup of fat, supplement with vegetable oil (neutral flavor) or melted unsalted butter (richer flavor).
- Roasting pan (from the chicken)
- Wooden spoon or flat spatula
- Fine-mesh strainer
- Heatproof bowl or liquid measuring cup
- Medium saucepan
- Whisk (a flat roux whisk is ideal)
- Measuring cups and spoons
- Deglaze the pan (2 min). When the chicken is done roasting, tilt it upright so the juices from the cavity run into the roasting pan. Transfer the chicken to a carving board to rest. Place the roasting pan over medium-high heat. If the pan bottom looks dry, add 1 cup of chicken broth. Using a wooden spoon, scrape up all the browned bits from the bottom of the pan — these are pure concentrated chicken flavor and form the backbone of the gravy.
- Strain and separate (10 min, mostly inactive). Pour the pan drippings through a fine-mesh strainer into a heatproof bowl or liquid measuring cup. Let the liquid sit undisturbed until the fat rises to the surface, about 10 minutes (speed this up by placing the bowl in the refrigerator or freezer for 5 minutes). Skim off the fat and measure it — you need exactly ¼ cup (60 ml). If you have less, make up the difference with vegetable oil or melted unsalted butter. If you have more, reserve or discard the excess.
- Measure the liquid (1 min). Measure the remaining defatted drippings below the fat layer. You need 2 cups (480 ml) of liquid total. If you have less, top up with low-sodium chicken broth. If you have more, you can reserve the extra for another use or discard it — but for the proper flour-to-liquid ratio, stick to 2 cups.
- Build the roux (2 to 4 min). In a medium saucepan over medium-high heat, warm the ¼ cup of reserved fat until shimmering. Whisk in the ¼ cup of all-purpose flour and cook, whisking constantly, until the mixture is bubbling and has darkened slightly to a pale golden color — about 2 to 4 minutes. The color you develop here determines the final color and toasty depth of the gravy: a pale roux yields a mild, creamy gravy; a deeper golden roux adds nutty complexity. Do not let it go past deep amber.
- Whisk and simmer (2 to 4 min). Pour the drippings-and-broth mixture into the roux all at once, whisking vigorously to eliminate any lumps. Bring to a boil over medium-high heat, then reduce the heat to maintain a gentle simmer. Cook, whisking often, until the gravy has thickened enough to coat the back of a spoon — about 2 to 4 minutes. The finished gravy should be smooth, glossy, and silky.
- Season and serve (1 min). Remove from heat. Season generously with kosher salt and freshly ground black pepper to taste. Serve immediately over roast chicken, mashed potatoes, stuffing, or a warm salad of roasted vegetables and wilted greens.
- Serving Suggestions. Spoon generously over carved roast chicken or turkey; ladle over creamy mashed potatoes, polenta, or roasted root vegetables; use as a sauce for an open-faced chicken sandwich on toasted bread with wilted greens; drizzle over a warm salad of roasted vegetables, bitter greens, and leftover chicken; or serve alongside Yorkshire puddings and roasted Brussels sprouts for a full Sunday roast plate.
- Color is flavor. A pale blonde roux yields a mild gravy; a deeper golden roux adds nuttiness and complexity. Cook the roux to your preference, but do not rush this step — and do not let it go past deep amber, as burnt roux is irredeemably bitter.
- Deglaze while the pan is hot. The browned fond releases easily when the pan is still sizzling. Work immediately after removing the chicken for best results.
- Pour the liquid all at once. Adding the drippings-and-broth mixture in a single, confident pour while whisking vigorously is the key to a lump-free gravy. A slow, hesitant pour encourages clumps.
- Whisk constantly during the roux. Flour can burn in seconds once it hits hot fat. Keep the whisk moving across the entire bottom of the pan for even cooking.
- Season at the end, after thickening. Salt and pepper taste different once the gravy has reduced and thickened. Taste and adjust after the simmer — you will likely need more salt than you expect, especially if using low-sodium broth.
- Gravy thickens as it cools. Aim for a consistency that coats the back of a spoon while still warm — it will continue to thicken as it sits. If it becomes too thick, whisk in warm broth 1 tablespoon at a time to loosen.
- A flat whisk (roux whisk) is ideal. Its shape reaches the corners of the saucepan and prevents lumps more effectively than a balloon whisk.
| Mistake | Why It Hurts | The Fix |
|---|---|---|
| Skipping the deglazing step | The browned bits (fond) stuck to the pan hold intense concentrated chicken flavor — leaving them behind results in a pale, one-dimensional gravy | Always scrape up every speck of fond with broth while the pan is still hot over medium-high heat |
| Using too much fat or too little flour | The ratio of fat to flour to liquid is critical. Too much fat makes the gravy greasy; too little flour makes it thin and watery | Measure precisely: ¼ cup fat, ¼ cup flour, 2 cups liquid. This 1:1:8 ratio is the gold standard for a medium-bodied gravy |
| Adding the liquid too slowly | Pouring liquid gradually while whisking creates lumps — the flour particles hydrate unevenly and clump together | Pour the 2 cups of liquid all at once into the roux and whisk immediately and vigorously |
| Under-cooking the roux | Raw flour tastes pasty and starchy — it leaves an unpleasant, chalky finish on the palate | Cook the roux until it is bubbling and has darkened slightly, at least 2 minutes of active cooking |
| Forgetting to strain | Bits of cooked-on chicken skin, caramelized juices, and herbs produce a gritty, unappealing texture in the finished gravy | Always strain the drippings through a fine-mesh strainer before building the gravy |
| Seasoning too early | Salt and pepper become more concentrated as the gravy simmers and reduces — early seasoning can lead to an oversalted final product | Season only at the end, after the gravy has reached its final consistency |
| Letting the gravy boil after thickening | Vigorous boiling can break the emulsion and make the gravy watery and separated | Maintain a gentle simmer, not a rolling boil, during the final thickening stage |
- Herb & Garlic: Add 2 sprigs of fresh thyme, 1 sprig of rosemary, and 1 smashed garlic clove to the drippings during the simmer. Remove herbs before serving.
- Mushroom Gravy: Sauté 6 oz (170 g) of finely chopped cremini mushrooms in the fat before adding the flour. Cook until the mushrooms release their liquid and begin to brown, then proceed with the roux.
- White Wine Gravy: Replace ½ cup (120 ml) of the chicken broth with an equal amount of dry white wine. Add it to the deglazing step for extra acidity and complexity.
- Giblet Gravy: Finely chop the cooked giblets (heart, gizzard, liver) from the chicken cavity and stir them into the finished gravy along with 1 tablespoon of fresh parsley.
- Balsamic-Butter Finish: Whisk in 1 tablespoon of chilled unsalted butter and 1 teaspoon of aged balsamic vinegar off the heat for a glossy, tangy-sweet finish.
- Smoky Paprika Gravy: Whisk ½ teaspoon of smoked paprika into the roux along with the flour for a subtle, smoky undertone that pairs beautifully with roast chicken.
- Sherry Cream Gravy: Replace ¼ cup (60 ml) of the broth with dry sherry and stir in 2 tablespoons of heavy cream at the end for a richer, more luxurious texture.
| Storage Method | Details |
|---|---|
| Refrigerator | Store in an airtight container for up to 5 days. The gravy will solidify into a gel-like consistency. Reheat gently over low heat, whisking in warm broth or water 1 tablespoon at a time to restore the proper consistency. |
| Freezer | Freeze in an airtight container or zip-top freezer bag (lay flat to save space) for up to 2 months. Thaw overnight in the refrigerator. Reheat over low heat, whisking to recombine — the gravy may look separated at first but will come back together with gentle heat and whisking. |
| Reheating | The ideal method: transfer to a small saucepan, add a splash of broth or water, and reheat over medium-low heat, whisking constantly, until hot and smooth. Microwave is not recommended — it heats unevenly and can break the emulsion. |
This is a sauce, not a wine-drinking dish on its own, so pairings depend on the meal it accompanies:
- With roast chicken dinner: A medium-bodied, unoaked Chardonnay — Chablis or Mâcon-Villages — with enough weight to stand up to the gravy and enough acidity to cut through it.
- For a poultry and stuffing plate: A Pinot Noir from Burgundy or Willamette Valley — the earthiness of the wine mirrors the roastiness of the gravy.
- With mashed potatoes and vegetables: A dry, herbal Sauvignon Blanc (Loire Valley) whose grassy notes complement the herbaceous side of a roast meal.
- For an open-faced chicken sandwich: A crisp, minerally Vermentino or a light, fruity Dolcetto are both versatile, easy-drinking options.
- If serving with mushrooms: A Nebbiolo or Barbaresco (even young) — the tannins and truffle-like notes of Nebbiolo love roasted chicken jus and mushrooms.
| Per Serving (about ¼ cup) | |
|---|---|
| Calories | 88 |
| Protein | 2 g |
| Fat | 6 g |
| Carbohydrates | 6 g |
| Fiber | 0 g |
| Sugar | 0 g |
| Sodium | 280 mg (varies by broth) |
Nutrition values are approximate and based on drippings from a roast chicken, low-sodium chicken broth, all-purpose flour, and added fat to reach ¼ cup. Actual values will vary significantly based on the fat content of your chicken, the amount of rendered fat, and the broth used.
Can I use turkey drippings instead of chicken?
Absolutely — this same recipe works perfectly with turkey drippings. The technique is identical; just substitute the bird. Turkey gravy often benefits from a slightly longer roux cook for deeper color and flavor.
My gravy is lumpy — can I save it?
Yes. Strain the lumpy gravy through a fine-mesh strainer into a clean saucepan, pressing on the solids with a spatula. Alternatively, use an immersion blender to smooth it out — but be careful not to over-blend, which can make the gravy starchy.
Can I make this gluten-free?
Yes — substitute the all-purpose flour with an equal amount (¼ cup) of gluten-free all-purpose flour blend (one containing xanthan gum works best) or sweet rice flour. The cooking time and technique remain the same. Note that different gluten-free flours have slightly different thickening power; adjust with additional broth if needed.
Why does my gravy taste like raw flour?
You under-cooked the roux. The flour needs to be cooked until it is bubbling and has darkened slightly — at least 2 minutes of active whisking. Raw flour has a distinct pasty, chalky taste that cannot be fixed after the liquid is added. If this happens, start over with a properly cooked roux.
Can I use cornstarch instead of flour?
Yes, but the technique changes: cornstarch-based gravy (slurry method) is thinner, glossier, and does not hold up as well to reheating. Mix 2 tablespoons cornstarch with ¼ cup cold broth, whisk into the simmering drippings, and cook for 1 minute. It will not have the same body or flavor depth as a flour-based roux gravy.
- Classic Brown Butter Umami Sauce (Volume 2)
- Roast Chicken with Lemon & Herbs (Volume 3)
- Simple Pan-Seared Chicken Thighs (Volume 2)
- French Carrot Sauce (Volume 2)
- Perfect Mashed Potatoes (Volume 1)
Recipe from "The Italian Kitchen" by Vita Milanese — Volume 2: Sunday Sauce
Recipe from The Italian Kitchen by Vita Milanese — Volume 2 · Sunday Sauce. Discover all volumes on the ebook page.