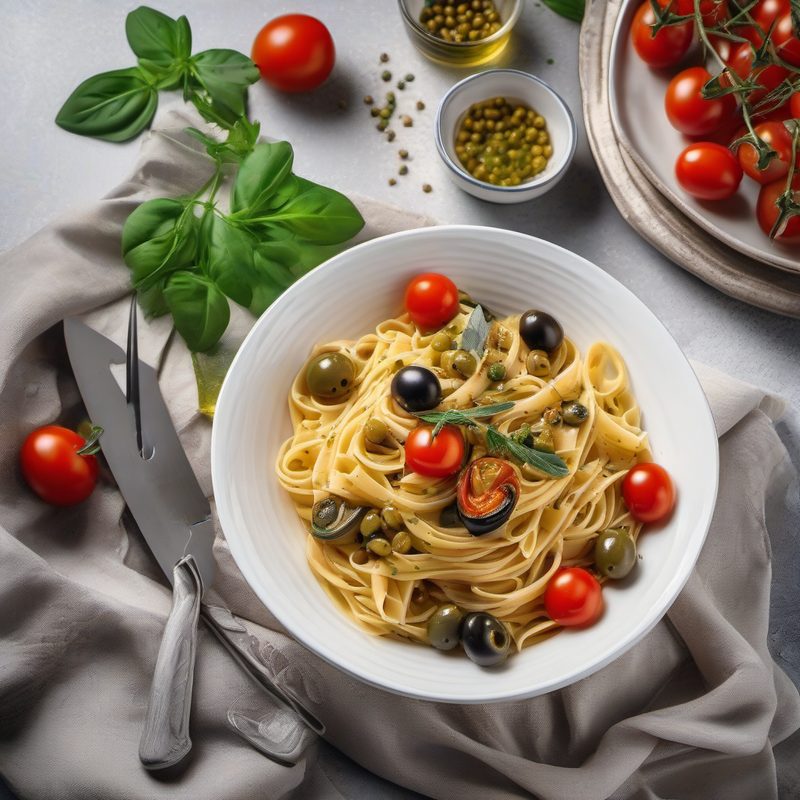
Cavatelli Bottarga Tomatoes
A stunning Sardinian-inspired pasta where hand-shaped cavatelli—tiny, ridged shells made from just semolina and water—become the perfect vehicle for a sauce that's equal parts sweet, spicy, and briny. Halved datterini cherry tomatoes burst into a quick, concentrated pan sauce with garlic and fresh chili, while paper-thin shavings of cured mullet bottarga melt into the warm pasta, releasing a tidal wave of saline, umami-rich flavor. It's a dish built on contrasts: the tender, chewy cavatelli against the soft, burst tomatoes, the clean heat of chili against the deep, funky richness of bottarga. Made entirely from pantry staples—no cream, no butter, no dairy at all—yet it tastes luxuriously complex, like something you'd order at a coastal trattoria in Cagliari.
| Amount | Ingredient |
|---|---|
| 40–60 g (1½–2 oz) | Mullet bottarga (bottarga di muggine), for shaving or grating |
| 6–8 | Fresh basil leaves, torn |
This is the pasta you make when you want to impress without spending hours at the stove. The cavatelli dough comes together in minutes from just two ingredients—fine semolina flour and warm water—and requires nothing more than a 30-minute rest before shaping. Shaping cavatelli by hand is one of the most satisfying techniques in fresh pasta making: you roll the dough into skinny ropes, cut them into little pillows, and drag a butter knife across each piece to create the signature shell shape with a ridged interior that traps every drop of sauce. The total hands-on work is less than 25 minutes, and the payoff—a bowl of tender, handmade pasta that looks like it came from a nonna's kitchen—is immense. While the dough rests, you build the sauce: cherry tomatoes halved and briefly sautéed with garlic and fresh chili until they soften and release their juices, but retain their shape enough to burst sweetly in every bite. The bottarga is the star—shaved or finely grated over the finished dish, it doesn't cook into the sauce but rather melts on contact with the hot pasta, releasing its signature briny, almost floral sea flavor. Fresh basil leaves add a final herbal brightness. It's a study in restraint—few ingredients, each one essential, layered with care.
Includes 30 minutes inactive resting time for the dough.
For the Cavatelli Dough
For the Sauce
For Finishing
Use level tablespoons and standard metric measures. The best-quality ingredients matter here—this is a minimalist dish where each component is fully exposed. Use DOP-grade datterini tomatoes (from Sicily if possible), a grassy, peppery extra-virgin olive oil, and bottarga di muggine from Sardinia or Sicily for the most authentic flavor. Bottarga is sold in vacuum-sealed blocks—it keeps for months in the refrigerator and should be shaved paper-thin with a sharp knife or Microplane, never grated into powder unless you prefer a more diffused flavor.
🥘 Equipment
- Large mixing bowl or clean work surface for kneading
- Bench scraper or dough cutter
- Butter knife or offset spatula (for shaping cavatelli)
- Large pot (6 qt / 6 L minimum) for pasta
- Large skillet or sauté pan (12-inch / 30 cm)
- Chef's knife and cutting board
- Small knife for halving cherry tomatoes
- Microplane or fine grater (for bottarga, if grating)
- Vegetable peeler or sharp slicing knife (for shaving bottarga)
- Colander or mesh strainer
- Measuring cups and spoons
- Wooden spoon or heat-resistant spatula
- Tongs or spider skimmer
- Large rimmed baking sheet or wooden board (for holding shaped cavatelli)
- Kitchen towel or plastic wrap (for resting dough)
- Paper towels or clean kitchen towel
📋 Preparation
Step 1 — Make the Cavatelli Dough (10 minutes + 30 minutes resting)
Mound the flour: Place the semolina flour on a clean work surface or in a large mixing bowl. If working on a surface, shape the flour into a wide, flat mound with a deep well in the center—like a volcanic crater. The well should be large enough to hold all the water without overflowing.
Add the water and salt: Dissolve a generous pinch of fine sea salt in the warm water. Pour the salted warm water into the well of the flour.
Incorporate the flour: Using a fork or your fingertips, gradually draw the flour from the inner walls of the well into the water, stirring in a circular motion. Work slowly—you want to incorporate the flour into the water a little at a time, not flood the well. As the mixture comes together into a shaggy, lumpy mass, switch to using your hands.
Knead the dough: Once all or most of the flour is incorporated and the dough holds together in a rough, craggy ball, begin kneading. Push the dough away from you with the heel of your palm, fold it back over itself, rotate a quarter turn, and repeat. Knead for 8 to 10 minutes until the dough is completely smooth, supple, and elastic—it should feel like a firm, silky play-dough, not sticky or dry. If it feels too dry, wet your hands with a few drops of water and continue kneading. If too sticky, lightly dust your work surface with a pinch of semolina and knead it in.
The dough should be firm but pliable—semolina dough is stiffer than egg pasta dough and should feel dense and smooth, almost like modeling clay. A properly kneaded dough springs back slightly when you press it with a finger. If it cracks at the edges when you fold it, it's too dry—dampen your hands and continue kneading. If it sticks to the work surface, a light dusting of semolina is all you need; too much extra flour will make the cavatelli dense and heavy.
Rest the dough: Shape the kneaded dough into a ball, flatten it slightly into a thick disc, and wrap it tightly in plastic wrap or cover with an inverted bowl. Let it rest at room temperature for 30 minutes. This rest relaxes the gluten, making the dough easier to roll and shape without it snapping back.
Do not skip or shorten the rest. Freshly kneaded semolina dough is tight and springy—if you try to shape it immediately, the ropes will shrink and pull back as you roll them, and the cavatelli will lose their shape during cooking. The 30-minute rest is mandatory, not optional.
Step 2 — Prepare the Sauce Ingredients (5 minutes, during dough rest)
Halve the tomatoes: Rinse and dry the cherry tomatoes. Using a small, sharp knife, cut each tomato in half lengthwise through the stem end. Set aside in a bowl.
Prepare the garlic and chili: Lightly crush the garlic clove with the flat side of your knife—just enough to crack it open and release its fragrance, not so much that it disintegrates. Slice the fresh chili into thin rings. If you prefer milder heat, remove the seeds and membranes before slicing. Set both aside.
Datterini tomatoes are smaller and sweeter than standard cherry tomatoes, with a higher sugar content and thinner skin that bursts beautifully in the pan. If you can't find datterini, use the best-quality cherry tomatoes available—preferably on the vine, as they tend to be sweeter. Avoid Roma or plum tomatoes, which are too meaty and won't burst into sauce the same way.
Step 3 — Shape the Cavatelli (15 to 20 minutes)
Prepare your workspace: Dust a large rimmed baking sheet or wooden board lightly with semolina flour. This is where you'll place the shaped cavatelli—make sure they don't touch each other or they'll stick. Keep a small bowl of semolina nearby for dusting.
Divide the dough: Unwrap the rested dough and cut it into 3 equal pieces with a bench scraper. Keep the pieces you're not working with covered with plastic wrap or a damp towel to prevent them from drying out.
Roll the ropes: On a lightly floured surface, take one piece of dough and roll it into a long, thin rope about 1 cm (⅜ inch) thick—roughly the thickness of your index finger. Roll from the center outward with both hands, applying even pressure. The rope should be uniform in thickness along its entire length; tapered ropes produce unevenly sized cavatelli that cook at different rates. A rope about 60 to 70 cm (24 to 28 inches) long is typical.
Cut the pieces: Using a bench scraper or a sharp knife, cut the rope crosswise into 1 cm (⅜ inch) pieces—essentially tiny pillows of dough. Try to keep the cuts even and clean; ragged cuts can cause the cavatelli to unfurl during cooking.
Shape each cavatello: This is the technique that gives cavatelli their signature ridged shell shape.
- Take one dough pillow and place it on your work surface.
- Hold a butter knife or offset spatula at a shallow angle (about 30 degrees) against the work surface, with the blade resting on the front edge of the dough piece.
- In a single, firm motion, drag the knife toward you across the dough while applying gentle downward pressure. The dough should curl over the blade as it rolls forward, creating a small, elongated shell with a ridged interior and a smooth, rounded exterior. The motion is similar to scraping a sticker off glass—one smooth pull.
- The finished cavatello should look like a tiny, ridged shell or a miniature canoe—about 2 to 3 cm (¾ to 1¼ inches) long, with grooves on the inside that will catch the sauce.
Shaping cavatelli takes a little practice, but the technique is forgiving. If your first few don't look perfect, they'll still taste wonderful—just keep going. The key motions are: (a) shallow angle of the knife, (b) firm, even pressure, (c) one smooth dragging motion. If the dough sticks to the knife, dust the blade lightly with semolina. If the dough doesn't curl, you're pressing too lightly or the angle is too flat. If it squishes flat, the angle is too steep or you're pressing too hard. After 5 or 6 pieces, you'll find the rhythm and every subsequent cavatello will look more uniform.
Place on tray: Transfer each shaped cavatello to the semolina-dusted baking sheet, spacing them about ½ cm (¼ inch) apart so they don't touch. Repeat with the remaining two pieces of dough.
Once shaped, the cavatelli can sit at room temperature for up to 1 hour before cooking. If you need to hold them longer, freeze them on the baking sheet until solid (about 1 hour), then transfer to a zip-top freezer bag—they can be cooked directly from frozen, adding 1 to 2 minutes to the cooking time. Do not refrigerate shaped cavatelli without first freezing them; the moisture in the refrigerator can make them sticky and cause them to clump.
Step 4 — Build the Tomato-Chili Sauce (8 to 10 minutes)
Heat the oil: Place the large skillet over medium heat. Add 3 tablespoons of olive oil and let it warm until shimmering but not smoking, about 1 minute.
Sauté the aromatics: Add the crushed garlic clove and sliced chili to the oil. Cook, stirring frequently, until the garlic is fragrant and just beginning to turn pale gold at the edges, about 30 to 45 seconds. Do not let the garlic brown or burn—it will turn bitter and cannot be fixed.
Add the tomatoes: Carefully add the halved cherry tomatoes to the skillet—they may sputter as they hit the hot oil. Add a pinch of salt. Toss or stir to coat the tomatoes evenly with the aromatics and oil.
Cook the sauce: Cook over medium-high heat, stirring occasionally, for 5 to 6 minutes. The tomatoes should soften and begin to release their juices, and some will start to collapse. You're looking for a sauce where about half the tomatoes have burst and released their liquid, creating a loose, juicy pan sauce, while the other half remain mostly intact—so you get both the concentrated sweetness of burst tomatoes and the fresh, bright pop of whole ones in every bite.
The sauce should be loose and glossy—think a light, brothy tomato juice rather than a thick, reduced sauce. The pasta will finish cooking in this sauce and absorb some of the liquid. If the sauce seems too thick or the pan looks dry before the tomatoes have softened, add a splash of water (about 2 tablespoons) to loosen it. If the tomatoes are releasing plenty of liquid on their own, let them cook undisturbed. The goal is a quick, bright sauce—not a long-simmered ragù.
Remove the garlic: Once the sauce is ready and the tomatoes have softened, fish out the spent garlic clove and discard it. It has done its job—infusing the oil with its fragrance. Keeping it in the dish would result in an overly assertive, raw garlic bite that would compete with the delicate bottarga.
Keep warm: Reduce the heat to low and keep the sauce warm while you cook the cavatelli. If the sauce reduces too much while waiting, add another splash of water to restore its loose consistency.
Step 5 — Cook the Cavatelli (6 to 8 minutes, concurrent with Step 4)
Boil the pasta water: While the sauce simmers, bring a large pot filled with generously salted water (about 1½ tablespoons kosher salt per 4 quarts / 4 liters of water) to a rolling boil over high heat. The water should taste pleasantly salty—like sea water.
Cook the cavatelli: Gently drop the shaped cavatelli into the boiling water, one handful at a time, stirring gently with a wooden spoon or spatula to prevent them from sticking to each other or to the bottom of the pot. Cook until they float to the surface, then continue cooking for 1 to 2 minutes more. Fresh semolina cavatelli cook relatively quickly—total time is typically 5 to 6 minutes from when they hit the water, but taste one to be sure. The cavatelli should be tender but still pleasantly firm (al dente), with no raw, chalky center.
Fresh cavatelli cook much faster than dried pasta, so stay close to the pot. They're done when they float to the surface and the cut edges lose their raw, floury appearance. Overcooked fresh pasta turns mushy and loses its satisfying chew—better to undercook by 30 seconds and let them finish in the sauce.
Reserve pasta water: Before draining, scoop out about 1 cup (240 ml) of the starchy pasta cooking water using a ladle or measuring cup. Set it aside—it's your sauce adjuster.
Transfer the cavatelli: Using a spider skimmer, mesh strainer, or tongs, transfer the cooked cavatelli directly from the pasta pot into the skillet with the tomato-chili sauce. Do not drain them in a colander first unless you need to—the small amount of clinging pasta water adds starch and seasoning to the sauce. If you prefer to drain, do so quickly and add a splash of the reserved pasta water to the sauce immediately to keep things loose.
Reserve more pasta water than you think you'll need—at least 1 cup. The starchy water is the key to adjusting the sauce consistency without diluting its flavor. You may only use half of it, but running out halfway through finishing the dish is frustrating.
Step 6 — Finish and Serve (2 minutes)
Finish the pasta in the sauce: Increase the heat under the skillet to medium-high. Add about ¼ cup (60 ml) of the reserved pasta water to the skillet and toss the cavatelli vigorously with the tomato-chili sauce using tongs or a wooden spoon. Cook for about 1 minute, tossing frequently, until the sauce clings to the ridges of each cavatello and the pasta is perfectly al dente.
Adjust consistency: The finished pasta should be glossy and well-coated, with a thin layer of sauce clinging to every piece—not swimming in liquid, but not dry either. If it looks dry, add another splash of pasta water and toss. If it looks too soupy, let it cook for 30 seconds longer to allow excess liquid to evaporate. You're aiming for a consistency where the sauce lightly coats the cavatelli without pooling at the bottom of the pan.
Remove from heat: Take the skillet off the heat. The pasta will continue to absorb sauce as it rests, so slightly looser than desired at this stage is perfect.
Plate: Divide the cavatelli among 4 warmed shallow bowls or plates. Run the bowls under hot water for 30 seconds and dry them before serving—cold bowls cause the sauce to seize up and the pasta to clump.
Add the bottarga: Using a sharp vegetable peeler or a very sharp knife, shave or slice the bottarga into paper-thin, translucent shards directly over each serving. Alternatively, use a Microplane to grate it into a fine, fluffy cloud. Use about 10 to 15 g (½ oz) per serving—generous enough that every bite has some bottarga, but not so much that it overpowers the delicate tomatoes and chili. The bottarga should land on top of the pasta, not be stirred in—it melts and releases its flavor as the heat of the pasta warms it.
Garnish and serve: Scatter torn fresh basil leaves over each bowl. Finish with a final drizzle of good extra-virgin olive oil—just a thin ribbon, enough to add gloss and richness. Serve immediately.
Bottarga is the soul of this dish, and how you handle it matters. Shaved into thin, translucent sheets, it offers a more delicate, melt-in-your-mouth experience where the flavor unfolds gradually as you chew. Grated into a fine dust, it distributes more evenly through the pasta and provides a more intense, all-at-once briny hit in every bite. Both approaches are authentic—let your preference guide you. If grating, do it just before serving; finely grated bottarga loses its volatile aromatics quickly. Keep the unused portion wrapped tightly in plastic wrap in the refrigerator—bottarga keeps for months if properly stored.
🧑🍳 Chef's Tips
- Use fine semolina (rimacinata), not coarse. Cavatelli dough relies on finely ground durum wheat semolina (semola di grano duro rimacinata) for its smooth, pliable texture. Coarse semolina (semola di grano duro) is too gritty and won't form a cohesive dough—the cavatelli will crack and fall apart during cooking. If you can only find coarse semolina, pulse it in a food processor for 30 seconds to create a finer grind, or pass it through a fine-mesh sieve to remove the larger granules.
- Weigh your ingredients for the dough. The ratio of 400 g semolina to 240 g water (1.67:1, roughly 60% hydration) is calibrated for perfect cavatelli dough. Measuring by volume is unreliable with flour—a cup of semolina can vary by 20 to 30 g depending on how it's scooped. Use a digital scale for consistent, repeatable results.
- Don't over-flour the work surface when shaping. It's tempting to dust generously to prevent sticking, but too much excess semolina will create dry, floury patches on the cavatelli that turn pasty and gummy when cooked. Dust lightly—you should barely see the flour on the surface—and brush any excess off the shaped cavatelli with a dry pastry brush before cooking.
- Taste your bottarga before using it. Bottarga varies significantly in quality, saltiness, and intensity between producers. A well-made bottarga di muggine should smell like the sea—clean and briny, not fishy or ammonia-like—and have a firm, waxy texture that slices cleanly. Taste a small sliver before shaving it over the pasta. If it's exceptionally salty, use less; if it's milder and more delicate, be more generous. Adjust the salt in the tomato sauce accordingly—you may need to omit or reduce the salt in the sauce if your bottarga is very salty.
- The chili is non-negotiable for balance. The fresh chili provides more than just heat—it adds a bright, fruity note that cuts through the rich bottarga and lifts the sweetness of the tomatoes. The goal is gentle warmth, not fiery spice. A single small chili (fresno, bird's eye, or a thin Italian peperoncino) with seeds intact provides a pleasant, lingering heat that complements without overwhelming. If you're sensitive to spice, remove the seeds and membranes before slicing—this reduces the heat by about 80% while keeping the chili's fruity character.
- Serve immediately on warmed plates. Cavatelli are at their peak the moment they hit the plate. As they cool, the sauce thickens, the pasta firms up, and the bottarga loses its melt-in-your-mouth quality. Warm your serving bowls in a 200°F (95°C) oven for 5 minutes or run them under hot water for 30 seconds and dry them thoroughly before plating. Every minute of warmth translates to a better eating experience.
- Make cavatelli in advance for entertaining. Shaped cavatelli freeze beautifully. Arrange them in a single layer on a semolina-dusted baking sheet and freeze until solid (about 1 hour), then transfer to a zip-top freezer bag. They cook directly from frozen—just add 1 to 2 minutes to the cooking time. This lets you prepare the pasta component days ahead and focus on the sauce and assembly on serving day.
❌ Common Mistakes
| Mistake | Why It Hurts | The Fix |
|---|---|---|
| Using the wrong type of semolina | Coarse semolina won't form a cohesive dough—the cavatelli crack, break apart, or turn gritty during cooking | Always use fine semolina (semola di grano duro rimacinata); if only coarse is available, pulse it finer in a food processor |
| Not resting the dough | The gluten hasn't relaxed, so the ropes snap back as you roll them and the cavatelli shrink and curl unevenly during cooking | Rest the wrapped dough for a full 30 minutes at room temperature—do not shorten or skip this step |
| Over-flouring the cavatelli during shaping | Excess semolina creates dry, floury patches that turn pasty and gummy when boiled | Dust the work surface and baking sheet very lightly; brush any excess flour off the shaped cavatelli before cooking |
| Overcooking the fresh pasta | Fresh cavatelli cook in 5 to 6 minutes—overcooking makes them mushy, waterlogged, and flabby | Taste a cavatello 30 seconds after they float; they should be tender but firm (al dente); undercook by 30 seconds and let them finish in the sauce |
| Cooking the sauce too long | The cherry tomatoes disintegrate into a uniform puree, losing the textural contrast between burst and whole tomatoes | Cook the sauce for 5 to 6 minutes max—just until about half the tomatoes have burst and released their juices; the rest should remain intact |
| Adding bottarga during cooking | The bottarga dissolves into the sauce, losing its distinctive textural melt—it becomes just another salty seasoning instead of the starring flavor | Always add bottarga as a final garnish over the plated pasta, never into the hot pan; the residual heat should melt it gently |
| Burning the garlic | Burnt garlic turns bitter and acrid—this bitterness spreads through the entire sauce and cannot be masked | Cook the garlic over medium heat, not high; remove it the moment it turns pale gold (about 30 to 45 seconds); never let it brown |
| Serving on cold plates | The sauce seizes up, the pasta clumps, and the bottarga firms up instead of melting—the dish loses its glossy, luscious quality | Always warm serving bowls before plating—run them under hot water for 30 seconds and dry them, or warm in a low oven |
| Using too much or too little pasta water | Too little: the sauce is dry and the pasta clumps. Too much: the sauce is watery and slides off the cavatelli instead of clinging | Start with ¼ cup of reserved pasta water and add more in 1-tablespoon increments until the sauce flows freely but still coats the pasta |
💡 Variations
| Variation | How To |
|---|---|
| Spicy Cavatelli (Aglio, Olio e Peperoncino style) | Double the chili to 2 fresh chilies and add ½ teaspoon of red pepper flakes along with the garlic in Step 4. Omit the tomatoes entirely and finish with just olive oil, chili, garlic, bottarga, and a generous handful of fresh parsley. This spartan version lets the bottarga and chili shine—the cavatelli's ridges trap every drop of garlic-chili oil |
| Zucchini and Bottarga Cavatelli | Add 1 medium zucchini (about 200 g / 7 oz), diced into ½-inch (1 cm) cubes, to the skillet in Step 4 along with the cherry tomatoes. Cook until the zucchini is tender and lightly golden at the edges, about 4 to 5 minutes. The mild, sweet zucchini provides a tender contrast to the briny bottarga and makes the dish more substantial without overwhelming the delicate sea flavor |
| Lemony Cavatelli with Bottarga | Add the finely grated zest of ½ lemon and 1 tablespoon of fresh lemon juice to the finished pasta in Step 6 just before serving, along with the bottarga and basil. The bright citrus cuts through the richness of the olive oil and bottarga, adding a fresh, lifting brightness that's especially welcome in spring and summer. Serve with extra lemon wedges on the side |
| Cavatelli with Breadcrumbs (Sardinian-style) | Toast ½ cup (60 g) of coarse, fresh breadcrumbs in a dry skillet over medium heat with 1 tablespoon of olive oil until golden and crisp, about 3 to 4 minutes. Sprinkle the toasted breadcrumbs over the finished cavatelli along with the bottarga and basil. The crunchy breadcrumbs add texture—a classic Sardinian technique called "sa mazzamurru" that provides a satisfying contrast to the tender pasta |
| Add Anchovy for Extra Umami | Add 2 oil-packed anchovy fillets to the skillet in Step 4 along with the garlic and chili. Cook, mashing the anchovies with a wooden spoon, until they dissolve into the oil—about 30 seconds. Then proceed with the cherry tomatoes. The anchovies don't make the dish taste fishy; they melt into a deep, savory background note that amplifies the bottarga's umami without competing with it |
| Cavatelli with Clams and Bottarga | Steam 1 lb (450 g) of small clams (vongole veraci or littlenecks) separately in a covered pot with ¼ cup of white wine until they open, about 4 to 5 minutes. Add the clams and their strained cooking liquid to the tomato-chili sauce in Step 6 before adding the pasta. Discard any clams that haven't opened. Finish with bottarga and basil as directed. The briny clam juice and the bottarga create an intense double-seafood flavor that's pure coastal Sardinia |
| Roasted Cherry Tomato Version | Instead of pan-sautéing the cherry tomatoes, toss the halved tomatoes with 2 tablespoons of olive oil, a pinch of salt, and the sliced chili on a baking sheet. Roast at 400°F (200°C) for 15 to 20 minutes until the tomatoes are wrinkled, caramelized at the edges, and have released their juices. Add the roasted tomatoes and their juices to the skillet, then proceed with Step 5. Roasting concentrates the tomatoes' sweetness and adds a subtle smoky depth |
| Vegan Cavatelli with Smoked Paprika and Walnut "Bottarga" | Omit the bottarga and create a vegan alternative: finely grate ½ cup (60 g) of toasted walnuts and toss with 1 tablespoon of soy sauce, ½ teaspoon of smoked paprika, ¼ teaspoon of garlic powder, and 1 teaspoon of olive oil. Spread on a baking sheet and bake at 300°F (150°C) for 8 to 10 minutes until dry and crumbly. Sprinkle over the finished pasta like bottarga. The smoky, salty, umami-rich walnut crumbs mimic the texture and savoriness of bottarga in a surprisingly convincing way |
| Cavatelli with Pesto and Bottarga | Replace the tomato-chili sauce with ½ cup (120 ml) of fresh basil pesto (homemade or high-quality store-bought) thinned with ¼ cup (60 ml) of reserved pasta water. Toss the cooked cavatelli with the pesto in the skillet over low heat, then finish with shaved bottarga and extra basil. The combination of basil pesto and bottarga is unexpected and brilliant—the herbal, garlicky pesto and the briny, umami bottarga create a flavor that's far greater than the sum of its parts |
❄️ Storage & Leftovers
| Method | Details |
|---|---|
| Refrigerator (uncooked cavatelli) | Shaped, uncooked cavatelli can be refrigerated on a semolina-dusted baking sheet, covered tightly with plastic wrap, for up to 24 hours. They may dry out slightly on the surface, which is fine—dry cavatelli actually hold their shape better during cooking. If they feel sticky after refrigeration, dust them lightly with semolina before cooking |
| Freezer (uncooked cavatelli) | Arrange shaped cavatelli in a single layer on a semolina-dusted baking sheet and freeze until solid (about 1 hour). Transfer to a zip-top freezer bag, squeezing out as much air as possible. Frozen cavatelli keep for up to 3 months. Cook directly from frozen—do not thaw first, or they'll become mushy. Add 1 to 2 minutes to the cooking time |
| Refrigerator (assembled dish) | Store leftover cavatelli with sauce in an airtight container for up to 2 days. The pasta will continue to absorb the sauce and become denser and more compact—this is expected. The bottarga and basil should be stored separately and added fresh upon reheating; bottarga that's been refrigerated on top of hot pasta will turn rubbery and lose its delicate melt-in-your-mouth quality |
| Reheating | The best way to reheat is in a skillet over medium-low heat with a splash of water or reserved pasta water. Add the leftover cavatelli, 2 tablespoons of water, and toss gently for 2 to 3 minutes until heated through. The steam from the water rehydrates the pasta and loosens the sauce. Add a fresh drizzle of olive oil and, crucially, a fresh shaving of bottarga and fresh basil—these two elements lose their magic when reheated and must be added fresh to revive the dish |
| Freezing the sauce | The tomato-chili sauce (without pasta) freezes well for up to 3 months. Cool completely, transfer to a freezer-safe container, and freeze. Thaw overnight in the refrigerator, then reheat gently in a skillet and toss with freshly cooked cavatelli. Make fresh cavatelli or use frozen ones—the combination of freshly made pasta and thawed sauce is far superior to freezing the assembled dish |
| Reviving leftovers | If the refrigerated pasta seems dry or clumpy, add 1 teaspoon of extra-virgin olive oil and 1 tablespoon of water per serving before reheating in a skillet. The fresh bottarga and basil added at the end are not optional—they're what turns leftover pasta from a sad, dense lump back into something vibrant and worth eating |
🍷 Wine Pairing
| Wine | Why |
|---|---|
| Vernaccia di Oristano (Sardinia) | The quintessential Sardinian white—a nutty, saline, almost sherry-like wine with notes of toasted almond, dried apricot, and sea salt. The oxidative style and briny finish are a perfect mirror for the bottarga's umami richness, while the bright acidity cuts through the olive oil. This is the wine they drink with bottarga in Sardinia—a perfect regional match that elevates the dish to transportive levels |
| Vermentino di Sardegna (Sardinia) | Sardinia's most widely planted white grape—crisp, mineral-driven, and herbal with notes of green apple, white peach, Mediterranean herbs, and a distinctive salty, almost iodine-like finish. The bright acidity and saline character are a natural partner for the briny bottarga and sweet cherry tomatoes. Serve well-chilled (48°F / 9°C) for maximum refreshment. A classic, reliable pairing that's easy to find and affordable |
| Greco di Tufo (Campania) | A rich, complex white from Campania with notes of ripe pear, lemon zest, almond, and a distinctive flinty, smoky mineral character. The full body and textural richness stand up to the cavatelli's dense, chewy texture, while the bright acidity and mineral finish cut through the olive oil and complement the bottarga's brininess beautifully. One of Italy's most underrated food wines |
| Fiano di Avellino (Campania) | Aromatic, honeyed, and nutty with notes of ripe peach, hazelnut, chamomile, and a touch of smoky flint. The wine's textural richness and moderate acidity create a luxurious mouthfeel that matches the silky, tender cavatelli and the melting bottarga. The nutty notes echo the toasted, cured quality of the bottarga—a thoughtful, complex pairing |
| Gavi di Gavi (Piedmont) | Made from the Cortese grape—elegant, mineral, and precise with notes of green apple, citrus blossom, and wet stone. The wine's laser-like acidity and clean, focused finish provide a refreshing counterpoint to the rich olive oil and bottarga, cleaning the palate between each bite. A more restrained, elegant choice that lets the subtle flavors of the dish shine |
| Soave Classico (Veneto) | Made from Garganega grapes on volcanic soils—light-bodied, floral, and almond-scented with notes of white flowers, lemon, and a subtle salty, bitter almond finish. The wine's delicacy and freshness won't overpower the delicate bottarga and chili, making it a sensitive, graceful pairing that harmonizes rather than competes |
| Franciacorta Brut (Lombardy) — Sparkling | A method-traditionnelle sparkling wine from Lombardy—fine bubbles, green apple, brioche, and citrus with crisp, cleansing acidity. The bubbles and acidity act as a palate scrubber, cutting through the olive oil and refreshing the palate between each briny, bottarga-laced bite. A celebratory, luxurious pairing that transforms the dish into a special-occasion meal |
| Dry Italian Rosé (Chiaretto del Garda or Cerasuolo d'Abruzzo) | A dry, crisp rosé with red berry, citrus, herb, and mineral notes. The combination of refreshing chill, bright acidity, and subtle red fruit sweetness is a versatile match for the sweet tomatoes, spicy chili, and briny bottarga. Particularly lovely in warm weather when you want a wine that's lighter than a white but still structured enough for the dish |
🥗 Suggested Side Dishes
- Simple arugula and fennel salad with lemon vinaigrette — Peppery wild arugula tossed with paper-thin shavings of raw fennel bulb, a squeeze of lemon juice, good olive oil, flaky salt, and shaved Parmigiano. The sharp, peppery arugula and crisp, anise-scented fennel provide a bright, refreshing contrast to the rich, briny pasta and cleanse the palate between bites
- Crostini with whipped ricotta and roasted cherry tomatoes — Toasted slices of crusty sourdough or pane carasau (Sardinian flatbread) topped with creamy whipped ricotta and a spoonful of the extra roasted cherry tomatoes. The cool, creamy ricotta and crunchy toast are a textural counterpoint to the tender, saucy cavatelli
- Grilled zucchini and eggplant with fresh herbs — Thinly sliced zucchini and eggplant grilled or charred on a grill pan until tender with deep char marks, then dressed with olive oil, lemon juice, fresh oregano, and mint. The smoky, charred vegetables echo the Mediterranean flavors of the main dish and add a satisfying smoky dimension
- Sardinian pane carasau with olive oil and sea salt — Thin, crispy Sardinian flatbread (carta da musica) broken into pieces, drizzled with good olive oil, and sprinkled with flaky sea salt and dried oregano. The crackling, paper-thin bread is the perfect vehicle for sopping up any remaining sauce from the bottom of the bowl and adds a fun textural contrast to the tender pasta
- Marinated olives and roasted peppers — A platter of mixed marinated olives (Gaeta, Castelvetrano), roasted red and yellow bell peppers in olive oil, and cornichons. The salty, briny olives echo the bottarga's sea flavor, while the sweet, tender roasted peppers complement the cherry tomatoes. A no-cook side that comes together in minutes while the pasta cooks
- Sautéed Swiss chard or spinach with garlic and lemon — Wilted greens sautéed in olive oil with a clove of garlic and finished with a squeeze of lemon juice. The earthy, slightly bitter greens provide a nutrient-dense, vibrant green counterpoint to the rich, golden-brown pasta and clean the palate with every bite
📊 Nutrition (per serving, estimated)
| Calories | Protein | Fat | Carbs | Fiber |
|---|---|---|---|---|
| 520 | 16 g | 18 g | 74 g | 4 g |
Nutrition values are estimates based on 4 servings using 400 g semolina, 240 g water, 300 g datterini cherry tomatoes, 3 tablespoons extra-virgin olive oil, 1 garlic clove, 1 fresh chili, 50 g mullet bottarga, and fresh basil. Actual values will vary based on specific brands, the exact amount of olive oil absorbed and used for finishing, and the amount of bottarga used per serving. The cavatelli dough contains no eggs—it's vegan until the bottarga is added, and the semolina provides a good source of complex carbohydrates and protein. Bottarga is high in omega-3 fatty acids and provides a significant amount of B vitamins, iron, and selenium. To reduce fat, use 2 tablespoons of oil for the sauce and skip the final drizzle. The dish is naturally dairy-free and contains no gluten-free ingredients—substitute with a gluten-free semolina blend if needed. Both traditional bottarga di muggine and the more expensive bottarga di tonno (tuna bottarga) work equally well; the latter has a milder, slightly sweeter flavor.
❓ Frequently Asked Questions
Can I use dried pasta instead of making fresh cavatelli?
Absolutely—and the dish will still be delicious. Use about 400 g (14 oz) of dried orecchiette, conchiglie (small shells), or gnocchetti sardi, which have a similar size and shape to cavatelli and do an equally good job of trapping the sauce in their ridges and hollows. Cook the dried pasta according to the package directions until al dente, reserving 1 cup of pasta water before draining, then proceed with Step 6—finishing the pasta in the sauce with a splash of pasta water. The texture will be different (dried pasta is firmer and chewier), but the flavors are still spectacular. If you have the time, however, making fresh cavatelli is genuinely transformative—the tender, pillowy texture of handmade pasta is one of life's simple pleasures and takes this dish from excellent to unforgettable.
What is bottarga, and where can I find it?
Bottarga (bottarga di muggine) is the salted, pressed, and air-dried roe sac of the grey mullet. It's sometimes called "the Mediterranean parmesan" or "Sardinian caviar" because of its intense, savory, umami-rich flavor with a distinct briny, almost floral character. It has a firm, waxy texture that's sliced paper-thin or grated over pasta, salads, and crostini. Look for it at Italian specialty stores, well-stocked supermarkets (in the specialty cheese or deli section, usually vacuum-sealed), or online retailers. The most prized bottarga comes from Cabras, Sardinia—look for DOP certification if authenticity matters to you. Bottarga di tonno (tuna bottarga) is a more affordable alternative with a milder, slightly sweeter flavor. Both are excellent. Store the unused portion tightly wrapped in plastic wrap in the refrigerator—it keeps for 3 to 6 months or even longer.
Can I use jarred or pre-crushed tomatoes instead of fresh cherry tomatoes?
You can, but the result will be significantly different and less satisfying. This sauce relies on the sweet, concentrated flavor of fresh cherry tomatoes (ideally datterini) that are halved and briefly cooked so they burst and release their juices while retaining some of their shape and texture. Jarred crushed tomatoes are cooked, pureed, and lack the bright, fresh acidity and textural variation that makes this sauce special. If fresh cherry tomatoes are truly unavailable, use canned San Marzano whole peeled tomatoes—roughly crush them by hand and proceed as written, but reduce the cooking time to 3 to 4 minutes since they're already cooked. The result will be a more homogenous, less vibrant sauce, but still much better than using jarred crushed tomatoes.
The cavatelli dough is too dry/crumbly. What went wrong?
Semolina absorbs water more slowly than all-purpose flour, so your dough may feel dry and crumbly during the first few minutes of kneading. This is normal—resist the urge to add more water immediately. Continue kneading for 2 to 3 minutes; the heat of your hands and the continued working will help the semolina fully hydrate and come together into a smooth, cohesive dough. If after 3 minutes of kneading the dough is still cracking at the edges and won't form a smooth ball, add water 1 teaspoon at a time, wetting your hands and kneading it in, until the dough becomes supple. Conversely, if the dough feels too sticky, knead in a very small pinch of semolina—but err on the side of slightly stickier rather than drier; a dry dough produces tough, dense cavatelli that don't puff up properly during cooking.
My cavatelli are falling apart in the boiling water. Why?
This usually happens for one of three reasons: (1) the dough was too dry and didn't form a cohesive structure—the pieces crack along their edges and disintegrate; (2) the cavatelli weren't sealed properly during shaping—if the knife drag doesn't apply enough pressure to fuse the two sides of the dough together, they'll unfurl in the boiling water; or (3) the dough wasn't kneaded enough—undercooked gluten can't hold the pasta's shape during cooking. Next time, knead the dough for the full 8 to 10 minutes until it's completely smooth and elastic, make sure the dough is properly hydrated (it should feel like firm, pliable play-dough), and press firmly when dragging the knife across each piece—you should feel the dough curl and seal against the blade. A properly shaped cavatello should hold its shape when pinched between your fingers.
Can I make the cavatelli dough in a stand mixer or food processor?
Yes—both work well and reduce the hands-on effort. For a stand mixer: combine the semolina and salted warm water in the bowl of a stand mixer fitted with the dough hook. Mix on low speed until the dough comes together, then increase to medium-low and knead for 6 to 8 minutes until smooth and elastic. For a food processor: pulse the semolina and salt to combine, then add the warm water through the feed tube while pulsing. Process until the dough forms a rough ball, then transfer to a work surface and knead by hand for 2 to 3 minutes to smooth it out. In both cases, the 30-minute rest is still mandatory.
The bottarga is too salty for my taste. Can I reduce the saltiness?
Bottarga is naturally salty—it's cured with salt before being pressed and dried. If you find it too assertive, try these strategies: (1) Use less bottarga—start with half the recommended amount (about 20 g total instead of 40 to 60 g) and add more to taste; (2) Slice it thinner—paper-thin shards distribute the briny flavor more gently than thicker slices or grated bottarga, which concentrates the salt in every bite; (3) Serve the bottarga on the side and let each person add their own—this lets diners control the intensity; (4) Pair it with a squeeze of fresh lemon juice—the acidity counteracts the saltiness and brightens the overall flavor; (5) Rinse the bottarga block under cold water for 30 seconds before shaving—this removes some surface salt, though it also slightly dilutes the flavor. Remember, bottarga is meant to be intense—a little goes a long way.
Is this dish gluten-free? Dairy-free? Vegan?
The cavatelli dough is made from 100% semolina (durum wheat) and water—it contains no eggs and no dairy, so it's naturally vegan and dairy-free. However, it is NOT gluten-free because semolina is wheat. For a gluten-free version, substitute with a gluten-free 1:1 all-purpose baking flour blend (one containing rice flour and xanthan gum works best) and adjust the water—gluten-free flours absorb water differently and typically need about 10% less water. The dough will be more delicate and harder to shape; gluten-free cavatelli are best cooked immediately after shaping and handled gently. If bottarga di muggine is used, it's not vegan (it's fish roe). For a vegan version, see the Vegan Cavatelli with Smoked Paprika and Walnut "Bottarga" variation in the Variations section.
My sauce is watery. How do I fix it?
A watery sauce usually means the cherry tomatoes released more liquid than expected, or the pasta wasn't finished in the sauce long enough to absorb the excess liquid. To fix: increase the heat to medium-high and cook the pasta and sauce together for another 1 to 2 minutes, tossing frequently, until excess liquid evaporates and the sauce thickens and clings to the cavatelli. If you've already plated and the sauce is pooling at the bottom of the bowl, transfer everything back to the skillet and reduce over high heat. Avoid adding extra pasta water to a sauce that's already too thin—use it only if the sauce is too thick. The goal is a glossy coating where the sauce clings to the cavatelli's ridges, not a soupy broth at the bottom of the bowl.
🔗 Related Recipes
- Orecchiette with Broccoli Rabe and Sausage (Orecchiette con cime di rapa e salsiccia) (page 29)
- Spaghetti alle Vongole (Spaghetti with Clams, Garlic, and White Wine) (page 42)
- Linguine with Pesto, Green Beans, and Potatoes (Linguine al pesto con fagiolini e patate) (page 22)
- Pasta all'Arrabbiata (Spicy Tomato Penne with Garlic and Red Pepper) (page 19)
- Spaghetti con le Polpette (Spaghetti with Neapolitan Meatballs) (page 53)
- Fusilli with Roasted Eggplant and Bell Pepper Pesto (page 56)
- Penne with Sausage and Roasted Red Pepper Sauce (page 62)
- Spaghetti Cacio e Pepe (Spaghetti with Pecorino Romano and Black Pepper) (page 8)
🏷️ Search Tags
📸 Photo Reference
Photo reference: `vol1_109.png` — A wide, shallow ceramic bowl filled with freshly made cavatelli—small, shell-shaped pasta with visible ridges—generously coated in a glossy, bright red tomato sauce speckled with bits of fresh chili. Halved datterini cherry tomatoes are scattered throughout, some burst and melted into the sauce, others remaining intact for pops of sweetness. Paper-thin, translucent shards of amber-colored mullet bottarga are artfully arranged on top of the pasta, curling slightly in the heat. A few torn fresh basil leaves are tucked around the edges, and a thin ribbon of emerald-green extra-virgin olive oil glistens on top. Shot from a slightly elevated 45-degree angle on a warm, rustic wooden table with natural daylight—soft and inviting. In the background: a small block of bottarga on a wooden board with a sharp slicing knife, a scattering of semolina flour, and a glass of pale, chilled Vermentino di Sardegna. Sardinian coastal presentation—clean, minimal, elegant, with the focus squarely on the glistening pasta and its golden-amber crown of bottarga.
Recipe from "The Italian Kitchen" by Vita Milanese — Volume 1: Pasta Perfetto
Recipe from The Italian Kitchen by Vita Milanese — Volume 1 · Pasta Perfetto. Discover all volumes on the ebook page.